At its core, a domain name transfer is simply the process of moving your domain from your current provider (the registrar) to a new one. It's a very common, safe procedure that puts you back in the driver's seat of your online assets, all without taking your website offline.
Why Transferring Your Domain Is a Smart Move
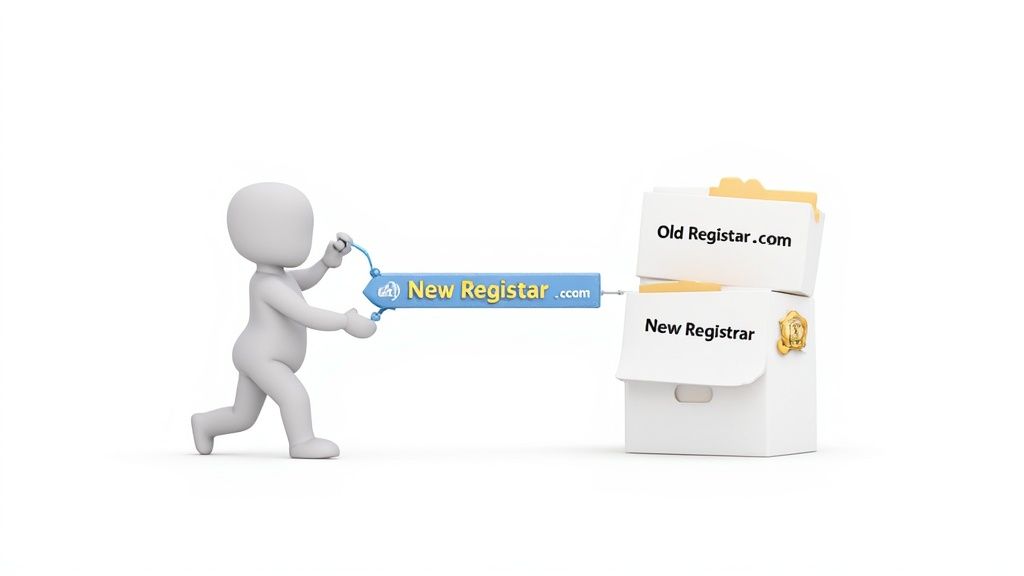
Moving your domain to a new provider might sound like a huge technical headache, but it’s actually a routine part of managing your digital presence. Thousands of website owners do it every day for very practical reasons that, frankly, just make their lives easier.
It’s often the first real step towards taking full control of your online identity. The process is much more straightforward than most people think, and the best part is it doesn't interfere with your live website or email services.
Consolidate Your Digital Assets
One of the biggest drivers for a transfer is simplicity. It’s a common story: your domain is registered with one company, your website hosting is with another, and your emails are handled by a third. This kind of digital sprawl means you're juggling multiple logins, different dashboards, and a mess of renewal dates.
Bringing everything under one roof just makes sense.
- Single Point of Contact: Instead of guessing who to call when there's an issue, you have one support team for everything. When your domain and hosting are managed together, troubleshooting becomes much, much faster.
- Unified Billing: You get one clear invoice for all your services. This makes it so much easier to track your business expenses and you'll never miss a renewal.
- Streamlined Control: All your critical settings—from DNS records to hosting files—are in one convenient client area. You can learn more about managing key services like setting up your business email in our dedicated guide.
Secure Better Pricing and Features
Let's be honest, costs and features can vary wildly between registrars. That amazing deal you got when you first registered might not look so great a few years down the track. Many providers hook you with low introductory prices that balloon at renewal time.
Transferring gives you the freedom to find a provider with more transparent and competitive long-term pricing. On top of that, a new registrar might include valuable features for free that your current one makes you pay for, like advanced DNS management or better security tools.
By moving your domain, you're not just changing providers; you're actively choosing a partner that better aligns with your budget and technical requirements for the future.
Access Superior Customer Support
When something goes wrong, you need responsive and knowledgeable support—fast. If you’ve ever been stuck on hold for an hour or received vague, unhelpful advice, you know exactly how frustrating poor service can be. The search for better customer service is one of the top reasons people transfer their domains.
Moving to a provider like UpTime Web Hosting, which is known for expert, local support, means you have a reliable team you can actually talk to. Whether it's a simple question or a technical hiccup, getting help quickly provides incredible peace of mind.

Performance you can feel, backed by clients who depend on it. Read how our support and uptime create long‑term customer success.Power Your Business with Better Hosting
Your Essential Pre-Transfer Checklist
A successful domain transfer is all about preparation. Just like checking your tyres and fuel before a long road trip, a few simple checks now will save you from major headaches later on. Skipping these steps is one of the most common reasons a transfer fails, so let’s walk through exactly what you need to do at your current registrar before you get started.
Think of this as laying the groundwork for a smooth move. It's similar to other big digital projects, like a full e-commerce store relocation. In fact, reviewing a comprehensive Shopify migration checklist often brings up key domain considerations that are easy to miss.
Disable the Registrar Lock
First things first: you need to find and disable the registrar lock, which is sometimes called a domain lock. This is a basic security feature that acts like a deadbolt on your domain, stopping anyone from making unauthorised attempts to move it away from your current provider. It's on by default for your protection.
Before you can kick off a transfer, this lock has to be switched off. You can usually find this setting in your current registrar's domain management panel, often as a simple toggle or a button labelled "Unlock Domain."
- Practical Example: Let's say your domain is with GoDaddy. You would log in, navigate to "My Products," find your domain, and in the "Additional Settings" section, you'll see a "Domain Lock" option. You simply click "Edit" and toggle it from On to Off.
Verify Your Administrative Contact Information
This is, without a doubt, the most critical step. The official approval for the transfer is sent via email to the administrative contact listed for your domain. If this email address is old, incorrect, or one you can't access anymore, you simply will not receive the approval link. The transfer will time out and fail.
You need to check the public WHOIS database or your registrar's control panel to see what email is listed as the administrative contact. Double-check that it's an address you actively use and monitor. For a quick check, you can use a free tool like the ICANN Lookup tool to see the publicly available contact details for your domain.
While you're at it, make sure all your contact details are up to date. This is more important than ever as the Australian domain market continues its rapid expansion. In the last year alone, total domain registrations in Australia jumped from 1,325,459 to 1,688,577—that's a 27.4% growth rate. With so many domains being managed, accurate ownership data is essential.
Key Takeaway: If the admin email is wrong, update it immediately. Be aware that some registrars impose a 60-day transfer lock after a change to registrant contact information, so it's vital to get this right well before you plan to move.
Temporarily Disable Domain Privacy
Many domain owners use a privacy service (like WHOIS Guard or Domain Privacy) to shield their personal contact information from public view. While great for security, these services often replace your real email with a generic, forwarding one. The problem is, these forwarding systems can sometimes delay or even block that all-important transfer approval email.
To avoid any issues, the best practice is to temporarily turn off your domain privacy service just before you start the transfer. Once it's all done, you can easily switch it back on at your new provider.
Request Your Authorisation Code
The final piece of the puzzle is the Authorisation Code. You might also see it called an Auth Code or an EPP code. This is basically a unique password for your domain that proves you have the authority to move it. Think of it as the master key that unlocks the transfer process.
You'll need to request this code from your current registrar, but how you get it can vary:
- Some providers show the code directly in your domain control panel.
- Others will email the code to the administrative contact when you ask for it.
- A few might require you to get in touch with their support team.
Once you have this code, keep it somewhere safe. You will need to give it to your new registrar—like us here at UpTime Web Hosting—to officially kick things off. Having this code ready makes the whole process so much faster.
Plus, having your domain, hosting, and email all in one place is a huge time-saver. Check out our guide on how to set up your professional business email to see just how much simpler life gets when your services are integrated.
Right, so you’ve done the prep work and you're ready to get this domain transfer started. This is where you formally kick things off with your new registrar and give the final nod of approval. Think of it as a digital handshake between your old and new providers, with you in the middle making it official.
At this stage, it’s less about wrestling with technical settings and more about keeping an eye on your inbox. Acting quickly on the confirmation emails is the single biggest factor in making sure the whole process goes smoothly and without annoying delays.
This simple graphic breaks down those key prep steps that lead right up to this point.
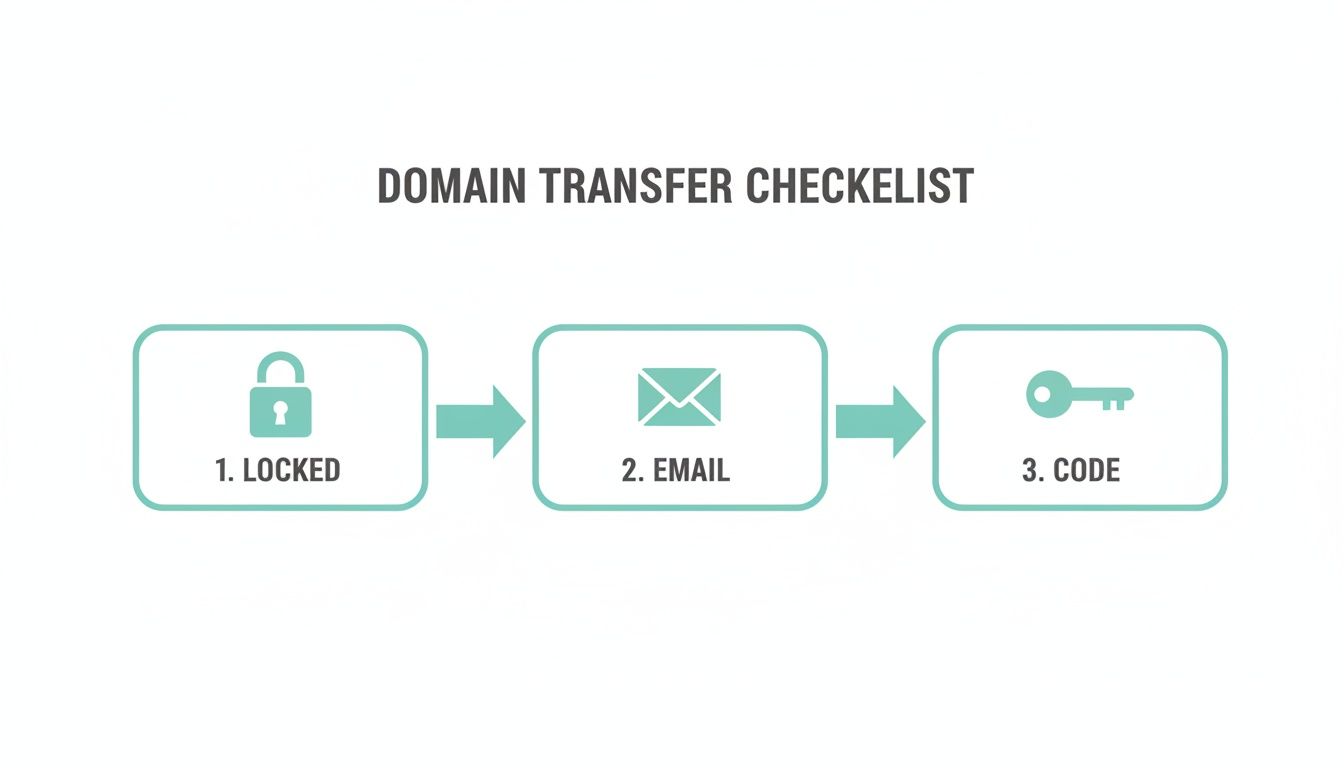
Seeing it laid out like this really shows how each step is a crucial security check, confirming it’s really you before the domain goes anywhere.
Submitting the Transfer Request
First things first, you'll need to log into your new host's client area. For our customers, this would be the UpTime Web Hosting dashboard. Look for an option like "Transfer a Domain," which is usually pretty easy to spot in the main menu.
You’ll then be asked for two key bits of info you’ve already got handy:
- The domain name you want to transfer: Double-check this for any typos. One wrong letter and the whole thing will fail.
- The Authorisation Code (or EPP Code): This is that unique password for your domain. Carefully copy and paste it into the field to avoid any mistakes.
Once you hit submit, the new registrar’s system uses that Auth Code to fire off an official transfer request to the central domain registry. This is the action that formally gets the ball rolling.
The All-Important Verification Email
Shortly after you submit the request, the most critical part of the whole process happens. An automated email, often called a Form of Authorisation (FOA), will be sent to the domain's administrative contact email. This is the exact email address you checked and updated earlier.
This email is the official green light. It contains a link you absolutely must click to approve the move. Honestly, ignoring this email is the number one reason we see domain transfers fail or get stuck in limbo.
Expert Tip: If you don't see the verification email within an hour, dive into your spam or junk folder. These automated emails can sometimes get filtered by mistake. The faster you act on it, the faster your transfer will go through.
The email itself will be straight to the point, usually saying something like "A transfer has been requested for yourdomain.com.au, please click here to approve or deny it."
Now, if you're moving more than just a domain name—say, an entire website from one platform to another—things can get a lot more involved. For anyone in that boat, a detailed guide can be a lifesaver. For instance, this article on transferring your website from Wix to Shopify offers a clear roadmap for a similarly complex project.
Approval and Confirmation from Both Sides
Once you've clicked that approval link, you've officially given your consent. The new registrar now has what it needs to proceed. The request then gets passed over to your current (soon-to-be-ex) registrar.
Your old provider will also usually send you an email. This message is mostly a final heads-up, confirming they've received a valid transfer request and giving you one last chance to cancel it if you didn't authorise it. Some registrars might even give you a link to "expedite" the release of the domain, which can sometimes shave a day or two off the waiting time.
But if you do nothing? No problem. The transfer will just proceed automatically after a mandatory waiting period set by ICANN, the global domain authority.
Understanding the Transfer Timeline
After all the approvals are ticked off, it's pretty much a waiting game. The total time a domain name transfer takes can vary, mainly depending on the domain extension (.com, .com.au, etc.) and the registrars involved.
Below is a table that breaks down what you can generally expect.
Domain Transfer Timeline and Key Stages
| Stage | Typical Duration | Required Action | Notes |
|---|---|---|---|
| Initiation | 5-10 minutes | Submit the domain and Auth Code to the new registrar. | This is the very first step you take. |
| Verification | 15 mins – 2 hours | Click the approval link in the FOA email. | Check your spam folder! This is the most critical action. |
| Registrar Approval | Instant – 24 hours | (Optional) Approve the release at your old registrar. | Some registrars allow you to speed up the release. |
| Registry Processing | 5 – 7 days | None. Just wait. | This is a mandatory ICANN waiting period for security. |
| Completion | Instant | Update your nameservers if needed. | You'll get a final confirmation email. |
For a standard domain like a .com or .net, you should plan for it to take between five to seven days to fully complete. This waiting period is a built-in security measure, giving the original owner a window to stop a fraudulent transfer.
While you're waiting, you don't need to do a thing. Your website and emails will carry on working just as they are, running on your old provider's nameservers. The transfer itself happens behind the scenes at the registry level and won't impact your live services until it's 100% finished.
Navigating the Specifics of AU Domain Transfers

While the core steps for a domain transfer are pretty much the same everywhere, Australian domains dance to a slightly different beat. Regulated by the .au Domain Administration (auDA), names ending in .com.au, .net.au, and the newer .au direct come with their own set of rules. Getting these local requirements right is the key to a smooth, hassle-free transfer.
The biggest hurdle is the eligibility requirement. Unlike a standard .com domain that anyone can register, .au domains demand that the registrant has a verifiable Australian presence. This isn't just a one-off check when you first buy the domain; it’s a crucial detail that stays in effect even when you're moving it to a new provider.
The AU Eligibility Rule
To hold any .au domain, you have to meet specific criteria, and your new registrar will verify your eligibility as part of the transfer process.
Here are the common ways to prove your Australian presence:
- An active Australian Business Number (ABN) or Australian Company Number (ACN).
- A registered Australian trademark number.
- Status as an incorporated association or registered charity.
Practical Tip: Before you start the transfer, check that the ABN/ACN associated with your domain is current by using the official Australian Business Register lookup service. An invalid ABN is a common reason for transfer rejection.
Understanding AU Auth Codes
For most domains, the transfer key is called an EPP code or Auth Code. Down Under, you'll often hear it called the .au Auth Code or sometimes the Registry Key. Don't get confused—they're all the same thing: a unique password for your domain that proves you have the authority to move it.
Just like with other domains, you'll need to get this code from your current registrar. You can usually find it in your control panel or have it sent to the official registrant email address.
A fantastic perk with .au transfers is the speed. Once you approve the transfer with the correct Auth Code, it can be done and dusted in as little as two days. This completely bypasses the standard five-to-seven-day waiting period you see with generic domains like .com.
The Rise of AU Direct Domain Transfers
The introduction of .au direct domains—the shorter, snappier version like yourbrand.au—has really shaken up how Aussie businesses manage their online identity. Transferring them has become incredibly common as businesses consolidate their digital assets.
This shift is a huge reason why Australia's domain market exploded by 27.4% in just one year, jumping from 1,325,459 domains in late 2023 to 1,688,577 in 2024. By March 2023, .au direct domains already accounted for over 740,000 registrations, making up 18% of all .au domains.
The transfer process for a .au direct domain follows the exact same auDA rules, needing an Auth Code and valid eligibility. Many businesses are now moving their existing .com.au and new .au domains to a single provider to make life easier.
If you're thinking about doing the same, learning about Australia's new top-level domain is a great place to start. It's a smart move that helps streamline your branding and simplifies your digital footprint under one trusted roof.
Host your website with our 5-star rated, cPanel website hosting plans.
Super fast servers, with security included and hosted in your choice of Australian Data Center.
View cPanel Plans
How to Transfer Your Domain to UpTime Web Hosting
Alright, you’ve done the prep work with your old provider and you’re ready to bring your domain home to us. Fantastic. Getting it moved into our secure client area is the final piece of the puzzle, and it’s a pretty straightforward process.
First things first, you'll need to log in to your UpTime Web Hosting account. Once you're on the main dashboard, find "Domains" in the menu and click on "Transfer Domains to Us". This is where the magic happens.
Kicking Off the Transfer
On the transfer page, you'll find a simple form asking for two key bits of information you should already have from your old registrar.
- Your Domain Name: Type in the full domain you want to move. It sounds obvious, but always double-check for typos!
- Your Authorisation Code: This is the EPP or Auth Code you got from your previous provider. Carefully paste it into the field provided.
Once you’ve entered those details, our system will do a quick check to make sure everything lines up. From there, it'll add the transfer to your cart. Just complete the checkout, and that officially kicks off the request with the domain registry.
A quick heads-up: When you transfer a domain, industry rules usually require you to renew it for at least one year with the new registrar. This cost will be added at checkout, but don't worry—it simply extends your registration by a year from its current expiry date.
What Happens Next
With the request submitted, the final approval steps can begin. An automated verification email will be sent to the domain's official administrative contact—that’s the email address you made sure was correct in the pre-transfer checklist.
It’s crucial that you open that email and click the approval link inside. This is your official "yes" to the move.
After you've done that, the rest is pretty much on autopilot. We take care of all the communication with the registry and your old provider. You can sit back and relax, knowing your domain is on its way.
Consolidating your domain and hosting just makes life easier. And if you’re also looking to move your entire website to UpTime Web Hosting, our team is ready to make that just as seamless.
Common Questions About Domain Transfers
It's completely normal to have a few questions when you're transferring a domain name. After all, it’s one of your most important digital assets, so a bit of uncertainty is expected. Let's run through some of the most common queries we hear to help clear things up.
The number one worry is always about downtime. Will my website or email suddenly go dark during the move? The short answer is no. A domain transfer only changes the company responsible for your domain's registration—that's it.
Your website and email are actually controlled by your nameservers. These settings aren't touched during the transfer, so they'll keep pointing to your current hosting provider. This ensures everything stays online and running smoothly for your visitors and customers without any interruption.
How Long Will the Transfer Take?
This is probably the second most common question we get. For standard domains like .com or .net, you can typically expect the process to take five to seven days. This isn't your new registrar being slow; it's a mandatory waiting period set by ICANN (the global domain authority) as a security measure to prevent unauthorised or fraudulent transfers.
Australian domains, like .com.au, are a different story. They're often much quicker. Once you approve the transfer with the correct Auth Code, it can be done and dusted in as little as two business days. If you want to dive deeper into the nuts and bolts, we've got a detailed knowledge base article on domain transfers that covers it all.
Transferring Expired or Nearing-Expiry Domains
What if your domain has already expired? Trying to transfer an expired domain is a risky move. Most registrars block it, and you risk the domain falling into a "redemption period," which makes getting it back much more expensive. The safest bet is to renew your domain with your current registrar first, then kick off the transfer.
The same advice applies if your domain is getting close to its expiry date, say, within a week. Renew it before you start. This simple step can save you a world of headaches if the transfer takes a day or two longer than you expected.
What Happens to My DNS Records?
Your DNS records – the settings that point your domain to your website, email, and other services – live with your current provider. It's a common misconception, but they don't automatically move over with the domain to your new registrar.
Pro Tip: Before you start the transfer, log in to your current domain provider and take a screenshot or copy of all your DNS records. A practical way to do this is to use an online tool like DNSChecker.org to view your current MX, A, and CNAME records. Once the transfer is complete, you can just replicate those settings at your new provider to ensure services like email and subdomains keep working perfectly.
A little bit of prep here goes a long way and ensures a smooth, surprise-free transition.
Ready to bring your domain to a secure, local provider with expert support? At UpTime Web Hosting, we make the domain transfer process simple and straightforward. Start your domain transfer today.