
Knowing how to back up your WordPress site isn't just a technical task; it's about choosing your strategy. You can go with automated plugins, lean on your hosting provider's services, or take direct control with manual cPanel actions. Each path offers a different degree of control and hands-on involvement, meaning there’s a perfect fit for every type of website owner.
Why a WordPress Backup Is Your Ultimate Safety Net
Running a WordPress site without a solid backup plan is one of the biggest risks you can take with your business. It's not just about guarding against hackers, either. A simple human error, a plugin update that conflicts with your theme, or a server hiccup can bring your entire online presence crashing down.
For an Australian small business, that downtime translates directly into lost sales, frustrated customers, and a serious blow to your professional reputation. Think of proactive backups as a non-negotiable part of smart website management. They are your digital insurance policy, giving you peace of mind and a clear way back when things inevitably go wrong.
Understanding Your Backup Options
When it comes to protecting your website's data, you've got a few different roads you can take. The right one for you really boils down to your technical confidence, how frequently you update your site's content, and your budget. The main options fall into two camps: automated or manual.
- Automated Backups: These are the "set it and forget it" heroes of the backup world. They run on a schedule you define, without you needing to lift a finger. This is perfect for busy business owners and usually involves either a dedicated WordPress plugin or a service offered by your web host.
- Manual Backups: This approach puts you in the driver's seat, giving you total control over when and how your site is saved. It requires a few more technical steps, but it's fantastic for creating a one-off backup right before you make big changes, like installing a new theme or a major plugin.
This flowchart maps out the main decision you'll face when figuring out the best way to back up your WordPress site.
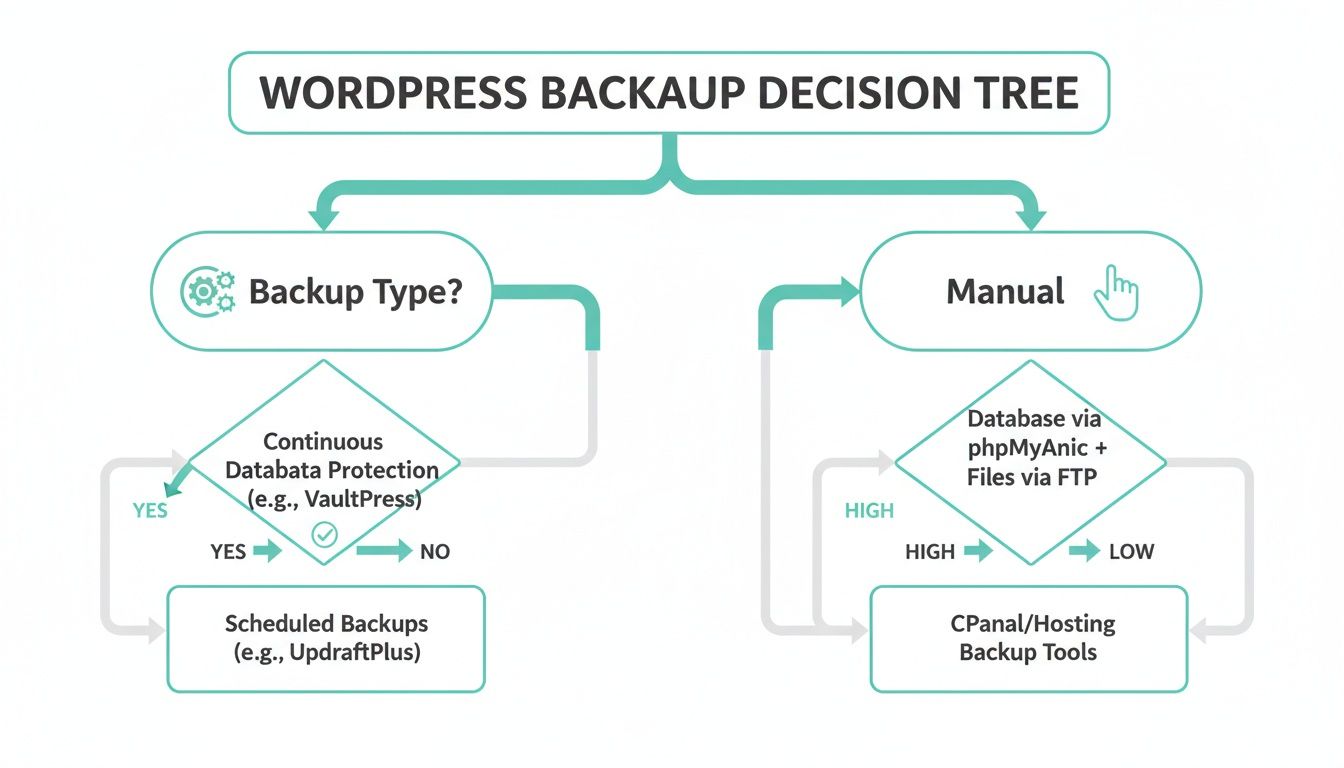
As you can see, your first choice is between an automated or manual method. From there, each path branches out to different tools and processes designed for the job.
When Backups Are Not Enough
A strong backup strategy is your first and best line of defence against data loss. But what happens in a worst-case scenario where critical data is gone and you don't have a recent or working backup? In these rare but stressful situations, you might need to call in the professionals. While it's definitely a last resort, knowing your options is important. For catastrophic data loss, you might need to explore reliable data recovery services.
Your backup is only as good as your ability to restore it. An untested backup file provides a false sense of security, which is why verification is a non-negotiable step in any professional backup strategy.

Performance you can feel, backed by clients who depend on it. Read how our support and uptime create long‑term customer success.Power Your Business with Better Hosting
Automating Backups with a WordPress Plugin
For most business owners, the simplest and most reliable way to back up a WordPress site is to hand the job over to a dedicated plugin. These tools take all the guesswork out of the process, running on a schedule you set without you ever having to manually download files or export databases.
It’s the classic "set it and forget it" approach, and it ensures your site is consistently protected.
A well-regarded example of such a plugin is UpdraftPlus. With millions of active installations, it provides a clear, straightforward path to creating a rock-solid, automated backup system. The goal is to get you from a fresh install to a fully scheduled, off-site backup plan that just works silently in the background.
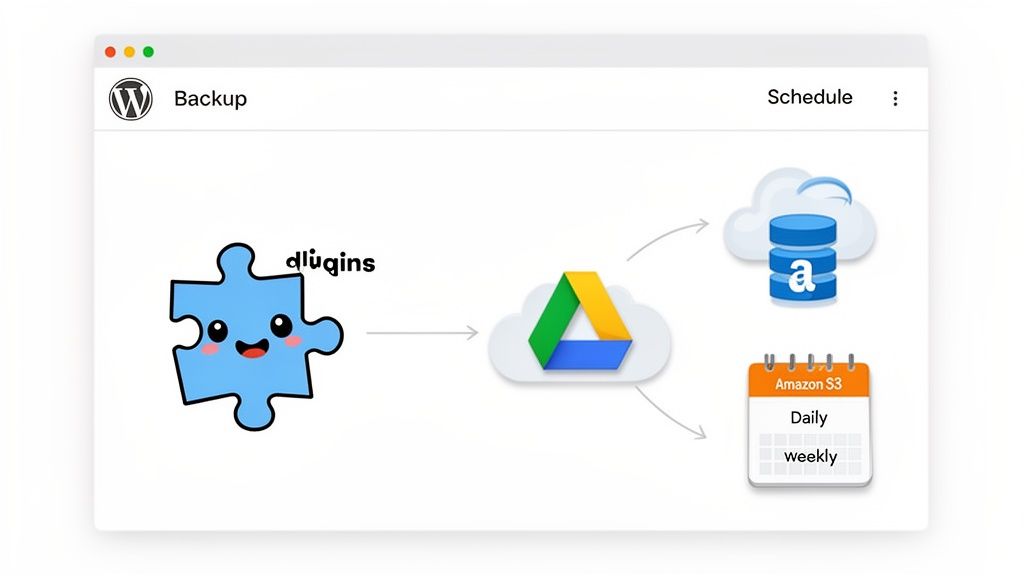
The UpdraftPlus dashboard gives you a simple, one-click interface for creating backups, restoring your site, and linking up your remote storage. Everything you need is organised in one easy-to-find spot inside your WordPress admin area.
Installing and Configuring Your First Backup
Getting started is as simple as installing any other plugin. From your WordPress dashboard, head to Plugins > Add New, search for "UpdraftPlus," then click Install Now and Activate. Once it's ready, you'll find its settings under Settings > UpdraftPlus Backups.
The very first thing you should do is set up your backup schedule and connect a remote storage location. This is absolutely critical. Storing backups on the same server as your website is a huge risk—if that server goes down, you lose both your live site and all your backups.
To get this sorted, go to the Settings tab in the UpdraftPlus dashboard. You’ll see two main scheduling options:
- Files backup schedule: This covers all your themes, plugins, and media uploads. Basically, everything that controls how your site looks and functions.
- Database backup schedule: This is where all your content lives—posts, pages, user comments, and crucial website settings.
You need both for a complete site restoration. A solid starting point for most businesses is a daily database backup and a weekly file backup. Your content (the database) usually changes far more often than your site’s design (the files).
Pro Tip: If you run a busy e-commerce store or a membership site, daily backups for both files and the database are non-negotiable. Losing even a few hours of order or user data could be disastrous. On the flip side, a simple portfolio site that only gets updated once a month might be perfectly fine with weekly backups.
Connecting to Off-Site Storage
After you’ve set your schedule, scroll down the page to choose your remote storage. UpdraftPlus supports a ton of options, including Google Drive, Dropbox, and Amazon S3. Pick the service you prefer and just follow the on-screen instructions to authorise the connection.
For example, connecting to Google Drive is a quick, three-step process:
- Select the Google Drive icon.
- Click the "Sign in with Google" button.
- Follow the prompts to grant UpdraftPlus access to a specific folder in your Google Drive.
Once you’re authenticated, all your automated backups will be sent straight to your chosen cloud storage, keeping them safely separated from your web server. If you want to dive deeper into building these kinds of systems, you can learn more about how to automate backups and protect your business data.
Running a Backup and Restoring Your Site
With your schedule and remote storage all configured, it’s a great idea to run your first manual backup. This just confirms that everything is connected and working as it should be.
Head back to the Backup / Restore tab and click the big blue "Backup Now" button. A window will pop up asking what to include and whether to send the backup to your remote storage. Leave the default options checked and click away. The plugin will get to work creating the backup and uploading it.
The real magic of a plugin like this shines through when you actually need to restore your site. The whole process is incredibly simple and doesn't require messing around with FTP or database management tools.
To restore from a backup, you just need to:
- Go to the Backup / Restore tab.
- Scroll down to the "Existing backups" section.
- Find the backup you want to use and click the "Restore" button.
- A new screen will appear, letting you choose which parts to restore (plugins, themes, uploads, database, etc.).
- Select all the components for a full restore and follow the prompts.
UpdraftPlus handles the entire job, pulling the files from your remote storage and putting your site back to the exact state it was in at that point in time. This one-click restoration makes recovering from a site crash or a dodgy update completely manageable, even if you’re not a technical expert.
Using Your Hosting Provider for Effortless Backups
While plugins give you a lot of hands-on control, leaning on your hosting provider for backups is often the easiest and most reliable way to go. Think of it as a powerful safety net that works quietly in the background, protecting your website without you having to lift a finger. It's the ultimate "set it and forget it" backup solution.
For Australian business owners who need solid assurance without adding another job to their overflowing to-do list, this method is a lifesaver. Services like UpTime Web Hosting's nightly, encrypted, off-site backups offer complete peace of mind, knowing a full copy of your site is automatically created and stored securely, far away from the server your website lives on.
The Value of a Managed Solution
One of the biggest advantages of host-level backups is that they protect you from simple human error. It’s surprisingly easy to forget a manual backup before a big update or to accidentally mess up a plugin's settings. A managed solution from your provider just wipes those risks off the table.
The responsibility for creating, securing, and storing your backups falls to the experts. This is especially crucial for dynamic sites like e-commerce stores, where losing even a single day's worth of orders and customer data can be incredibly damaging.
For any Australian WordPress site, daily automated backups should be your baseline. Attacks and failures happen fast and often. Security reports show the average new WordPress site is probed thousands of times within its first 24 hours online, which really drives home why a daily backup schedule is essential to minimise any potential data loss.
Finding and Restoring Backups in cPanel
One of the best things about host-managed backups is how easy they are to access. For hosts like UpTime Web Hosting that use cPanel, finding your backups is a piece of cake. You don't need to install anything extra—the tools are already built into your hosting control panel.
Here’s how you’d typically find and manage your backups:
- Log in to cPanel: Jump into your hosting control panel, either directly or through your client area.
- Find the Backup Tool: Look for an icon like "JetBackup," "Acronis Backup," or something similar. This is your gateway to all the automated snapshots of your site.
- See Your Backups: Once inside, you'll see a list of available restore points, usually organised by date. This gives you a clear history of your site's snapshots.
Restoring your site is usually just as straightforward. With a few clicks, you can choose to restore the entire account, just specific files, a database, or even individual email accounts.
Practical Example: Let's say you install a new plugin and it completely breaks your site's checkout process. Instead of panicking, you can log into cPanel, open the backup tool, choose last night's snapshot (before you installed the rogue plugin), and restore your files and database. Your site is back online and working perfectly in just a few minutes.
What to Check with Your Hosting Provider
Be warned: not all hosting backup services are the same. When you're looking at a host, you absolutely need to dig into the details of their backup policy. Your website's safety really depends on asking the right questions.
Make sure you get crystal-clear answers on these points:
- Backup Frequency: How often do they take backups? Nightly is the standard for any reputable provider.
- Retention Policy: How long are backups kept? A 30-day retention period is a great benchmark, giving you a full month of restore points to choose from.
- Storage Location: Are the backups stored off-site? This is non-negotiable. If they're on the same server as your live site, a single server failure could destroy both your site and your backups.
- What’s Included: Does the backup cover everything? It must include your website files (themes, plugins, uploads), your database, and your email accounts.
- Restore Process: Can you restore the backups yourself? A self-service option is ideal, so you don't have to wait on a support ticket in an emergency.
Choosing from a list of quality Australian web hosting providers that are upfront about these policies ensures you have a reliable safety net when you need it most. This approach to backing up your WordPress site gives you maximum protection with minimal effort.
Host your website with our 5-star rated, cPanel website hosting plans.
Super fast servers, with security included and hosted in your choice of Australian Data Center.
View cPanel Plans
Taking Control with a Manual cPanel Backup
While automated systems are fantastic for peace of mind, sometimes you just need absolute control. Think about those moments right before a major site update, a big theme change, or migrating to a new server. Performing a manual backup gives you a precise, perfect snapshot of your website at that critical moment.
Mastering this skill means you’re never solely reliant on automated systems. You can take direct action whenever you need to. This hands-on approach uses tools already built into your cPanel dashboard. We’ll break it down into the two essential parts: backing up your website files and exporting your database. Together, they create a complete, restorable copy of your entire WordPress site.
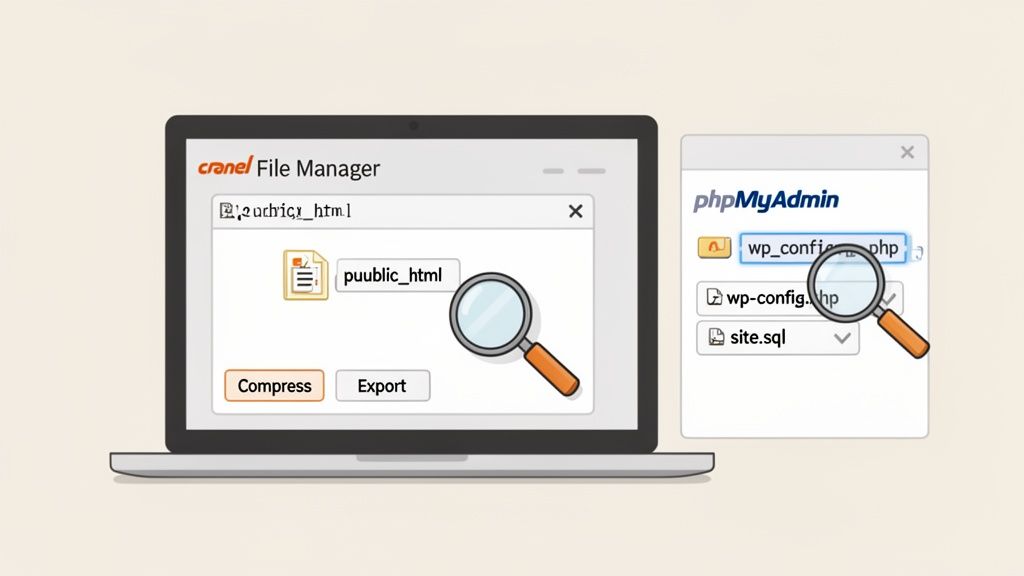
This screenshot shows the two key areas you'll be working with in cPanel—File Manager for your site's files and phpMyAdmin for its database. These are your core tools for a proper manual WordPress backup.
Backing Up Your WordPress Files with File Manager
Your WordPress files are everything that makes your site look and function the way it does. This includes your theme, all your plugins, images, and other media uploads. The easiest way to grab all of them at once is to create a compressed zip archive right inside cPanel’s File Manager.
Here’s how to get your files safely bundled up:
- Head to File Manager: Log in to cPanel and find the File Manager icon, usually under the "Files" section.
- Find Your Root Directory: Open the
public_htmlfolder. This is where all your main website files live, including the core WordPress installation. - Select and Compress: Click "Select All" to highlight everything inside
public_html. Then, find and click the "Compress" button in the top toolbar. - Create the Zip Archive: A pop-up will appear. Choose "Zip Archive" as the compression type. Give the file a recognisable name, like
mywebsite-backup-files-DATE.zip, and click "Compress File(s)".
The system will get to work creating a single .zip file containing your entire website. Once it’s done, select this new zip file and click "Download" to save it straight to your computer. For bigger sites, this can also be done with an FTP client. If you want to get your head around the tech behind it, you can read our guide on what is FTP and how it works.
Key Takeaway: Always download the compressed backup file to your local computer or a separate cloud storage location. Leaving it on your server means you could lose both your live site and your backup if a server-wide issue ever occurs.
Exporting Your Database with phpMyAdmin
Your database is the beating heart of your website's content. It stores every single post, page, user comment, product, and setting. Without it, your files are just an empty shell. To get a copy of this crucial data, you’ll use a tool called phpMyAdmin.
Before you start, you’ll need to know your exact database name.
- Pro Tip: Finding Your Database Name: The easiest way to find it is to look inside your
wp-config.phpfile. In File Manager, find this file in yourpublic_htmldirectory, right-click it, and select "View". Look for a line that starts withdefine( 'DB_NAME', '...' );. The value inside the second set of quotes is your database name.
Once you have that, you’re ready to export.
- Open phpMyAdmin: Back in your cPanel dashboard, find and click the phpMyAdmin icon under the "Databases" section.
- Select Your Database: In the left-hand column of phpMyAdmin, click on the name of your WordPress database—the one you just found in the
wp-config.phpfile. - Go to the Export Tab: With your database selected, click on the "Export" tab in the main navigation menu at the top.
- Choose the Export Method: For most situations, the "Quick" export method is all you need. Just make sure the format is set to "SQL", which is the standard for database backups.
- Download the SQL File: Click the "Go" or "Export" button. Your browser will then download a
.sqlfile to your computer. This file is the complete backup of your database.
By completing both of these steps, you now have a full, independent backup of your WordPress site, giving you ultimate control over your digital assets.
How to Verify Your Backups Actually Work
Having a backup system in place is a great start, but let's be honest: an untested backup is more of a hope than a reliable strategy. The most overlooked part of backing up your WordPress site is actually making sure you can restore it. This is the one step that turns a simple file into a genuine business recovery plan.
The last thing you want is to discover your backup file is corrupted or incomplete in the middle of a real emergency. The good news? You can safely test everything without ever touching your live, customer-facing website.
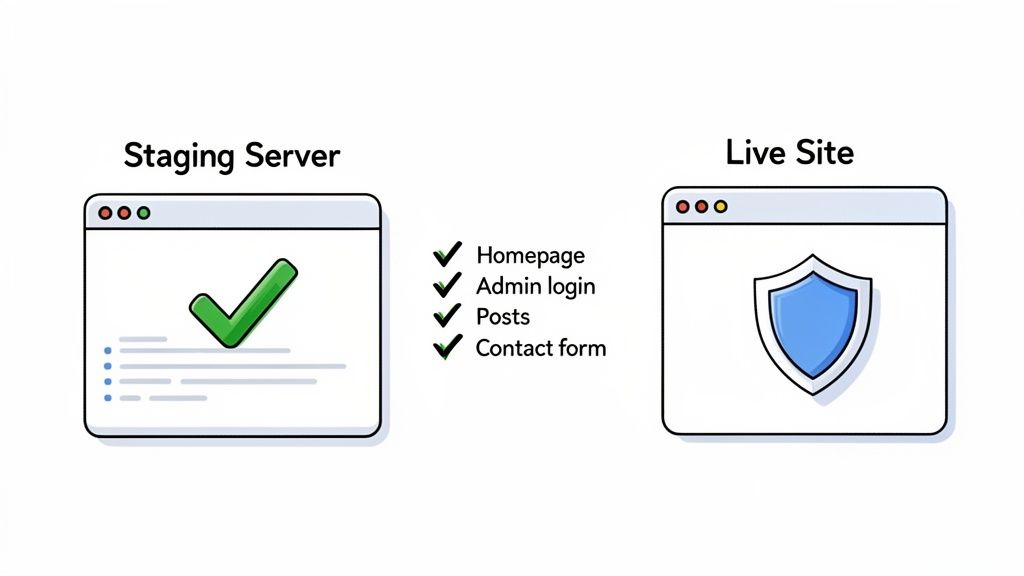
This verification process gives you genuine confidence that when you need it most, your recovery plan will work exactly as expected.
Creating a Safe Testing Environment
Here's the golden rule of testing backups: never restore a backup directly onto your live site unless it's an absolute emergency. Doing so could instantly overwrite recent orders, new customer sign-ups, or other important data. Instead, you need a safe, isolated space to work in.
Your two best options for this are a staging site or a local server.
- A Staging Site: Many quality web hosts, including UpTime Web Hosting, offer one-click staging environments. This creates an exact, private clone of your live site where you can safely test the restore without any risk.
- A Local Server: You can also test on your own computer using a fantastic free tool like Local by Flywheel. It lets you create a fully functional WordPress installation on your machine, giving you the perfect sandbox to practise a full restoration from scratch.
Using one of these methods ensures your live website remains completely untouched and online for your customers while you check your backup's integrity behind the scenes.
Your Essential Verification Checklist
Once you've restored the backup in your safe environment, it's time to run through a quick but thorough checklist. The goal is to confirm that both the files and the database have been brought back correctly and that the site actually works.
Don't just glance at the homepage and call it a day. Methodically check these key areas:
- Can You Log In? First up, try to access your WordPress admin dashboard (
/wp-admin). If you can log in, it's a great sign that the user database is intact. - Is Recent Content There? Check for your most recent blog posts, pages, or products. This confirms the database backup was current when it was created.
- Are Images and Media Loading? Browse a few pages and posts. Seeing all your images and media uploads displaying correctly confirms your
wp-uploadsfolder was properly restored. - Do Core Functions Work? Test something important, like your contact form. Fill it out and see if the submission goes through as expected. For an e-commerce site, you might add a product to the cart.
Running through this simple checklist provides tangible proof that your backup is complete and fully functional. It moves you from "I think I have a backup" to "I know I can restore my site."
Establishing a Realistic Testing Schedule
This process doesn't need to be a weekly chore. For most Australian small businesses, a realistic and effective schedule is to test a backup once every quarter. It’s also a smart move to test one after any significant site change, like installing a major new plugin or switching themes.
Failing to test can have serious consequences. We've seen it happen. Real-world audits often find that a significant percentage of backups are unusable upon restoration due to corrupted files or version mismatches. Because of this, best practices now mandate at least quarterly restore tests—a simple habit that drastically reduces potential downtime.
Treating this as a core part of your business operations builds resilience. For those who prefer a hands-off approach, our web maintenance and support plans can manage this entire process for you, ensuring your recovery strategy is always validated and ready to go.
Got Questions About WordPress Backups?
When you first start thinking about backing up your WordPress site, it's easy to feel a bit overwhelmed. That's perfectly normal. Getting straight answers to your questions is the first step toward building a backup plan you can actually count on. Let's tackle some of the most common queries we get from business owners just like you.
How Often Should I Back Up My WordPress Site?
There’s no magic number here—the right backup schedule really depends on how often your website changes. It's all about what makes sense for your business.
For a busy online store processing orders all day, daily backups are non-negotiable. If you're a blogger who posts a new article once a week, then a weekly backup schedule is a great fit. And for a more static portfolio site? You might think monthly is enough, but we’d still recommend weekly as a safer baseline. You never know when you might need it.
Here's a simple rule of thumb: match your backup frequency to the maximum amount of data you're willing to lose. If the thought of re-doing a full week's worth of work makes you break out in a cold sweat, you need weekly backups at the absolute minimum.
Where’s the Safest Place to Store My Backups?
The golden rule of backups is simple: store them anywhere except on the same server as your website. Keeping your backups on your server is like hiding a spare key under the doormat—if something goes wrong with the server, you lose your site and your only way to fix it.
Best practice is to keep your backups "off-site" in a totally separate, secure location. This means that even if your entire server has a catastrophic failure, your backup files are safe, sound, and ready to go.
Here are the safest spots:
- Third-party cloud storage: Services like Google Drive, Dropbox, or Amazon S3 are fantastic, affordable options for stashing your backup files.
- Your web host's solution: An even smarter approach is to use a managed service like UpTime Web Hosting's encrypted, off-site backups. This takes the whole process off your plate, handling everything for you automatically and securely.
What’s the Difference Between File and Database Backups?
It helps to think of your website as two separate but equally important parts. You need both for a complete, working website.
Your database is the 'what' of your site. It stores all your content—every blog post, page, user profile, comment, and all your website settings. It's the unique information that makes your site yours.
Your files are the 'how'—they control how your site looks and works. This includes your theme, all your plugins, images, and any other media you've uploaded.
Can Running a Backup Slow Down My Website?
The short answer is yes, it can. The process of gathering up all your files, compressing them into a zip archive, and exporting your database can be pretty resource-intensive. This can cause a temporary slowdown, especially if you're on a shared hosting plan.
This is exactly why nearly all automated backup systems—whether it's a plugin or something managed by your host—are scheduled to run during off-peak hours. Usually, this is in the middle of the night when your visitor traffic is at its lowest. Server-level backups, like the ones we manage, are also highly optimised to keep the performance impact as minimal as possible. You can dive deeper into how different backup methods work in the official WordPress documentation.
Protecting your business starts with a reliable foundation. At UpTime Web Hosting, we provide fast, secure, and 100% Australian web hosting that includes automated nightly backups, so you can focus on your business with complete peace of mind. https://uptimewebhosting.com.au
Related posts:
 Cloud Backup For Business An Essential Australian Guide
 The Ultimate Business Backup Guide For Australian SMBs
 A Practical Guide to WordPress Malware Removal
 Improve WordPress Speed with a Cache Plugin A Practical Guide
 Exploit Prevention for Small Business: A Practical Guide
 A Practical Guide to Create Forms on WordPress
 Anti-Virus Protection for Business: A Practical Guide
 Network Security Small Business: A Practical Guide to Protecting Your Assets