To improve WordPress speed with a cache plugin, you really just need to install a quality tool like LiteSpeed Cache. It works by creating static, ready-to-go copies of your pages. This simple step stops WordPress from having to build every single page from scratch for every visitor, which results in a dramatically faster experience for your users.
Why Caching Is Your Secret Weapon for a Faster Site
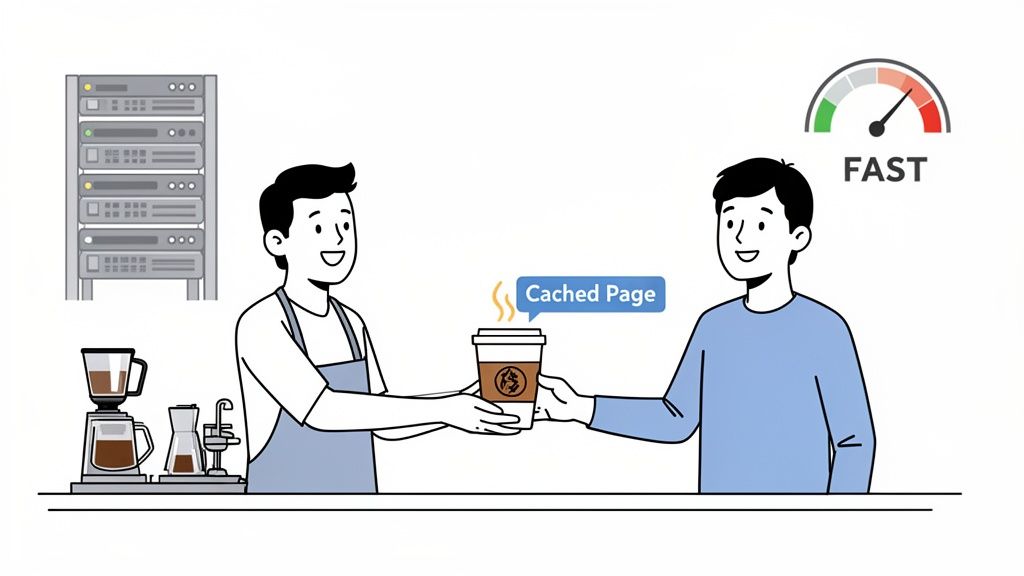
Let's cut through the technical jargon for a moment. Caching is hands-down the single most effective way to make your WordPress website feel instantly quicker. Think of it like a popular coffee shop that keeps its most-ordered coffees ready to hand over, instead of grinding beans and frothing milk for every single customer.
Without caching, every time someone lands on your site, WordPress has a lot of work to do. It has to poke the database for information, run a bunch of PHP scripts, and stitch together all the different parts—header, content, footer, widgets—just to build the page. That whole process takes time and chews up server resources, especially when you have a lot of visitors.
Caching flips this whole dynamic on its head. It takes the final, fully-assembled page and saves it as a lightweight, static HTML file. The very next visitor gets served this pre-made version in a flash, completely bypassing that slow, resource-heavy build process.
The Real-World Impact of Caching
This speed boost isn't just some technical metric to brag about; it has a direct impact on your business goals. Before you even touch a plugin, it’s a good idea to get a handle on the bigger picture of why a site might be slow and check out some practical fixes to speed up your website. Caching is a massive piece of that puzzle.
Here’s a look at how a faster site actually helps you:
- Better SEO Rankings: Google openly admits that site speed is a key ranking factor. A zippier site can lead to much better visibility in search results. For example, a site that improves its load time from 4 seconds to 2 seconds could see a tangible bump in its search rankings over time.
- Lower Bounce Rates: People are impatient. A page that loads quickly keeps them on your site, dramatically reducing the chance they'll click away before your content even shows up. If your blog post loads instantly, a reader is far more likely to stick around than if they're staring at a blank screen.
- Increased Conversions: If you run a WooCommerce store, speed is literally money. A snappy checkout process and fast-loading product pages directly lead to more sales. For instance, a one-second delay in mobile page load can decrease conversion rates by up to 20%.
By taking the load off your server, caching doesn't just make things faster for the user. It also massively improves your website's ability to handle more traffic without grinding to a halt.
Here at UpTime, our whole infrastructure is built with this in mind. We use LiteSpeed web servers, which means a plugin like LiteSpeed Cache can talk directly to the server hardware. This deep integration delivers performance gains that other, more generic plugins just can't compete with. The synergy between your hosting and caching plugin is critical.

Performance you can feel, backed by clients who depend on it. Read how our support and uptime create long‑term customer success.Power Your Business with Better Hosting
Choosing the Right Cache Plugin for Your Website
Feeling a bit overwhelmed by the dozens of WordPress caching plugins out there, all promising lightning-fast speeds? You're definitely not alone. The secret is to look past the marketing hype and use a practical framework to figure out what’s actually best for your website.
When you start to improve WordPress speed with a cache plugin, it really boils down to three things: ease of use, compatibility with your setup, and raw performance on Australian hosting. Let’s unpack what this means for you as a busy site owner.
Key Factors For Your Decision
The best choice always strikes a balance between power and simplicity. A plugin with a thousand settings is pretty useless if it’s too confusing to get right.
Here's what to keep in mind:
- Ease of Use: How intuitive is the setup? A good plugin should get you major speed improvements with a straightforward configuration, without you needing to call in a developer. For example, WP Rocket is famous for its "one-click" setup that applies about 80% of best practices automatically.
- Compatibility: Does it play nicely with your theme, page builder, and crucial plugins like WooCommerce? Caching conflicts are a real headache, causing everything from broken contact forms to checkout errors. A good plugin will have clear documentation on known incompatibilities.
- Real-World Performance: How well does it actually run on local servers? A plugin that’s optimised for your specific hosting environment is always going to give you better results.
For our clients at UpTime, we consistently recommend LiteSpeed Cache. Because our servers run on LiteSpeed technology, this plugin talks directly to the server, unlocking performance optimisations that other plugins simply can't match. It’s a native advantage that makes a tangible difference.
Comparing Top WordPress Cache Plugins
While we’re big fans of a server-integrated approach, it’s good to know what else is out there. Choosing the right plugin is especially important in the Australian WordPress ecosystem, where a surprising 1.54% of all global live WordPress sites are based.
For example, a premium plugin like WP Rocket often posts benchmarks showing it can slash Largest Contentful Paint (LCP) by an average of 35% thanks to its clever features. Digging into performance data like this is a great way to see how the top contenders stack up.
To give you a clearer picture, here’s a quick head-to-head look at the most popular options.
| Plugin | Key Feature | Best For | Pricing |
|---|---|---|---|
| LiteSpeed Cache | Direct server-level integration with LiteSpeed servers. | UpTime Hosting clients and anyone on a LiteSpeed server seeking maximum performance. | Free |
| WP Rocket | User-friendly interface and comprehensive features in one package. | Beginners who want a simple, powerful premium solution without a steep learning curve. | Premium |
| WP Fastest Cache | A straightforward, no-fuss approach with a free and premium version. | Users who need basic, effective caching without getting bogged down in complex settings. | Freemium |
While a dedicated cache plugin is a fantastic start, don't forget it's just one piece of the puzzle. It’s worth exploring the broader range of website speed optimization tools available, as caching works best as part of a complete performance strategy.
Ultimately, you’re looking for a tool that not only speeds up your site but also fits seamlessly into your workflow.
Right, you've picked your plugin. Now it's time to get our hands dirty. This is where we'll walk through setting up LiteSpeed Cache, which is our go-to recommendation for anyone serious about speeding up their WordPress site, especially if you're hosting with us. I'll take you through the essential settings and, more importantly, explain why we're choosing them, so you know exactly what you're doing and why it works.
If you're on one of our UpTime hosting plans, you'll find our AccelerateWP service actually does about 90% of this heavy lifting for you with just a few clicks. Still, it’s incredibly useful to understand what’s happening under the bonnet.
This little flowchart sums up the big decision points: ease of use, compatibility, and pure performance.
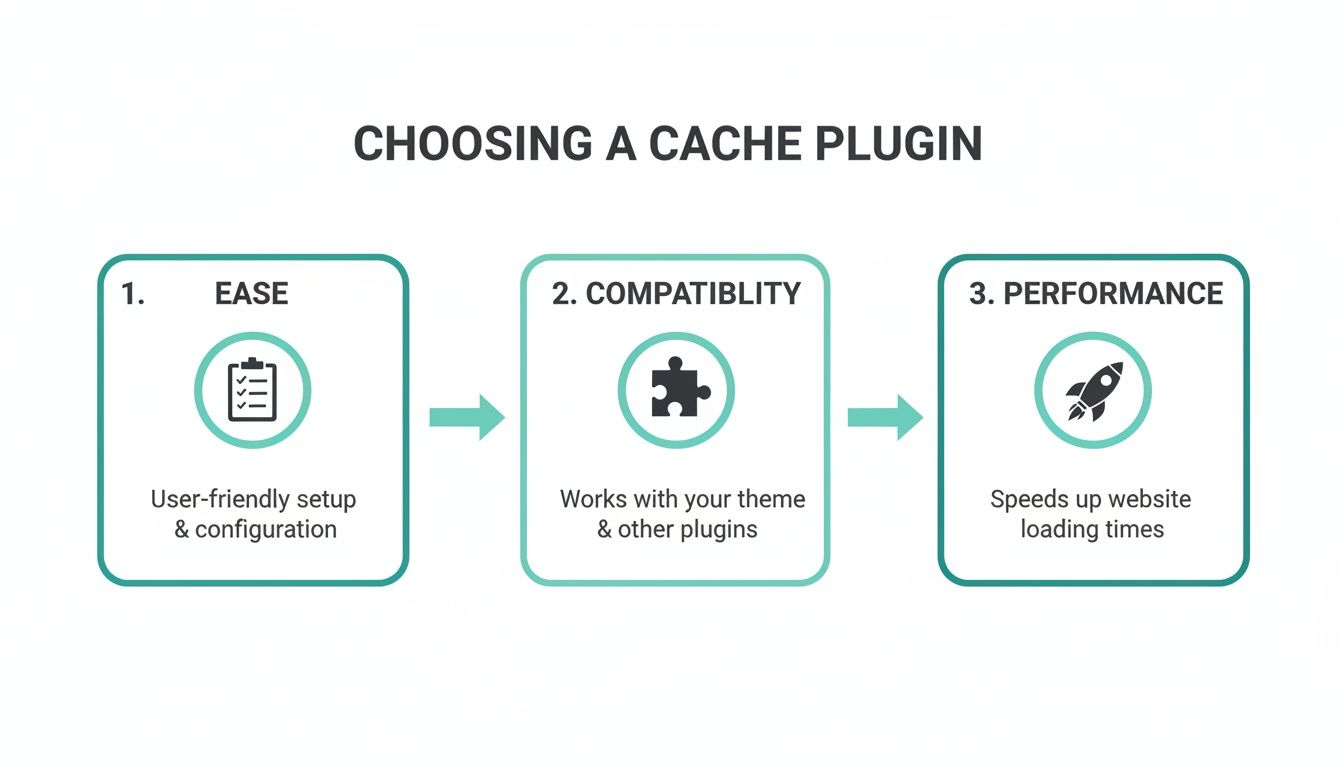
At the end of the day, the best plugin is the one that nails all three for your specific website.
Enabling Core Caching Features
First things first, you'll need to install and activate the LiteSpeed Cache plugin straight from the WordPress repository. Once that's done, you’ll see its menu pop up in your WordPress dashboard sidebar.
The plugin’s dashboard can look a bit overwhelming at first glance with all its tabs and options. Don't worry. You only need to focus on a couple of key areas to get a massive performance boost. Head over to LiteSpeed Cache > Cache and click the first Cache tab.
Here are the main settings to flick on:
- Enable Cache: This is the big red button. Turn it ON.
- Cache Logged-in Users: Keep this OFF. You’d only turn this on if you run something like a membership site where users see unique content after logging in. For most sites, it’s unnecessary.
- Cache REST API: It’s generally safe to leave this ON.
- Cache Login Page: Flick this to ON. It gives a nice little speed bump to your wp-admin login page.
Once you’ve saved these changes, the plugin gets to work creating static HTML versions of your pages. This immediately takes a huge load off your server.
Activating Object and Browser Caching
Next up, we're going to enable two other powerful types of caching. These settings tackle different parts of the speed puzzle, and together, they create a much faster experience for your visitors.
Object Cache
Pop over to LiteSpeed Cache > Cache > Object. This feature is an absolute game-changer for database-heavy sites, like WooCommerce stores or busy forums. It basically stores the results of common database requests in memory, so WordPress doesn't have to keep asking the database the same questions over and over again.
- Object Cache: Set this to ON.
- Method: Choose Redis if it's available (Memcached is the other option). We strongly recommend Redis.
- Host & Port: Your hosting provider, like us here at UpTime, will give you these details. With our cPanel hosting, these details are often
127.0.0.1for the Host and a specific port number found in your cPanel dashboard.
Browser Cache
Now, head to the LiteSpeed Cache > Cache > Browser tab. This one is simple but effective. Browser caching instructs your visitors' web browsers to save static files—things that don't change often, like your logo, CSS stylesheets, and JavaScript files—right on their own computer.
- Browser Cache: Just switch this to ON.
When someone comes back to your site, their browser just loads those files locally instead of downloading them all over again. This makes repeat visits feel almost instant.
A well-configured cache plugin doesn't just make your site feel faster; it measurably improves key metrics. For example, reducing Time To First Byte (TTFB) directly impacts Largest Contentful Paint (LCP), a core ranking factor for Google.
Across Australia's WordPress community, LiteSpeed Cache is a clear favourite. On optimised hosting environments like UpTime’s CloudLinux and LiteSpeed servers, we've seen sites achieve up to 70% faster request processing compared to older Apache setups. That means lightning-fast load times for your Aussie traffic.
For a complete video guide that's tailored specifically for our platform, check out our knowledge base article on setting up LiteSpeed Cache with WordPress.html). It’ll walk you through every single click.
Fine-Tuning Your Cache for Advanced Performance
Alright, you’ve switched on the essential caching features, and your site should already feel a lot snappier. Now, it’s time to get into the nitty-gritty with some pro-level adjustments.
These small tweaks are what separate a good caching setup from a great one. They ensure your site isn't just fast, but also completely reliable for every single visitor.
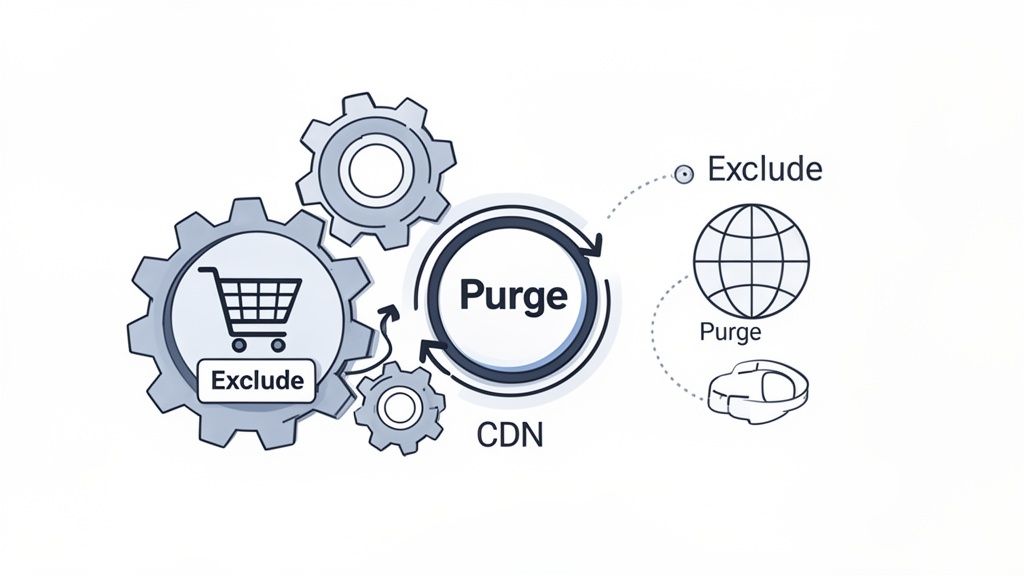
The first critical step is telling your cache plugin what not to cache. Caching dynamic pages—where the content changes from person to person—can cause absolute chaos. For an eCommerce store, this could mean one customer seeing someone else's shopping cart. A complete disaster for business.
Setting Up Smart Cache Exclusions
To head off these problems, you need to exclude specific URLs from ever being cached. Pretty much every quality cache plugin, including LiteSpeed Cache, has a dedicated spot for this. Look for a section labelled ‘Excludes’ or ‘Do Not Cache URLs’.
If you’re running a WooCommerce site, these are your non-negotiables for the exclusion list:
/cart//checkout//my-account/
Simply pop these paths into your exclusion rules. This move guarantees these critical, user-specific pages are always served fresh from the server. No data mix-ups, and the rest of your site stays lightning-fast.
Keeping Your Content Fresh with Automatic Purging
A common worry with caching is that visitors might see old, outdated content after you've made an update. That’s where cache purging saves the day. Instead of you having to remember to manually clear the cache every time you tweak something, a good plugin handles it automatically.
Most plugins are set up by default to purge the cache for a page when you update it. But you can often take this further. For instance, in LiteSpeed Cache's 'Purge' settings, you can tell it to automatically clear related pages too, like categories and tags, whenever you publish or update a post. It keeps everything perfectly in sync across your entire site.
Properly configured exclusions and purge rules are the backbone of a stable, high-performance website. They deliver the raw speed of caching without breaking the dynamic features modern sites rely on.
Supercharging Speed with a CDN
Want to truly improve WordPress speed with a cache plugin on a global scale? You need to pair it with a Content Delivery Network (CDN).
A CDN, like the hugely popular Cloudflare, takes copies of your website's static files—think images, CSS, and JavaScript—and stores them on servers all around the world.
So when someone from another country visits your site, the CDN serves those files from a server that's geographically close to them. This simple change drastically cuts down latency and slashes loading times. For a practical example, if your server is in Sydney, a visitor from London can load your images from a server in the UK instead of waiting for them to travel across the globe.
Modern cache plugins make this integration seamless. In LiteSpeed Cache, you just need to enter your Cloudflare API details, and the plugin takes care of purging the CDN cache right alongside your site's cache. It’s a powerful combination that ensures your website is fast for every visitor, no matter where they are in the world.
Small optimisations like these, coupled with keeping your server software up-to-date, make a massive difference. For more on that, you can read our guide on how to update your PHP version for WordPress.
Right, so you’ve switched on your cache plugin. High five! But how do you actually know if it's doing anything? Just flicking the switch isn't enough; you need to see the proof in the numbers to know your hard work is paying off.
The best way to see the real difference is to run a simple 'before and after' test. Before you touch anything, pop your website URL into a tool like GTmetrix or Google PageSpeed Insights to get a baseline score. Once you've got your caching all configured, run the tests again. Don't get bogged down in all the data; just focus on the metrics that really matter.
Key Performance Metrics to Watch
Your main goal is to see a noticeable improvement in a couple of key areas that have a massive impact on both user experience and your SEO rankings.
- Time to First Byte (TTFB): This is all about how quickly your server responds when someone visits your site. Caching should slash your TTFB because the server is just dishing out a ready-made HTML file instead of having to build the page from scratch for every single visitor. A good "before" TTFB might be 800ms, while an "after" could be under 200ms.
- Largest Contentful Paint (LCP): This is one of Google's Core Web Vitals, and it measures how long it takes for the biggest piece of content (usually a hero image or a big block of text) to show up on the screen. You're aiming for an LCP under 2.5 seconds, and good caching is one of the fastest ways to get there.
When you see those TTFB and LCP times drop, you've got solid proof that your caching is working. It's not just about a faster-feeling site; it’s about creating a better experience for your visitors and sending all the right signals to Google that your site is top-notch.
Troubleshooting Common Caching Problems
Of course, sometimes things go a bit sideways. If your site starts acting up after you've enabled caching, don't panic. It's almost always one of a few common hiccups that are pretty easy to sort out.
Seeing old content, or are your recent changes not showing up? This is the classic sign of a stuck cache. A quick manual purge will almost certainly fix it. For a step-by-step guide, check out our knowledge base article on clearing the LiteSpeed cache.
Another common headache is a broken contact form or a checkout process that won't complete. This is a dead giveaway that you've forgotten to exclude dynamic pages from being cached. Jump back into your settings and double-check your exclusion list to make sure pages like /cart/ and /checkout/ are set to never be cached.
Finally, one of the biggest mistakes we see people make is running two cache plugins at the same time. This is a surefire recipe for disaster. The plugins will clash and cause all sorts of unpredictable errors. Always stick to one, get it configured properly, and make sure any others are completely uninstalled.
Host your website with our 5-star rated, cPanel website hosting plans.
Super fast servers, with security included and hosted in your choice of Australian Data Center.
View cPanel Plans
Common Questions About WordPress Caching
Even with the best guide, a few questions always pop up when you start digging into WordPress caching. It's totally normal. To clear things up, we've put together some straight-up answers to the questions we hear the most.
Can You Cache the WordPress Admin Dashboard?
This is a big one. People often wonder if a cache plugin will make their WordPress admin area faster. The short answer is that page caching is almost exclusively for your website's front end—what your visitors see.
However, that doesn't mean you can't speed up the backend. By flicking on object caching in a plugin like LiteSpeed Cache, you can definitely make your admin tasks feel much snappier. It works by speeding up the database queries that happen behind the scenes, and it’s a feature we fully support on all our hosting plans. For example, loading your list of posts or processing a WooCommerce order can become noticeably faster with object caching enabled.
When Should I Manually Clear the Cache?
Honestly? Almost never. A properly set-up caching plugin is smart enough to automatically clear the cache for a specific page the moment you hit 'Update'. This means your visitors always see the freshest content without you having to lift a finger.
The only time you should really need to manually purge the entire site cache is after making a major, site-wide change, like:
- Switching to a new WordPress theme.
- Activating or deactivating a major plugin.
- Troubleshooting a weird display issue that you can't pin down.
If you need a hand with the specifics, you can learn more about enabling the built-in LiteSpeed WordPress cache right in our knowledge base.
One of the biggest mistakes we see is site owners running multiple caching plugins at the same time. This is a recipe for disaster. They'll inevitably conflict with each other and cause all sorts of unpredictable errors. Always pick one, configure it properly, and make sure any others are completely removed.
What's the Difference Between Page Caching and Browser Caching?
It's easy to get these two mixed up, but they do very different jobs.
Think of it this way: Page caching happens on your server. It creates static HTML copies of your pages so they can be delivered to new visitors in a flash.
Browser caching, on the other hand, happens on your visitor's computer. It tells their browser to store local copies of your site's files, like your logo, fonts, and stylesheets. When they come back for a second visit, everything loads instantly because it's already on their device. Both are crucial for a lightning-fast site.
Ready to feel the difference that truly optimised hosting makes? UpTime Web Hosting combines powerful LiteSpeed servers with expert local support to make your WordPress site fly. Explore our hosting plans today!