When your browser flashes a "DNS server not responding" error, it's essentially saying your device can't find the digital address for the website you're trying to visit. It’s a bit like your GPS losing signal. For most of us here in Australia, this is usually a simple fix, often pointing to a small glitch on your computer, a wonky setting, or a hiccup with your local internet provider. More often than not, it’s not a major drama and can be sorted out with a few quick checks.
First Steps to Fix DNS Errors on Your Devices
Before you even think about restarting your router or calling your ISP, the most common culprit behind a "DNS server not responding" error is right there on your device. Think of it like a well-travelled path that occasionally gets a temporary roadblock; a quick reset is usually all it needs. This is particularly common after software updates or when you install new apps that might quietly change your network settings in the background.
This flowchart gives you a good idea of the troubleshooting path, starting with your device before moving outwards to your router and eventually your ISP.
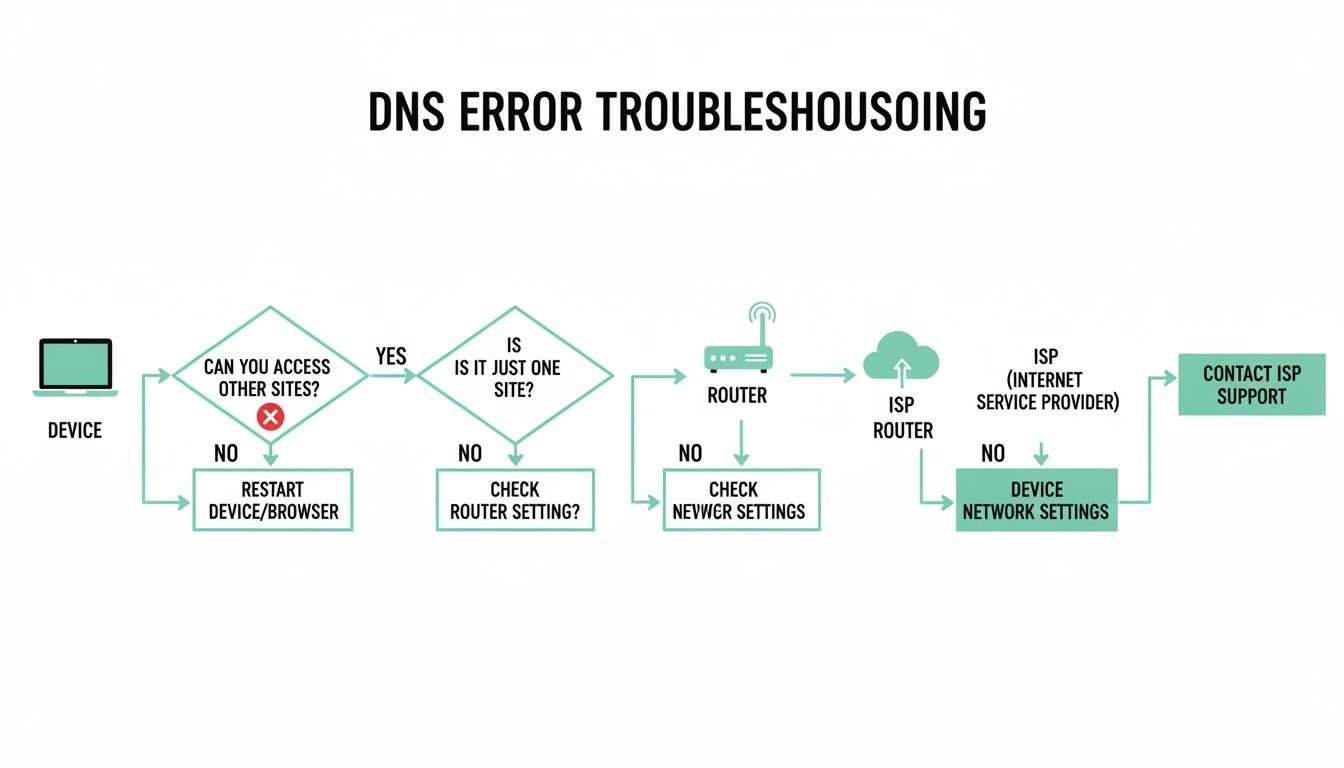
The key takeaway here is to always start with the device in your hands. It's the most likely source of the problem and, thankfully, the easiest to fix.
Why Start with Client-Side Fixes?
Your computer, phone, or tablet keeps a local log of websites you've visited—a DNS cache—to make future visits faster. If this saved information becomes outdated or corrupted, it can easily lead to connection errors. It can even be as simple as a browser glitch, which is why a "hard refresh" is one of the first things we recommend. If you're not sure how to do that, our guide on how to hard refresh your browser will walk you through it.
These initial checks are quick, don't require any technical wizardry, and solve a surprising number of DNS issues. They’re the digital equivalent of checking if a lamp is plugged in before deciding the bulb is blown.
The Domain Name System (DNS) is a simple lookup that translates the written name of a web service to its IP address. When DNS breaks, there is no way to look up the address, so requests fail, and the service itself sees no traffic arriving.
A bit of background knowledge can also be helpful. Understanding basic network components like the TCP/IP port can give you valuable insight into how your devices actually talk to the internet. It helps you grasp the mechanics of how your device asks for and receives information, making the whole troubleshooting process a lot less mysterious.
Seeing that error screen is a clear signal that the breakdown is happening at the very first step of internet communication: the DNS lookup. The rest of this guide will walk you through the most effective client-side fixes for Windows, macOS, and mobile devices, explaining why each step works along the way.

Performance you can feel, backed by clients who depend on it. Read how our support and uptime create long‑term customer success.Power Your Business with Better Hosting
Troubleshooting Your Router and Checking Your ISP Status
So, you’ve figured out the "DNS server not responding" error isn't just happening on one device. That's a classic sign the problem might be with your network hardware itself. Your router and modem are the gatekeepers between everything on your local network and the wider internet. Even a small glitch there can bring your connection to a grinding halt, but thankfully, a proper restart usually sorts things out.
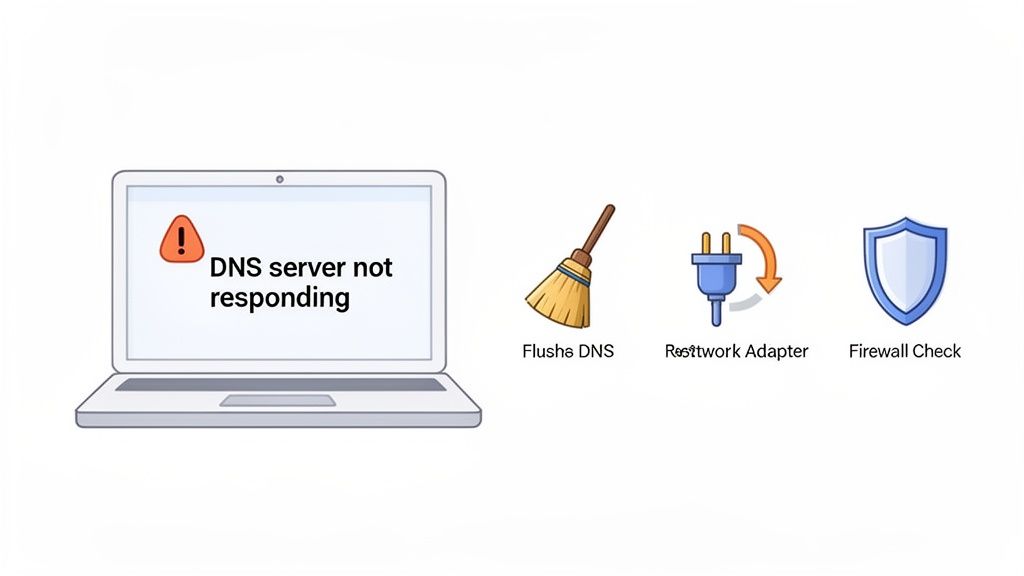
But here’s a tip I’ve learned over the years: just flicking the power switch off and on again probably won't cut it. To really clear out any DNS conflicts stuck in your hardware, you need to do a full power cycle. This process flushes the temporary memory (RAM) of your modem and router, forcing them to establish a completely fresh connection with your Internet Service Provider (ISP).
The Correct Power-Cycling Sequence
Doing this in the right order is crucial. I've seen plenty of people rush this part and end up right back where they started. Don't be one of them!
- Unplug Both Modem and Router: Start by physically unplugging the power cords from both your modem (the box that brings the internet into your home) and your Wi-Fi router. Don’t just hit the power button; pull the plugs from the wall.
- Wait a Full Minute: Leave both devices unplugged for at least 60 seconds. This is the most important step. It gives the internal components time to fully discharge and clear any bad data that’s causing the DNS error.
- Reconnect the Modem First: Plug your modem's power cord back in. Now, you need to be patient. Watch the status lights and wait until the power, receive, send, and online lights are all solid and stable (they're usually green or blue). This can take a couple of minutes.
- Connect the Router Last: Only once the modem is fully online should you plug your router's power cord back in. Give it another few minutes to boot up. The Wi-Fi indicator light will usually be solid or blinking steadily when it's good to go.
This sequence is key because it lets your modem get a clean, stable connection with your ISP before your router starts trying to manage your local network traffic.
Is Your ISP the Problem?
Sometimes, the issue is completely out of your hands and is actually on your Internet Service Provider's end. Providers like Telstra, Optus, or TPG can have network outages or DNS server failures that affect whole neighbourhoods or even cities. Before you spend another hour pulling your hair out over your own equipment, a quick check can save you a world of frustration.
A widespread ISP outage can mimic local network problems perfectly. Verifying their service status first is the most efficient step after you've ruled out your own device and router as the cause.
Most major Aussie ISPs have real-time network status pages on their websites or post updates on social media. It's always a good idea to check your provider's status tool for any known issues. We believe in that same transparency here at UpTime Web Hosting; you can see how to use our Network Status tool to check for any incidents on our end.
If you suspect it’s an ISP problem but their status page says everything is fine, it’s time to call their support team. To make that call as productive as possible, go in prepared:
- Tell them the exact error: Let them know you're getting a "DNS server not responding" message.
- Explain what you’ve done: Mention that you've already restarted your computer and properly power-cycled your modem and router. This shows you've done your homework and helps them skip the basic script.
- Ask direct questions: Don't be afraid to ask if there are any known DNS issues in your area or if any network maintenance is underway.
Besides DNS, other network gremlins like packet loss can also cause headaches. Knowing how to fix packet loss is handy, as it can sometimes be a symptom of a much larger problem at the ISP level.
Switching to a Public DNS for Better Reliability
So, you’ve checked your devices and given the router a good old reboot, but you’re still staring at that infuriating "DNS server not responding" error. It's time to look at the next likely culprit: the DNS servers themselves.
The default servers your Internet Service Provider (ISP) gives you can often be the weak link in the chain. They might be slow, a bit unreliable, or just the root cause of all your connection headaches.
The good news? You're not stuck with them. Switching to a public DNS provider is one of the quickest and most effective ways to sort out your internet speed and reliability. Think of it as taking a faster, better-maintained highway for your internet traffic instead of sticking to the congested local road your ISP puts you on.
Why Bother Making the Switch?
Honestly, the biggest win is usually a noticeable boost in browsing speed. Public DNS servers from providers like Google or Cloudflare are built for high performance. They often have server locations right here in Australia, which slashes the time it takes for your browser to look up a website's address.
But it’s not just about speed. Many public DNS services also throw in some serious security features. They can automatically block access to known malicious websites, protecting you from phishing scams and malware before they even get a chance to load. This adds a fantastic layer of security to your entire network without you having to lift a finger.
For those wanting to take things a step further, our guide on Getting started with DNS Filter explains how you can implement more advanced content filtering for your home or business.
Choosing the Right Public DNS Server for Australia
While there are plenty of options out there, a few names consistently pop up for Aussie users because of their solid performance, reliability, and extra features. To help you choose, here's a quick comparison of the most popular public DNS services.
Comparing Popular Public DNS Servers for Australia
| DNS Provider | Primary Server | Secondary Server | Key Features |
|---|---|---|---|
| Cloudflare | 1.1.1.1 | 1.0.0.1 | Privacy-focused, incredibly fast, and offers malware blocking options. |
| Google Public DNS | 8.8.8.8 | 8.8.4.4 | Highly reliable and widely used, with a massive global infrastructure. |
| OpenDNS | 208.67.222.222 | 208.67.220.220 | Family-friendly with excellent content filtering and security options. |
Each of these has its own strengths. Cloudflare's 1.1.1.1 service is a crowd favourite for its raw speed and its strong stance on user privacy—they promise not to sell your browsing data. Google's 8.8.8.8 is the dependable workhorse; it's known for rock-solid stability. And OpenDNS is a fantastic choice for families or small businesses that want to easily control the types of websites accessible on their network.
It's worth remembering that even the biggest global services aren't perfect. Local network conditions and caching quirks can sometimes throw a spanner in the works.
For instance, a few years back, some Australian users ran into a frustrating glitch with Google's public DNS. Changes made to .au domain records failed to update correctly for hours within Australia, even though they had propagated everywhere else in minutes. It was a good reminder that while global providers are generally excellent, local performance can sometimes have its moments.
Practical Steps to Change Your DNS Settings
Changing your DNS settings is a pretty simple job. You can do it on individual devices, but the best approach is to change it directly on your router. That way, every device on your network gets the benefit.
On Your Router (The Best Way)
By updating your router, every single device connected to your Wi-Fi—laptops, phones, smart TVs, you name it—will automatically start using the new, faster servers. The exact steps vary by router brand, but the general idea is the same:
- Log in to your router’s admin dashboard (usually by typing
192.168.0.1or192.168.1.1into your web browser). - Hunt down the DNS settings. These are often located under sections like "Network," "WAN," or "Internet."
- Punch in the primary and secondary DNS server addresses from the provider you chose.
- Save your changes and give the router a quick restart for the new settings to kick in.
On Windows 11
- Head to Settings > Network & internet.
- Click on Wi-Fi or Ethernet, whichever you're using.
- Select Hardware properties, then hit Edit next to "DNS server assignment."
- Switch it to Manual, enable IPv4, and type in your new primary and secondary DNS addresses.
On macOS
- Open System Settings > Network.
- Choose your Wi-Fi or Ethernet connection and click the Details button.
- Navigate to the DNS tab, click the little + icon, and add the new DNS server addresses.
By taking control of your DNS, you can often put that "DNS server not responding" error to bed for good and start enjoying a much more stable and responsive internet connection.
Host your website with our 5-star rated, cPanel website hosting plans.
Super fast servers, with security included and hosted in your choice of Australian Data Center.
View cPanel Plans
Time to Look at Server-Side DNS Issues
So, you’ve ruled out any problems on the user's end—it's not their computer, their phone, or their local network. Now the spotlight swings over to your website's hosting environment. For any business owner or developer, this is where you switch gears from client-side to server-side troubleshooting.
More often than not, the problem boils down to a simple misconfiguration in your domain’s DNS records. It’s like the internet’s address book is pointing visitors to the wrong place… or nowhere at all. It can be maddening because your website might be running perfectly fine, but if the DNS isn't right, no one can find it. It's the digital equivalent of having a beautiful shop open for business but listing the wrong address on every map in town.
First things first, let’s check if your domain's name server (NS) records are actually pointing to your hosting provider.
Confirming Your Name Server Records
Name servers are the big signposts on the internet. They tell everyone where to find the complete set of DNS records for your website. If these are wrong, nothing else you do will matter.
You can get a quick look at your NS records using a free online tool like DNSChecker.org. Just pop in your domain name, choose "NS" from the dropdown menu, and see what it spits out.
What you see should match the name servers your web host gave you. For example, if you're with UpTime Web Hosting, you'd expect to see something like ns1.uptimewebhosting.com.au and ns2.uptimewebhosting.com.au.
If the tool shows a completely different set of name servers, congratulations—you've likely found your culprit. To fix this, you'll need to log in to your domain registrar (that’s the company you bought your domain name from, like GoDaddy or VentraIP) and update them. If you need a hand with this, our guide on Configuring Nameservers for Plesk DNS walks you through the process step-by-step.
The Waiting Game: DNS Propagation Delays
Here's a heads-up: even after you've fixed your name servers, the change isn't instant. This is because of something called DNS propagation. Think of it like a global memo being sent out to every internet server in the world; it takes time for them all to get the message and update their own records. This delay is a classic source of confusion and often makes people think their fix didn't work.
This is a worldwide process, and major outages often show just how interconnected everything is. During the October 2023 Cloudflare outage, DNS lookup failures in the Australian region shot up to 15% for several hours. It was a stark reminder of how much businesses rely on DNS stability. Historically, propagation for .au domains can take anywhere from an hour to a full 48 hours.
You can keep an eye on this process in real-time with a propagation checker tool. These show you whether your new DNS records are live across different locations around the globe. If you see your new records popping up in some places but not others, it’s a solid sign that all you need to do is wait it out.
Checking Key DNS Records in cPanel
Once you're sure your name servers are correct and you've given propagation some time, the next port of call is to check the individual records inside your hosting account. These little records control very specific functions, like where your website lives and where your emails get sent.
The most critical ones to double-check are:
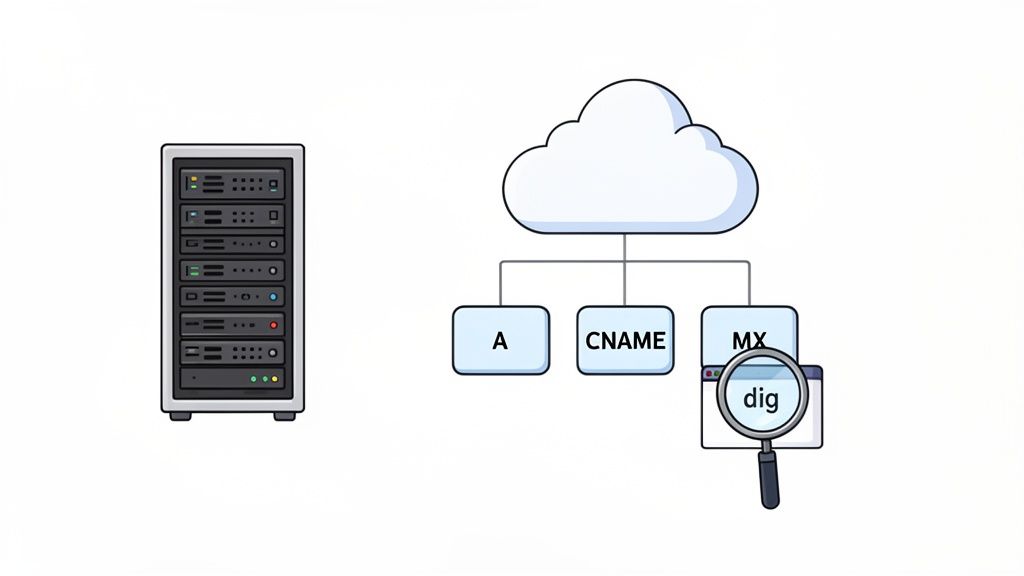
- A Record: The "Address" record. This is the big one. It maps your domain name (like
yourwebsite.com.au) directly to your server's IP address. If this IP is wrong, it’s a guaranteed "DNS server not responding" error for anyone trying to visit your site. - CNAME Record: The "Canonical Name" record points a subdomain (like
www.yourwebsite.com.au) to another domain name. It’s most commonly used to make sure the 'www' version of your site points to the non-'www' version, or vice-versa. - MX Record: The "Mail Exchanger" record tells the world where to send emails for your domain. If this is pointing to the wrong place, your website might be working fine, but you won't be receiving a single email.
A single incorrect character in an A record or MX record can take your entire website or email service offline. Always double-check these settings against the information provided by your hosting support team.
If you're using cPanel, you can find all these settings in the "Zone Editor". From there, you can see, edit, and add DNS records. If you’re not 100% sure what your correct IP address or MX records should be, don't guess. Check your hosting provider’s welcome email or their support documents for the right values. By methodically checking these records, you can confidently rule out a server-side misconfiguration as the source of the DNS drama.
Preventing DNS Errors and When to Seek Expert Help
Fixing a "DNS server not responding" error is one thing, but setting yourself up to avoid it in the first place is a much smarter strategy. A bit of proactive digital housekeeping can make a huge difference to your internet connection's stability and your website's reliability, saving you a lot of headaches and downtime later on.
This really just comes down to keeping your network software in good shape, watching out for hidden threats, and simply knowing your own setup. These aren't complex tech tasks; they're small habits that build a far more resilient online experience, whether you're just browsing the web or running a business-critical website.
Proactive Strategies for a Stable Connection
Prevention really starts with good maintenance. Just like your car needs a regular service, your digital tools need a bit of attention to keep running smoothly. By working these checks into your routine, you can often spot potential issues before they turn into a full-blown DNS outage.
- Keep Network Drivers Updated: The network adapter drivers on your computer are the crucial bit of software that lets it talk to your router and the internet. When they're out of date, they can cause all sorts of weird connection problems, including DNS errors. Just set a reminder to check for updates from your device manufacturer (like Dell, HP, or Apple) every few months.
- Run Regular Malware Scans: Some types of malware are built specifically to hijack your DNS settings. They can redirect your traffic to malicious websites or just break your connection entirely. Your best defence here is a reliable antivirus program set to run scheduled scans at least once a week.
- Document Your Network Configuration: This sounds more technical than it is. It's as simple as jotting down your router's login details, your current DNS server addresses (whether they're from your ISP or a public one), and your Wi-Fi password. Having this info handy saves you from frantically searching for it when things go wrong.
If you're managing a website, this proactive mindset is even more critical. Regularly checking that your domain registration and hosting services are renewed well before they expire is a simple step that prevents a basic admin oversight from taking your entire site offline.
Knowing When to Call for Backup
Even with the best preparation, some problems are just too big for a DIY fix. It’s important to know when you’ve hit a wall and it’s time to call in the experts. Wasting hours trying to solve something that needs specialised tools or access you don't have is just frustrating and gets you nowhere.
You should probably get some professional help if:
- You've tried all the client-side, router, and public DNS troubleshooting steps in this guide, and the error just won't go away.
- You think it’s a complicated server-side issue with your website's DNS records but you’re not confident editing them yourself. One wrong move here could make things much worse.
- The problem is affecting multiple people in different locations trying to reach your website, which strongly suggests a hosting or domain-level issue.
- You're dealing with a suspected security problem, like a DDoS attack, that's stopping your server from responding to normal DNS queries.
How UpTime Web Hosting Support Can Help
When it's time to escalate the issue for your website, our Australian-based support team is ready to step in. At UpTime Web Hosting, our entire infrastructure is located right here in Australia and is monitored 24/7 to provide a solid defence against DNS-related downtime. If you're a customer struggling with persistent "DNS server not responding" errors, please don't hesitate to reach out.
To help us sort out your issue as quickly as possible, please include the following info in your support ticket:
- Your domain name.
- A clear description of the error you're seeing.
- The troubleshooting steps you’ve already tried.
- Any recent changes you might have made to your domain or hosting settings.
This information gives our technicians a solid head start. For a bit more background on how these changes work behind the scenes, you can learn more about what DNS propagation is in our knowledge base. We’re here to keep your website fast, online, and secure.
Your DNS Questions, Answered
Dealing with DNS errors can feel like you're trying to read a foreign language, but you're not alone. We get these kinds of questions all the time. Let's break down some of the most common ones we hear so you can get a better handle on what's going on.
What Is a DNS Server and Why Does It Stop Responding?
The easiest way to think of a DNS (Domain Name System) server is as the internet's phone book. When you type in a friendly website address like uptimewebhosting.com.au, the DNS server's job is to look up that name and translate it into a numerical IP address—which is how computers actually find each other online.
A "DNS server not responding" error simply means your browser asked the phone book for a number, but it didn't get an answer back. This communication breakdown can happen for a few different reasons:
- The DNS server you're using might be temporarily offline or just swamped with too many requests at once.
- Your own computer's local DNS cache could be holding onto old, incorrect information.
- Sometimes, your firewall or antivirus program gets a bit too protective and mistakenly blocks the connection.
- The issue might also be with your router or even a network hiccup at your Internet Service Provider (ISP).
It's usually just a temporary glitch. For example, it’s not uncommon for a major Australian ISP's main DNS server to have a brief wobble. This often fixes itself in a few minutes, but you can also get around it by switching to a public DNS provider.
Can a VPN Cause DNS Server Errors?
Yes, absolutely. A VPN can sometimes be the source of a DNS error, which can be frustrating when you're using it to improve your privacy.
When you connect to a VPN, it re-routes all your internet traffic, including DNS lookups, through its own private servers. This is great for security, but if the VPN's DNS servers are slow, badly configured, or having their own technical issues, your computer won't be able to look up website addresses properly. This can trigger the "DNS server not responding" message, even if your actual internet connection is working perfectly.
A quick way to check is to disconnect the VPN for a moment and try the website again. If it loads, you've found the culprit. For anyone needing more control over their DNS traffic, our guide on Getting started with DNS Filter offers some deeper insights.
How Often Should I Flush My DNS Cache?
Flushing your DNS cache is an excellent troubleshooting tool, but it's not something you need to do routinely like clearing your browser history. The cache actually helps speed up your browsing by remembering recent lookups, so clearing it too often can make things a tiny bit slower because your device has to start from scratch every time.
Think of flushing your DNS as a targeted fix, not a daily chore. You should only really do it when you're hitting a wall—like seeing a "DNS server not responding" error, failing to access a site you know is up, or right after your website's DNS records have been changed.
For instance, if your web developer emails to say they've just pointed your domain to a new server, that's the perfect time to flush your DNS cache. It forces your computer to go and find the new, correct address instead of stubbornly clinging to the old one it has stored.
Is It Safe to Use a Public DNS Server?
Definitely. Using a well-known public DNS server from providers like Cloudflare, Google, or OpenDNS is not only safe but often a smart move for both security and performance. These large tech companies pour massive resources into their infrastructure, offering benefits you might not get from your ISP's default servers.
Here’s why it’s a good idea:
- Better Security: Many public DNS services come with built-in filters that can block you from accessing phishing sites and domains known to host malware.
- Stronger Privacy: Companies like Cloudflare have very public privacy-first policies, committing to not selling your browsing data to third parties.
- Greater Reliability: These services are built on huge, global networks designed for 100% uptime, meaning you're less likely to experience DNS-related outages.
Switching is a common practice that we often recommend to clients looking for a quick boost in reliability and security.
If you're tired of DNS headaches affecting your website's availability, trust UpTime Web Hosting for reliable, secure, and fast Australian hosting. Our local infrastructure and expert 24/7 support team ensure your site stays online, keeping you connected with your customers. Explore our hosting plans today at https://uptimewebhosting.com.au.