Adding a new mailbox in Outlook is usually a pretty painless process, often taking just a few minutes from start to finish. For most modern email accounts, particularly those from providers like UpTime Web Hosting, Outlook's built-in autodiscover feature does all the heavy lifting for you.
In most cases, all you'll need is your full email address and the password you set up. For example, if your new email is jane.doe@example.com, that's the address you'll use, along with its specific password.
Your Quick Guide to Adding a Mailbox in Outlook
Before we jump into the specific steps for different versions of Outlook, let's get a handle on the basics. Understanding how Outlook works behind the scenes will make the whole process smoother and help you sidestep common issues. The end goal is simple: get your new email account synced up and running so you can get back to business.
The Power of Autodiscover
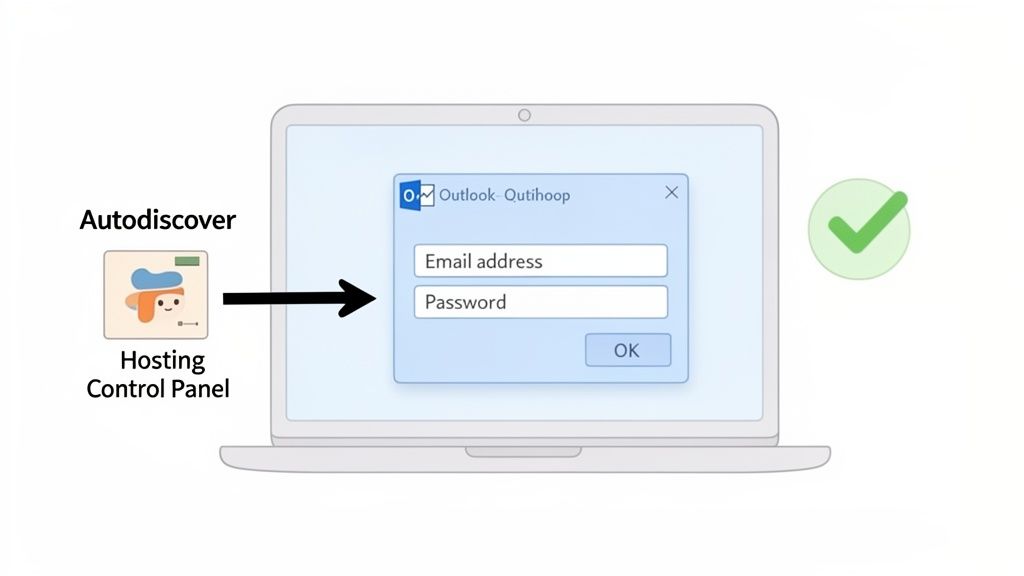
The magic behind this simple setup is a feature called Autodiscover. You can think of it as Outlook’s own little detective. When you enter your email address, it automatically goes out and finds all the technical server details your email provider requires.
This includes things you'd otherwise have to hunt for, like:
- Server names for both incoming and outgoing mail. For example,
mail.yourdomain.com.au. - Port numbers that your email server uses to communicate, such as
993for IMAP. - Encryption methods, such as SSL/TLS, to keep your connection secure.
Because this all happens in the background, the vast majority of people never have to manually punch in any of this technical info.
Finding Your Email Credentials
So, what do you need? Just two things: your full email address (e.g., contact@yourbusiness.com.au) and its password. You create and manage these details from within your web hosting control panel, like cPanel, which is offered by services like UpTime Web Hosting.
A very common trip-up is a simple typo in the email address or password. Before you even open Outlook, it's a good idea to log into your hosting account's "Email Accounts" section and double-check your credentials are correct. This one small step can save a lot of frustration.
For our UpTime customers across Sydney, Melbourne, Brisbane, and Perth, the process is incredibly straightforward. Once you've created an email account in cPanel, you just pop over to Outlook, go to File > Add Account, and type in your new address. Autodiscover takes it from there. For 90% of users, this whole workflow takes less than two minutes.
Getting this basic setup right provides a solid foundation for managing your business communications effectively. If you're keen to learn more, you can discover more about the latest Microsoft Outlook updates and how they might impact your email configuration.

Performance you can feel, backed by clients who depend on it. Read how our support and uptime create long‑term customer success.Power Your Business with Better Hosting
Adding Your Email Account to Outlook for Windows
When it's time to add a mailbox in Outlook for Windows, the great news is that for most modern email accounts, the process is pretty much automatic. Outlook is smart enough to find the necessary server settings all by itself, which means you often just need your email address and password to get going.
This automated process, known as Autodiscover, works like a charm with standard hosting setups, including those we provide at UpTime Web Hosting. Of course, sometimes things don't go quite to plan, and that's when knowing how to switch over to a manual setup is a lifesaver.
The Automatic Setup Process
For the vast majority of people, adding your email is a simple affair. Just head to File > Add Account in Outlook, type in your full email address (like sales@yourbusiness.com.au), and follow the on-screen prompts. Outlook will then do the heavy lifting, connecting to your email server and configuring everything for you.
This is the initial screen you'll see.
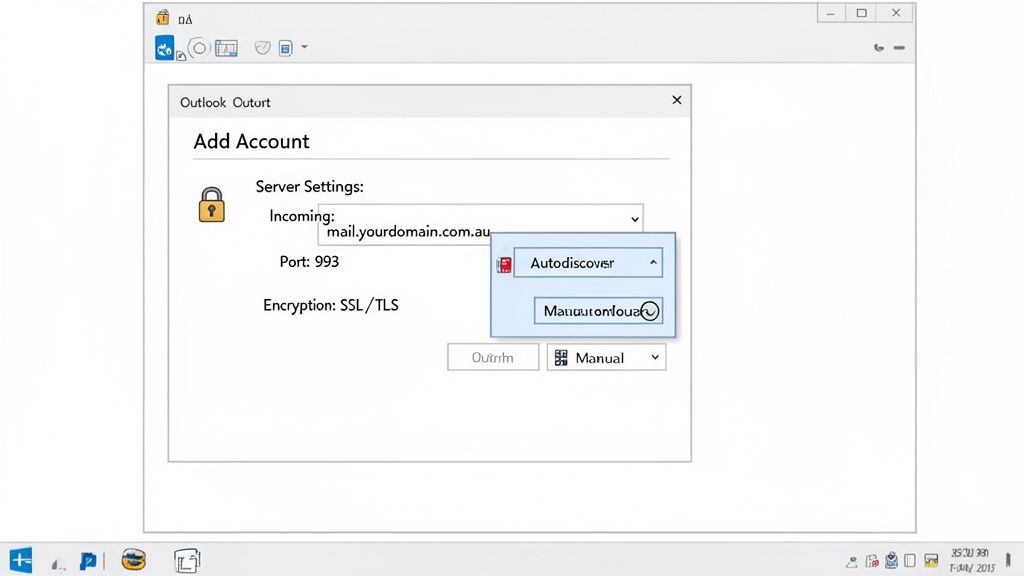
It’s this simple dialogue box where it all starts. By popping in your email and password, you're giving Outlook everything it needs to hunt down the correct server settings automatically.
When to Use Manual Setup
If the automatic setup fails a couple of times, don't panic. This can happen for a few different reasons, but it's easily fixed by manually punching in your server settings yourself. This is where you take the reins and tell Outlook exactly how to connect to your mailbox.
You'll need a few key details from your email provider. For an account with UpTime Web Hosting, the settings will look something like this:
- Account Type: IMAP (This is what we recommend as it syncs your emails across all your devices).
- Incoming Mail Server:
mail.yourdomain.com.au - Outgoing Mail Server (SMTP):
mail.yourdomain.com.au - Username: Your full email address (
sales@yourbusiness.com.au). - Password: Your email account password.
Getting these details right is the foundation of a solid connection. To enter them, you'll just need to click on the 'Advanced options' or 'Manual setup' link during the process.
Pro Tip: Always double-check your username is your full email address. A common mistake is just entering the part before the '@', which almost always leads to authentication errors. Taking a moment to verify this can save you a real headache.
Once you've entered the server names, the next step is to specify the port numbers and encryption method to keep your connection secure. These settings are crucial for protecting your data.
- Incoming server (IMAP): Port 993 with SSL/TLS encryption.
- Outgoing server (SMTP): Port 465 with SSL/TLS encryption.
Making sure SSL/TLS is selected is non-negotiable; it encrypts the data flowing between Outlook and your server, keeping your communications private. Taking the time to set up business email correctly from the get-go is vital for both security and reliability. A few extra minutes here establishes a secure, stable connection you can count on.
Connecting Your Mailbox on Mac and Mobile Devices
Your work doesn’t just happen at your desk, so your email shouldn’t be chained to it either. Getting your mailbox set up on your Mac and phone is pretty straightforward, making sure you’re always in the loop, whether you're in the office or on the go.
While the general idea is the same across devices, the interfaces on Mac and mobile have their own little quirks. Let’s walk through adding your account to Outlook for Mac and the Outlook mobile app, using a standard UpTime Web Hosting account as our example.
Adding an Account in Outlook for Mac
If you're coming from a Windows machine, a practical example of the difference on a Mac is where to find the "Add Account" option. You might instinctively look for the "File" menu, but on a Mac, things are tucked away elsewhere.
First, open up Outlook. Head to the top menu bar and click Tools > Accounts. This brings up the Accounts window, showing any mailboxes you've already connected. From there, just click the plus (+) icon and choose New Account.
Just like on Windows, you’ll be asked for your full email address, something like info@yourbusiness.com.au.
Outlook will then work its Autodiscover magic. For most modern hosting accounts, this is often all you need to do. But sometimes it needs a little help. If it can't automatically find the server settings, you'll have to pop them in manually.
- Username: Your full email address.
- Password: Your email account password.
- IMAP Server:
mail.yourdomain.com.au(Port 993, Use SSL). - SMTP Server:
mail.yourdomain.com.au(Port 465, Use SSL).
Using these exact settings ensures your connection is secure and everything stays synchronised. For a deeper dive into Mac-specific setups, Microsoft has a useful knowledge base article on adding Outlook email accounts that can help.
Setting Up on the Outlook Mobile App
The Outlook mobile app for iOS and Android is a real gem because it offers a clean, unified experience across both platforms. Once you've downloaded the app from your store, just tap Add Account and type in your email address. The app is incredibly good at sniffing out the correct server settings on its own.
If it does ask you to set it up manually, choose IMAP. You’ll then be prompted to enter the same server details we listed for the Mac setup. One of the best things about the mobile app is its push notification system—it’s fast and reliable, so you’ll know the second a new email lands.
To avoid a constant stream of dings and buzzes, take a moment to customise your notifications. You can set alerts for only your "Focused Inbox" or schedule quiet hours. This helps you stay on top of important messages without letting your phone run your day.
The whole point of this is to have your mail, calendar, and contacts perfectly synced everywhere. When you use IMAP with the right settings, any action you take on your phone—like deleting a message or marking it as read—instantly reflects on your desktop, and vice-versa. No more managing the same inbox twice.
Host your website with our 5-star rated, cPanel website hosting plans.
Super fast servers, with security included and hosted in your choice of Australian Data Center.
View cPanel Plans
How to Add and Use a Shared Mailbox
Shared mailboxes, like support@ or info@yourcompany.com.au, are fantastic for team collaboration. They centralise all your communication, making sure important customer queries don't get lost in one person’s inbox. Adding one to Outlook is pretty straightforward, but it's not quite the same as adding a personal account.
The most important thing to get your head around is that you don't need a password for the shared mailbox itself. Instead, an administrator grants your personal account permission to open and manage it. This is a much simpler and more secure way for teams to work together without juggling extra login details.
Adding the Mailbox in Desktop Outlook
Once your administrator confirms you've got access, adding the shared mailbox to Outlook is easy. Your own email account, which you've already set up, acts as the key.
Let's walk through a common scenario. A member of a growing online store's customer service team needs access to the main support@ inbox. Their manager has already granted them "Full Access" permissions through the mail server.
Here’s how they'd add it:
- First, head to the File tab in Outlook.
- Click on Account Settings, then choose Account Settings again from the menu.
- You'll see a list of your email accounts. Double-click on your primary one (the account that was given permission).
- In the window that pops up, click the More Settings button.
- Now, switch over to the Advanced tab and click Add.
- Just type in the email address of the shared mailbox (e.g.,
support@yourcompany.com.au) and hit OK.
Give it a moment, and you'll see the shared mailbox appear in the folder pane on the left, right below your primary one. From there, you can view, manage, and reply to emails just like it's your own.
A common trip-up is trying to add the shared mailbox using the main "Add Account" button. That process will ask for a password which, of course, doesn't exist for a shared mailbox. Always add it through your primary account's advanced settings.
Using shared mailboxes this way is a game-changer for team workflows. Everyone with permission sees the exact same conversation history, which cuts down on duplicate replies and ensures customers get consistent, timely support. For more on the technical side of managing these permissions, our knowledge base provides further guidance on user access levels. This approach turns a potentially chaotic group inbox into a seriously organised communication hub.
Troubleshooting Common Outlook Setup Issues
Even with a seemingly straightforward process, adding a mailbox in Outlook can sometimes hit a snag. Whether it's persistent authentication errors, a stubborn Autodiscover feature that just can't find your server, or even an overzealous firewall, a few common issues can bring the setup to a grinding halt. Let's walk through how to diagnose and fix these problems without the usual frustration.
Before you dive into the more complex fixes, always start with the basics. It sounds simple, but you'd be surprised how often the problem is a tiny typo in your email address or an incorrect password. A quick way to be sure is to try logging into your hosting cPanel with the same credentials. If you can get in there, your password is correct.
This visual guide can help you quickly map out the steps for adding a shared mailbox, depending on whether you already have the necessary permissions.
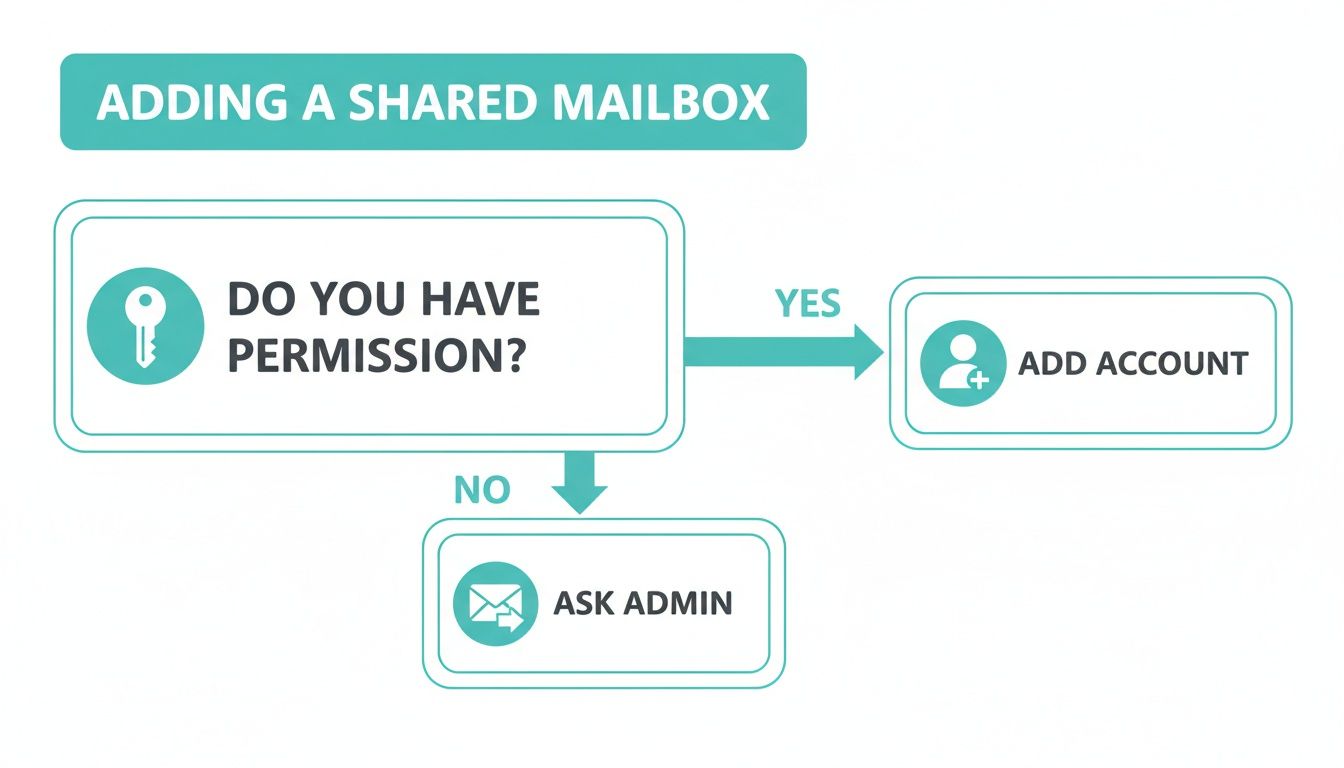
As the flowchart shows, the first and most critical step is confirming you have admin-granted permissions. From there, you'll know whether you can proceed to add the account or if you need to circle back and request access first.
Autodiscover Failures
Outlook's Autodiscover feature is incredibly convenient when it works, but it's not foolproof. If it repeatedly fails to find your server settings, there's a good chance it's due to a configuration issue with your domain. When this happens, your best bet is to switch to a manual setup.
By manually entering your IMAP and SMTP server details, you bypass Autodiscover entirely. This direct approach is often the quickest way to resolve those stubborn connection problems. Keep in mind that sometimes DNS issues can interfere with this process; you can learn more about what to do if your DNS servers are not responding in our detailed guide.
Firewall or Antivirus Interference
Aggressive security software can sometimes mistake Outlook's connection attempts for a threat and block them. If you've double-checked your login details and manual settings but still can't connect, temporarily disabling your firewall or antivirus is a great diagnostic step.
For instance, if you use a program like Norton or McAfee, find its icon in your system tray, right-click, and select the option to temporarily disable protection. If the connection suddenly works, you've found your culprit. The next step is to go into your security program's settings and add an exception for Outlook. This essentially tells your software to trust Outlook's activity, allowing it to sync your emails without any further interference.
Optimizing Your Email for Security and Performance
Knowing how to plug a new mailbox into Outlook is one thing, but making sure that connection is secure and running smoothly is just as important. For any business handling sensitive communications, a safe and efficient email setup is non-negotiable.
The single most critical step is to always use SSL/TLS encryption for both your incoming (IMAP) and outgoing (SMTP) mail servers. This wraps the conversation between Outlook and your server in a layer of code, making it completely unreadable to anyone trying to snoop. Think of it as the digital equivalent of a sealed envelope—it's an absolute must-have.
Leveraging Built-In Security Features
Good password habits are your first line of defence, of course. But a quality hosting provider adds some serious muscle to your security, with powerful features that work behind the scenes to protect you.
For instance, any reliable Australian hosting service will bundle in features like free SSL certificates, server-side spam filtering, and automated nightly backups. These protections at the server level fortify your entire email system before a threat even gets close to your inbox.
Many businesses find that the security baked into their hosting is a huge advantage. You can see how cPanel hosting in Australia provides these essential layers right out of the box, ensuring your communication isn't just functional, but properly defended.
Email management is a core part of Australia's digital economy. While setting up mailboxes is key, many professionals are hitting roadblocks, with New Outlook's 10-account limit frustrating 52% of campaign planners. On the bright side, post-2025 updates and proper server configurations have already cut junk mail rates by 7%, helping high-volume Aussie businesses hit impressive 21.2% open rates in the first hour.
Beyond the initial setup, you can really boost your productivity by exploring tools for optimizing your Outlook usage with time tracking. When you pair a rock-solid, secure configuration with smart workflow tools, you create a truly professional email experience.
Register your new domain name at competitive market prices including free domain add-ons like privacy, DNS Hosting, Custom Nameservers and Forwarding.
Always the best price and no nasty renewal price hikes.
Register A Domain Name
Got Questions? We've Got Answers
Setting up email can sometimes throw a few curveballs your way. Here are some quick answers to the questions we hear most often, tackling those common pain points that can pop up during the process.
Can I Add More Than One Email Account to Outlook?
Yes, you absolutely can! In fact, that’s one of Outlook’s biggest strengths.
It’s built to handle multiple email accounts all in one place. You can easily add your work email (e.g., sales@mycompany.com.au), a personal account (e.g., myname@gmail.com), and even shared mailboxes and see them all side-by-side. It’s a fantastic way to keep everything organised without constantly jumping between different apps.
What's the Difference Between IMAP and POP?
When you're setting up a new account, Outlook will almost always ask you to choose between these two. It's a crucial choice.
IMAP (Internet Message Access Protocol) is the modern standard and the one we always recommend. It works by syncing your emails across all your devices. So, if you read or delete an email on your phone, that change instantly shows up on your computer. It keeps everything consistent.
POP (Post Office Protocol) is an older method. It typically downloads your emails to a single device and then deletes them from the server. This can create a real headache, leaving you with a fragmented inbox where some messages are on your desktop but missing from your phone.
For a seamless experience across your computer, phone, and tablet, always choose IMAP. It guarantees you’re looking at the same, up-to-date mailbox no matter where you are.
My Password Isn't Working—What Should I Do?
First things first, carefully double-check for any typos. It sounds simple, but it’s the most common reason for a password failure. A sneaky caps lock key gets the best of us sometimes!
If you're positive the password is correct, the next step is to test it directly on the server. Try logging into your webmail account (usually accessible through your hosting control panel) with that same password. If it doesn't work there either, you’ll need to reset it in your hosting account’s email settings.
An incorrect password can also be the culprit behind weird sending issues. If you’ve recently changed your password and suddenly find your emails are stuck in your Outlook outbox, updating the password within Outlook's account settings almost always solves the problem.
For fast, reliable email hosting with friendly Australian support that makes setup a breeze, trust UpTime Web Hosting. Explore our hosting plans today!