In short
Hosting an ASP.NET Core application in IIS requires five things: IIS, the matching .NET Hosting Bundle, a Release publish folder, an IIS site with a dedicated application pool, and correct folder permissions. Publish the app, copy the output, configure bindings and HTTPS, then test the public endpoint and inspect logs before declaring the deployment complete. (learn.microsoft.com)
Key takeaways
- Install IIS before the .NET Hosting Bundle; repair the bundle installation if it was installed first. (learn.microsoft.com)
- Deploy the output from
dotnet publish, not the project source or an ordinary build folder. (learn.microsoft.com) - Give each in-process ASP.NET Core application a separate IIS application pool and select No Managed Code. (learn.microsoft.com)
- Grant the application-pool identity write access only to folders where the application actually writes files. (learn.microsoft.com)
- A successful home page is not enough; test public routes, API operations, logs, recycling and rollback. (learn.microsoft.com)
Table of contents
- What do you need before publishing to IIS?
- How do you install ASP.NET Core support on IIS?
- How do you publish and deploy the application?
- How do you configure the IIS site and application pool?
- How do you set permissions without giving the app too much access?
- How do you configure bindings, HTTPS and environment settings?
- How do you verify the deployment before calling it finished?
- What should you check when IIS returns 403, 500 or 503?
- How is ASP.NET Core Web API hosting in IIS different?
- Frequently asked questions
This guide covers server-based ASP.NET Core applications, including MVC applications, Razor Pages, server-side Blazor applications and Web APIs. The controls look different on shared hosting, but the same deployment facts still matter: runtime, publish output, site path, application identity, hostname and test endpoint.
What do you need before publishing to IIS?
You need a publishable ASP.NET Core project, an IIS server or compatible hosting account, and access to configure the application or provide its deployment package. Record the target framework, processor architecture, hostname, physical path, application-pool identity and rollback method before changing the server.
Pre-deployment checklist
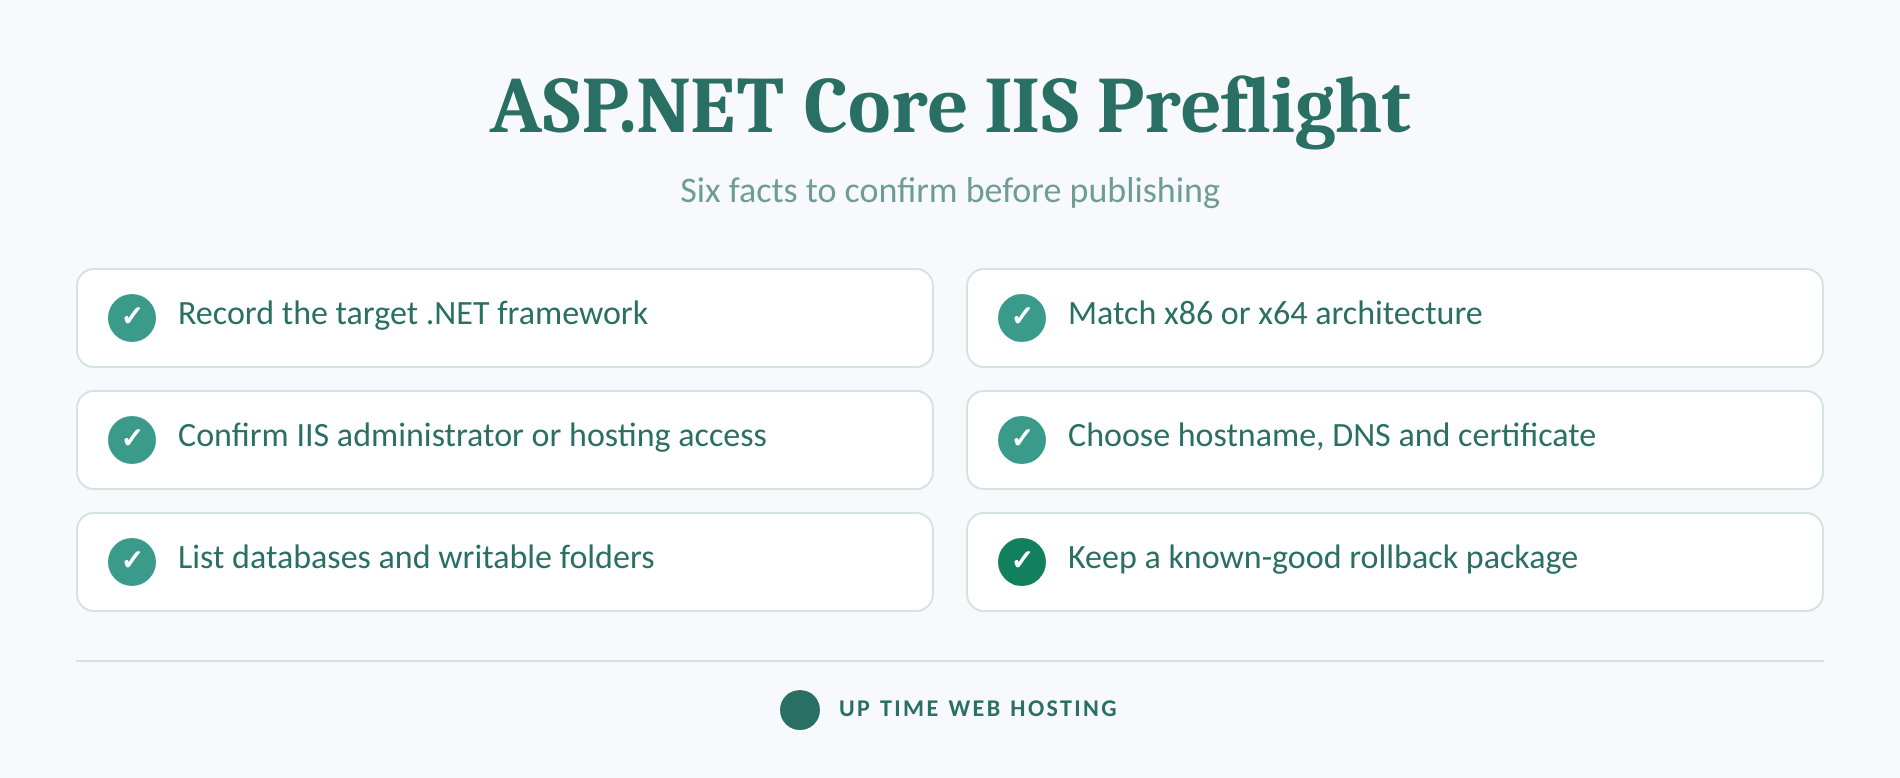
- Application target: Open the project file and record the target framework, such as
net8.0,net9.0ornet10.0. Also confirm whether the application is framework-dependent or self-contained. - Processor architecture: Confirm whether the build targets x64 or x86. The published application and IIS application-pool setting must agree.
- Server access: Confirm who can install Windows roles, the Hosting Bundle and certificates. For deployments using that operating system, the Windows Server 2022 overview provides useful platform context.
- Public endpoint: Decide the hostname, DNS record, HTTP and HTTPS ports, and certificate before creating the binding.
- Application resources: List required databases, network shares, upload folders, log directories, email services and external APIs.
- Recovery: Keep the previous known-good deployment and write down the exact test that decides whether the new release stays online.
Microsoft's IIS tutorial lists the .NET SDK on the development machine and an IIS-configured Windows Server as the basic prerequisites. Production deployment also requires decisions about HTTPS, access-control lists and data protection that the short tutorial intentionally leaves outside its scope. (learn.microsoft.com)
A successful IIS deployment starts with a written match between the application's target framework, server runtime, architecture, hostname and deployment path.

Performance you can feel, backed by clients who depend on it. Read how our support and uptime create long‑term customer success.Power Your Business with Better Hosting
How do you install ASP.NET Core support on IIS?
Enable the Web Server (IIS) role first, then install the .NET Hosting Bundle for the application's target .NET release. Restart IIS after installation so the worker services detect the runtime and ASP.NET Core Module.
As of September 12, 2026, Microsoft's 2026 IIS hosting guidance says the Hosting Bundle installs the .NET runtime, .NET libraries and ASP.NET Core Module required to run ASP.NET Core behind IIS. If the Hosting Bundle was installed before IIS, run the installer again and choose repair. (learn.microsoft.com)
- In Server Manager, add the Web Server (IIS) role.
- Include the IIS Management Console and World Wide Web Services.
- Add optional features only when the application needs them. Examples include Windows Authentication, WebSocket Protocol and Application Initialization.
- Download the current .NET Hosting Bundle or select the Hosting Bundle for the target release from Microsoft's .NET download pages.
- Run the installer as an administrator.
- Restart the server, or restart the IIS services from an elevated command prompt:
“powershell net stop was /y net start w3svc “
A framework-dependent deployment expects a compatible .NET runtime on the server. A self-contained deployment includes its runtime, but IIS still needs the ASP.NET Core Module supplied by the Hosting Bundle. Microsoft recommends framework-dependent deployment for most IIS installations where the Hosting Bundle manages the runtime. (learn.microsoft.com)
Install IIS first, then the matching Hosting Bundle, and restart IIS before testing the application.
How do you publish and deploy the application?
Create a Release publish folder with Visual Studio or the .NET CLI, then deploy the contents of that folder to the physical path used by the IIS site. Preserve the generated web.config because IIS uses it to load and configure the ASP.NET Core Module.
Safe deployment sequence
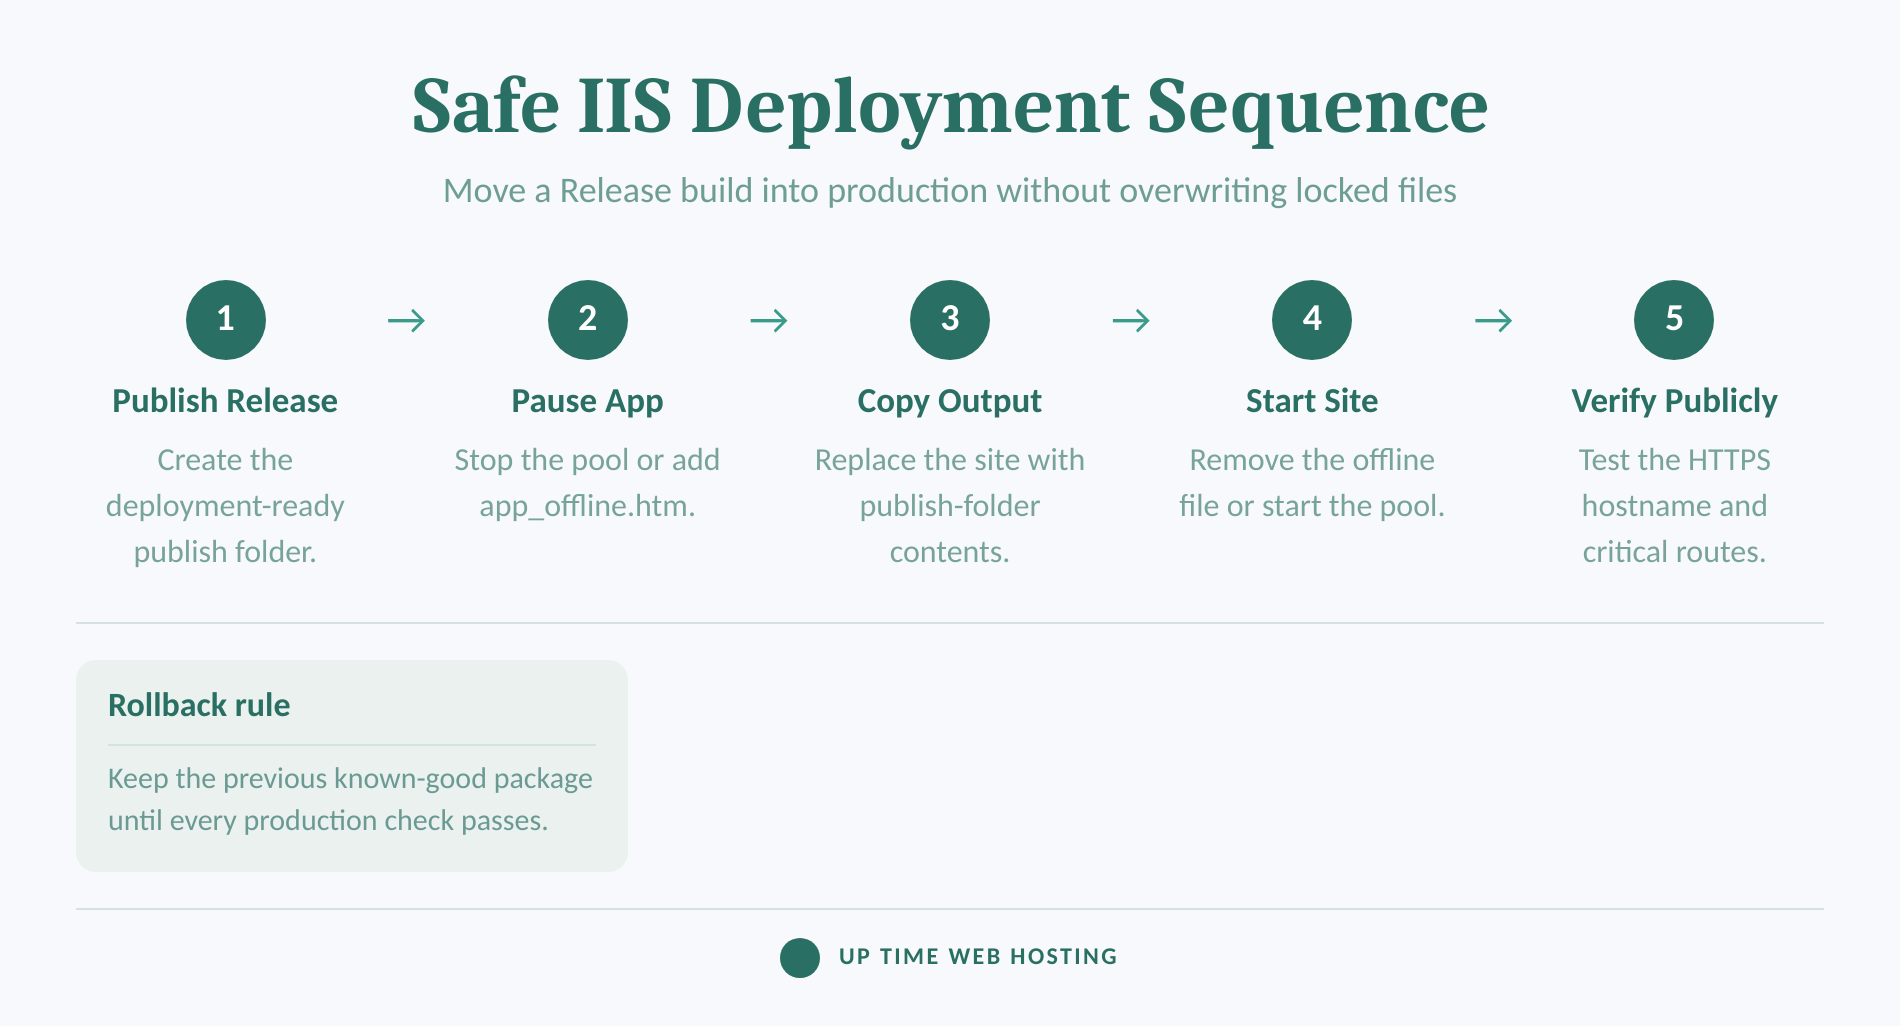
From the project directory, a basic framework-dependent publish command is:
“powershell dotnet publish --configuration Release --output .publish “
The dotnet publish command reference explains that publishing compiles the application and places its assemblies, dependencies, runtime configuration and other deployment files in an output directory. The publish folder is the deployment package. (learn.microsoft.com)
Before copying it, check that the folder contains the application DLL or executable, .deps.json, .runtimeconfig.json, dependencies, static content and web.config. Microsoft warns that web.config must remain at the application root because a missing or invalid file can prevent normal startup and may expose files that IIS should not serve. (learn.microsoft.com)
Use this deployment order:
- Publish to a staging directory rather than directly over the running site.
- Keep a copy of the current known-good deployment.
- Stop the application pool or place
app_offline.htmin the site root before replacing locked files. - Copy the contents of the publish folder into the IIS physical path.
- Remove
app_offline.htmor start the application pool. - Request the site immediately and begin the verification checklist below.
Web Deploy can handle file transfer and application shutdown when it is configured correctly. If a hosting provider supplies a publish profile, import it into Visual Studio rather than reconstructing the destination settings. Manual copying is also supported, but it places responsibility for locked files, permissions and rollback on the person deploying. The Microsoft IIS publishing tutorial documents both the publish-folder workflow and provider-supplied profiles. (learn.microsoft.com)
Deploy the contents of the publish folder, preserve web.config, and keep a rollback copy until verification passes.
Host your website with our 5-star rated, cPanel website hosting plans.
Super fast servers, with security included and hosted in your choice of Australian Data Center.
View cPanel Plans
How do you configure the IIS site and application pool?
Create an IIS website whose physical path points to the deployed publish directory, then assign a dedicated application pool. Set the application pool's .NET CLR version to No Managed Code, which Microsoft describes as optional but recommended for ASP.NET Core.
IIS site and application pool settings
In IIS Manager:
- Right-click Sites and select Add Website.
- Enter a site name, physical path and explicit hostname.
- Select or create a dedicated application pool.
- Open the pool's Basic Settings and set .NET CLR version to No Managed Code.
- Leave Managed pipeline mode as Integrated unless the application has a documented reason to use another setting.
- In Advanced Settings, confirm that Enable 32-Bit Applications matches the published architecture.
- Confirm that the pool identity is ApplicationPoolIdentity unless the application has a documented custom identity.
Microsoft requires separate application pools for applications using in-process hosting. Separate pools also prevent one application's configuration or failure from being mixed with another application's worker process. (learn.microsoft.com)
These server-level controls may not be available on shared Windows web hosting. In that case, use the provider's control panel, Web Deploy profile or file-deployment method, and ask the provider to confirm the supported .NET runtime, application-pool architecture and site root.
Give each ASP.NET Core application its own application pool and point the IIS site at the publish directory.
How do you set permissions without giving the app too much access?
The IIS application-pool identity needs read and execute access to the deployment folder, plus additional access only where the application writes data. Grant permissions to the named virtual identity, such as IIS AppPoolMyAppPool, instead of opening the site to broad user groups.
Microsoft states that IIS uses ApplicationPoolIdentity by default and that read and execute permissions should normally already be available. If the application writes uploads, generated files or local logs, give Modify permission to those specific directories rather than the entire application root. (learn.microsoft.com)
Use this approach:
- Keep the executable application and configuration files read-only to the worker identity where possible.
- Create separate folders for uploads, exports, temporary files and application logs.
- Grant Modify permission only to the folders that require writes.
- Confirm that a custom identity can access required databases, certificates or network shares.
- Avoid granting Full Control to
Everyone,Usersor the whole IIS worker group as a quick fix.
Folder access is only one part of operating the server. If responsibility for patching, backups, service recovery and IIS configuration is unclear, assign it before launch or use a defined Windows Server management arrangement.
Grant the application-pool identity only the file and resource access the application actually uses.
How do you configure bindings, HTTPS and environment settings?
Bind IIS to an explicit hostname and add HTTPS with a valid certificate before directing production traffic to the application. Set production configuration through ASP.NET Core configuration providers rather than treating web.config like a classic ASP.NET Framework configuration file.
For the site binding:
- Use the intended hostname, such as
app.example.com. - Use port 80 only for HTTP validation or redirection.
- Add a port 443 binding with the correct certificate.
- Avoid top-level wildcard bindings such as
*on port 80. Microsoft warns that explicit hostnames are safer. (learn.microsoft.com) - Confirm DNS points the hostname to the public server address before final external testing.
The IIS SSL configuration guide covers certificates and HTTPS bindings. Confirm that HTTPS works before enforcing redirects, because an incorrect certificate or binding can otherwise turn every HTTP request into a failed HTTPS request. (learn.microsoft.com)
Set the runtime environment to Production or a deliberate staging value. Environment variables override values loaded earlier from appsettings.json, and hierarchical keys can use a double underscore, such as ConnectionStrings__Main. The ASP.NET Core configuration guidance documents that order and syntax. (learn.microsoft.com)
Do not publish development secrets in source-controlled configuration files. Also avoid exposing the Development environment on a public site, because ASP.NET Core can return more specific startup details when Development is active. Preserve the generated web.config and use documented publish transforms or server-level environment configuration for deliberate changes. (learn.microsoft.com)
Use explicit host bindings, a valid HTTPS certificate and production-specific configuration kept outside source control.
Register your new domain name at competitive market prices including free domain add-ons like privacy, DNS Hosting, Custom Nameservers and Forwarding.
Always the best price and no nasty renewal price hikes.
Register A Domain Name
How do you verify the deployment before calling it finished?
Verification must prove that IIS can start the application and that real users or API clients can complete the operations that matter. Test from outside the server, inspect logs and recycle the application pool before removing the rollback package.
Go-live verification checklist
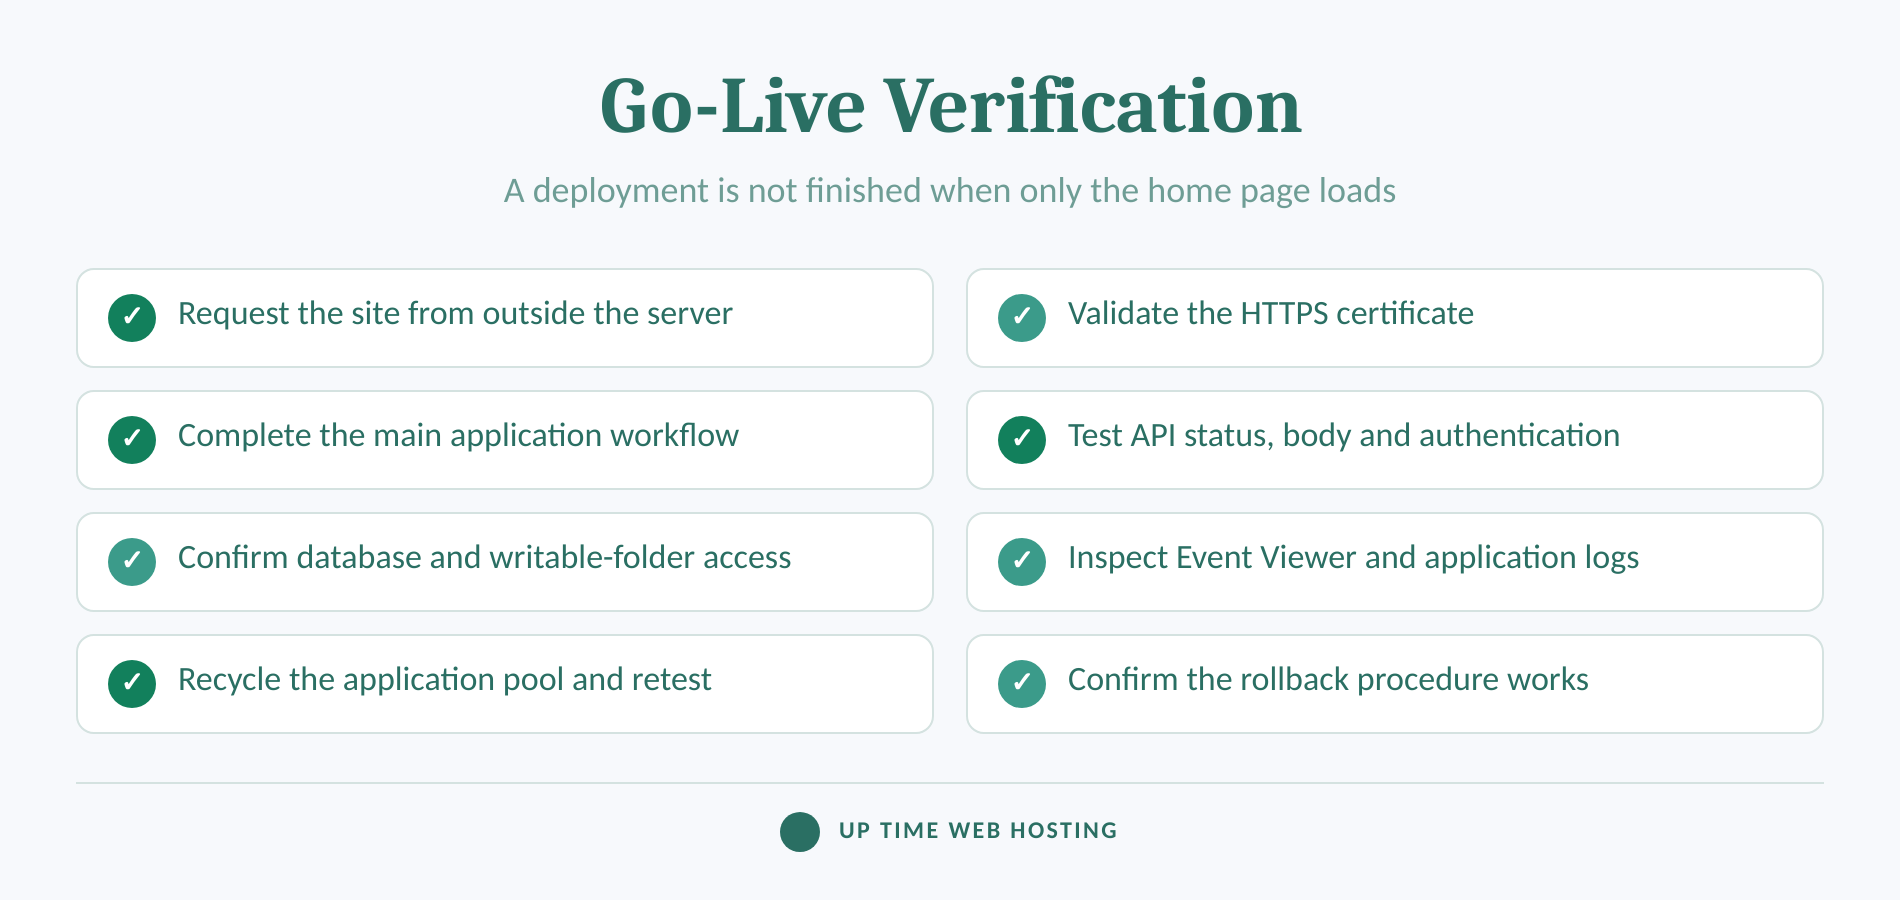
- Local request: Request the bound hostname from the server, using a hosts-file entry temporarily if DNS is not live.
- External request: Open the public HTTPS URL from another network or device.
- Certificate: Confirm the hostname matches the certificate and the certificate chain is trusted.
- Application path: Load a dynamic route, a static asset and the most important user workflow.
- Dependencies: Test database access, authentication, outbound services and every directory that requires writes.
- API behaviour: Request a real API route and check the status code, response body, content type and authorization result.
- Logs: Review Windows Event Viewer under Windows Logs > Application, IIS access logs and the application's own logs.
- Recycle: Recycle the application pool and repeat the critical checks.
- Rollback: Confirm the previous package can be restored using the written recovery procedure.
If the application supports health checks, a small endpoint can provide a repeatable startup test:
“csharp builder.Services.AddHealthChecks(); app.MapHealthChecks("/healthz"); “
Microsoft's ASP.NET Core health-check guidance explains how to register checks and map a health endpoint. A public health route should expose only the information its intended audience needs. (learn.microsoft.com)
Once the release passes manual checks, add server monitoring for the public endpoint and the infrastructure signals that can reveal failure after the deployment window closes.
A deployment is complete only after external requests, application functions, logs, recycle behaviour and rollback have been checked.
What should you check when IIS returns 403, 500 or 503?
Start with the exact HTTP substatus and the Windows Application Event Log instead of changing several IIS settings at once. The error code usually points toward the physical path, Hosting Bundle, runtime, processor architecture, application configuration or application-pool state.
Match the status code to the first check
| Symptom | Likely first cause | First check |
|---|---|---|
403.14 | Wrong physical path, incomplete deployment or missing web.config | Compare the IIS physical path with the complete publish folder |
500.19 | Invalid IIS configuration, missing ASP.NET Core Module or access problem | Confirm the Hosting Bundle and inspect the configuration error details |
500.30 | The application started under IIS but failed during startup | Inspect Event Viewer and the ASP.NET Core Module stdout log |
500.31 | The required .NET shared framework is missing | Compare the target framework with runtimes installed on the server |
500.32 | The application and worker process use different architectures | Match x86 or x64 publishing to the app-pool bitness |
503 | The application pool or website is stopped, or the pool keeps failing | Start the pool and inspect the event that caused it to stop |
Microsoft's IIS troubleshooting reference identifies a missing or malformed web.config as a common cause of 403.14, a missing runtime as the main cause of 500.31, and an architecture mismatch as the main cause of 500.32. (learn.microsoft.com)
For startup failures, collect the browser error, Application Event Log entry and ASP.NET Core Module output. Enable stdout logging only long enough to diagnose the failure, make sure the log directory is writable by the app-pool identity, and return to normal application logging after the cause is known. (learn.microsoft.com)
Use the IIS error code to choose the first diagnostic instead of changing unrelated settings.
Experience Microsoft 365 Business Standard for free for 30 days.
Up to 25 users with full access to email, OneDrive and Teams. Includes full versions of desktop apps of Outlook, Word, Excel, PowerPoint and more.
Try Microsoft 365
How is ASP.NET Core Web API hosting in IIS different?
ASP.NET Core Web API hosting in IIS uses the same Hosting Bundle, publish folder, application pool, permissions and binding process as other server-based ASP.NET Core applications. The difference is the acceptance test: an API deployment must be tested through real routes, methods, payloads and authentication rules.
Microsoft's IIS publishing tutorial applies to any server-based ASP.NET Core application, so an API does not require a separate IIS hosting model. (learn.microsoft.com)
Test at least these cases:
- A public
GETendpoint or health endpoint returns the expected success status. - An authenticated endpoint rejects an anonymous request and accepts a valid credential.
- A representative
POST,PUTorPATCHrequest accepts the expected content type and payload. - Invalid input returns the application's expected client-error response rather than an IIS-generated HTML page.
- A browser-based client can call the API from its real origin.
- Routes still resolve correctly if the API is deployed below a virtual application path rather than at the domain root.
Run the API tests through the public HTTPS hostname, not only against Kestrel on localhost. That final route includes DNS, the certificate, IIS bindings, the ASP.NET Core Module, authentication and the application's middleware pipeline.
ASP.NET Core Web API hosting in IIS uses the same deployment model, but API routes, authentication and payloads need direct testing.
What else do developers ask about IIS deployment?
The questions below cover the distinctions that cause the most confusion during a first IIS deployment. Each answer assumes an ASP.NET Core server application rather than a classic ASP.NET Framework application.
How to add ASP.NET in IIS?
To add ASP.NET Core to IIS, enable the Web Server (IIS) role, then install the .NET Hosting Bundle that supports the application's target framework. The bundle adds the runtime and ASP.NET Core Module used by IIS. Restart IIS after installation. Classic ASP.NET Framework uses different Windows role services. (learn.microsoft.com)
How to deploy an application in IIS?
To deploy an application in IIS, publish a Release build, copy the publish folder's contents to the site's physical path, create or update the IIS site and application pool, set permissions and bindings, then request the public URL. Keep web.config in the deployment root and check Event Viewer if startup fails. (learn.microsoft.com)
Do I need the .NET SDK on the IIS server?
No. A framework-dependent ASP.NET Core deployment needs the matching runtime and ASP.NET Core Module, normally installed by the Hosting Bundle. The SDK is needed on the development or build machine to publish the application. A self-contained deployment includes the runtime, but IIS still needs the ASP.NET Core Module. (learn.microsoft.com)
Why does the app work locally but fail in IIS?
Local success proves the application can run in the developer's environment, not that IIS has the same runtime, architecture, permissions or configuration. Compare the target framework with installed runtimes, confirm app-pool bitness, inspect the Application Event Log, and run the published build from a command prompt on the server. (learn.microsoft.com)
The repeatable IIS pattern is install, publish, configure, permit, bind, test and monitor.
What should you do next?
Write down the target framework, deployment architecture, hostname, physical path, app-pool identity, test endpoints and rollback folder before uploading the next release. That short deployment record prevents most configuration guesses when the application has to be moved, repaired or rolled back.
If maintaining IIS is not part of the plan, review compatible Australian ASP.NET web hosting and confirm the supported .NET runtime, database options and publishing method before building the production package.
Write down the deployment facts before uploading files, then test the same public endpoint users will call.