Your site is probably at that awkward point where shared hosting still works, but it doesn't feel dependable anymore. WordPress admin slows down when you're editing pages, plugin updates make you nervous, and if you run WooCommerce or manage client sites, you've likely started wondering whether it's time for a VPS.
That's usually when a proper WordPress VPS setup starts to make sense. In Australia, that decision isn't niche anymore. The digital market is broad enough to support it, with 2.59 million actively trading businesses in 2023–24 and 95% of Australian households connected to the internet in 2022–23, according to this WordPress VPS hosting overview referencing ABS and ACMA data. More businesses online and a near-universal online audience mean site speed, control, and reliability matter more than they used to.
The good news is that setting up WordPress on a VPS isn't magic. It's a sequence. Make the right decisions early, lock the server down before exposing it, install WordPress properly, then tune it for Australian visitors instead of relying on generic global advice.
Table of Contents
- Your First Step Planning Your WordPress VPS
- Provisioning Your Australian VPS with UpTime
- Essential Server Hardening and Security
- Installing WordPress with cPanel or a Manual Stack
- Tuning WordPress Performance for Australian Audiences
- Ongoing VPS Management and Best Practices

Performance you can feel, backed by clients who depend on it. Read how our support and uptime create long‑term customer success.Power Your Business with Better Hosting
Your First Step Planning Your WordPress VPS
Most setup problems start before the server exists. The mistake isn't technical. It's choosing a hosting path that doesn't match the way you work.
If you're a business owner who wants WordPress to run reliably with minimal server admin, a managed environment usually fits better. If you're a developer who wants full control over the web server, PHP handling, database layout, and deployment flow, an unmanaged VPS can be the right call. Both can run WordPress well. They just ask different things from you.
Choose your operating style first
A lot of first-time VPS users focus on RAM or CPU too early. The more useful question is simpler: do you want to manage WordPress, or manage a server as well?
A managed VPS with cPanel reduces the number of moving parts you need to handle yourself. You get a familiar interface, easier email and domain management, simpler SSL handling, and a faster path to getting WordPress online. That's usually the sensible choice for SMBs, agencies with junior staff, and anyone who doesn't want to debug web server configs at night.
An unmanaged VPS gives you flexibility. You choose Apache or Nginx, MariaDB or MySQL, your PHP setup, your firewall rules, your deployment flow, and your maintenance routine. That control is useful, but it also means every decision belongs to you.
Practical rule: If the phrase “I'll just SSH in and fix it” doesn't sound normal to you, start with managed.
cPanel Managed vs Manual Stack Which VPS Path is Right for You
| Factor | cPanel Managed VPS (via UpTime) | Unmanaged VPS (Manual LAMP/LEMP Stack) |
|---|---|---|
| Ease of setup | Faster for first-time VPS users | Slower, more hands-on |
| Server control | Limited to what the panel and host support | Full control over packages and configuration |
| WordPress installs | Usually point-and-click through an installer | Manual download, database setup, config, permissions |
| Security work | Some basics are handled for you | You handle SSH, firewall, hardening, updates |
| Best fit | Business owners, agencies, non-sysadmins | Developers, sysadmins, technical teams |
| Troubleshooting | Easier for common hosting tasks | Better for custom stacks, harder for beginners |
| Time commitment | Lower ongoing admin load | Ongoing maintenance is part of the job |
What a stack actually means
Your stack is the software layer under WordPress. That usually means a web server such as Apache or Nginx, a database such as MariaDB or MySQL, and PHP, commonly run through PHP-FPM for better performance.
That choice matters because it shapes everything after launch. It affects how caching works, where config files live, how plugin-heavy sites behave, and how easily you can troubleshoot. Choosing well at the start saves rebuilds later.
A simple example. If you're running a brochure site for an Australian service business, cPanel with a managed VPS is often enough. If you're hosting several client sites with custom deployment workflows, a manual stack may be cleaner because you can standardise the environment exactly the way your team wants.
Provisioning Your Australian VPS with UpTime
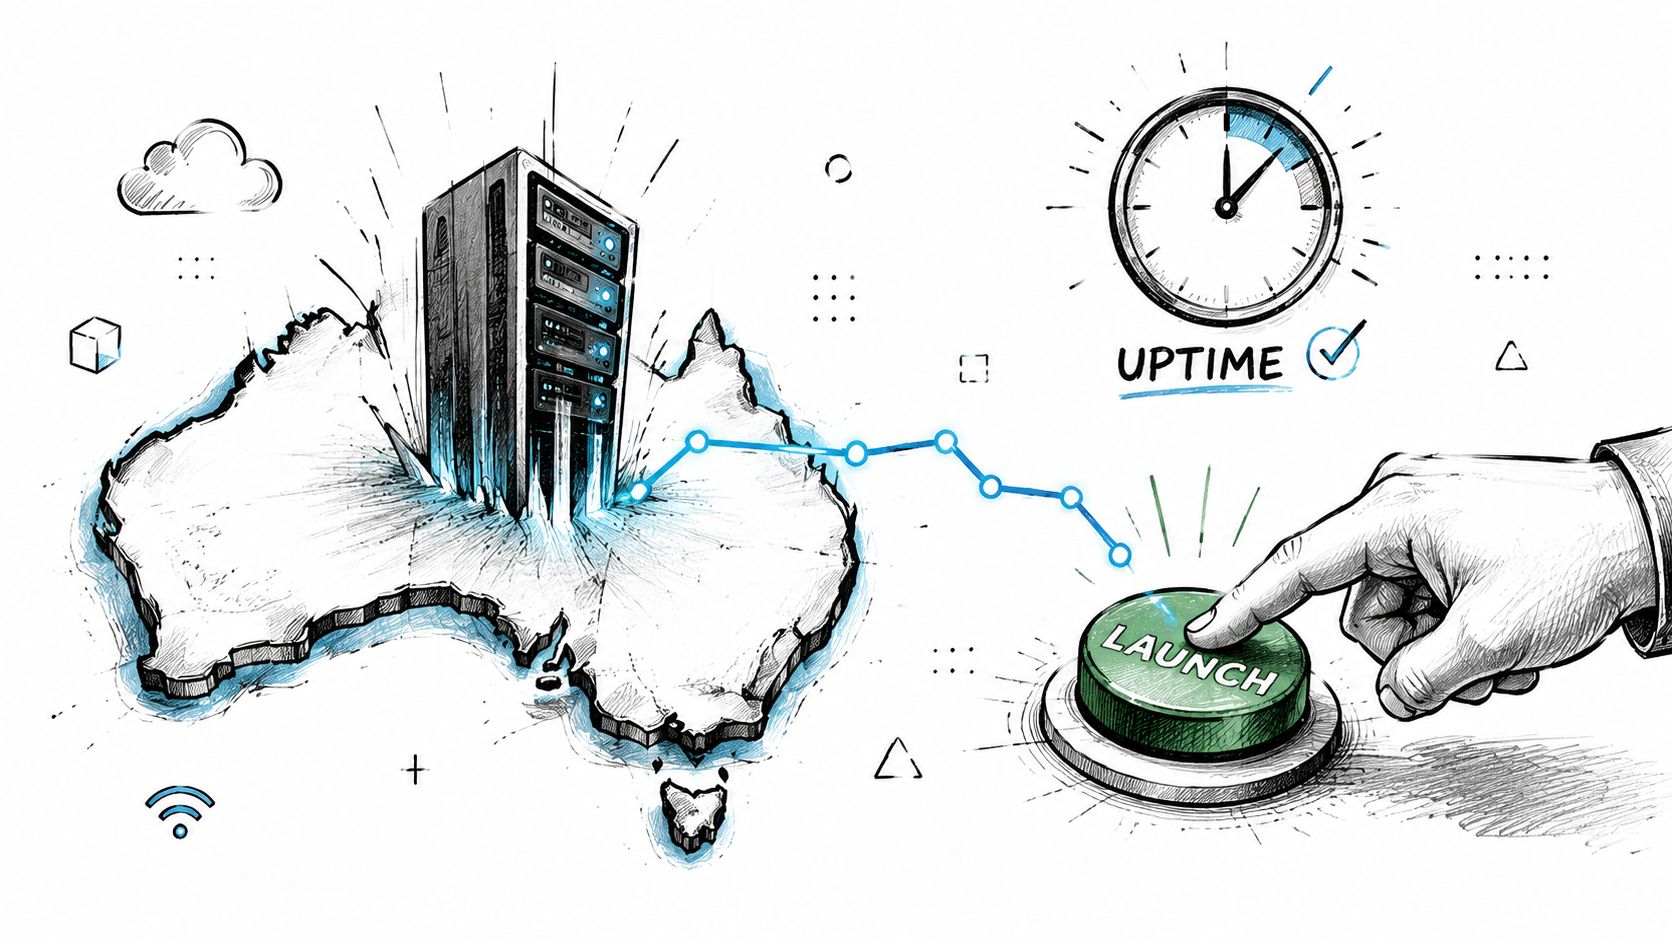
The server location is one of the few decisions you can't hide later with a plugin. If your customers are in Australia, keep the infrastructure close to them.
The local hosting story is much stronger than it used to be. The NBN reported more than 8.6 million homes and businesses ready to connect by June 2024, and the expansion of local data centres in Sydney and Melbourne has made low-latency VPS hosting practical for Australian business sites, as noted in this Australian infrastructure discussion.
Pick the location before the specs
For an Australian WordPress VPS setup, choose an Australian data centre first. Sydney and Melbourne are common starting points because they suit large eastern-state audiences well. If your operation is strongly regional, local availability in Brisbane or Perth can also make sense.
A service like UpTime's Managed VPS hosting in Australia fits the use case cleanly. It gives you an Australian-managed option with local infrastructure, which is often what small businesses want when they're moving beyond shared hosting but don't want to build everything from scratch.
Keep the first deployment boring. Local region, standard operating system, standard panel if needed, no unusual package choices.
A practical way to size the server
You don't need to over-engineer the first build. Match the server to the workload.
- Single business site: Start with a modest VPS if the site is mostly pages, forms, and standard plugins.
- Content-heavy site: Give yourself more headroom if there are lots of images, heavier plugins, or frequent admin activity.
- WooCommerce or membership site: Prioritise memory and database performance, because dynamic pages don't behave like a simple brochure site.
- Agency box with multiple installs: Leave room for cron jobs, backups, staging copies, and plugin updates happening at the same time.
A common mistake is buying a larger VPS to compensate for a messy WordPress install. More resources help, but they don't fix poor caching, overloaded plugins, or a bad stack choice.
Provision cleanly and keep the first build simple
Once the VPS is created, keep the initial checklist short:
- Choose the Australian location
- Select managed or unmanaged
- Confirm the operating system or cPanel image
- Create your admin access carefully
- Document the server name, credentials path, and support contacts
- Don't install extras yet
If you're running your first VPS, resist the urge to turn it into a Swiss Army knife. Don't mix mail hosting, development tools, multiple test apps, and production WordPress on day one unless you have a clear reason. A clean VPS is easier to secure, easier to tune, and much easier to recover when something breaks.
Host your website with our 5-star rated, cPanel website hosting plans.
Super fast servers, with security included and hosted in your choice of Australian Data Center.
View cPanel Plans
Essential Server Hardening and Security
A fresh VPS gets attention from bots quickly. That's normal. What matters is whether the server presents an easy target.
The three basics are straightforward. Use SSH keys instead of password logins where possible, put a firewall in front of the server, and let Fail2Ban block repeated bad behaviour. None of that is glamorous, but it stops a lot of routine noise before it becomes a real problem.

Lock down access before WordPress goes live
If you're on an unmanaged VPS, set up SSH key authentication first and avoid relying on password-based access. That reduces the chances of someone brute-forcing the login page on the server itself.
Basic hardening also includes using a normal sudo user for administration rather than treating root as your daily account. That keeps routine work safer and makes mistakes less destructive.
If WordPress security is still new territory, UpTime has a useful WordPress security guide detailing the application side as well as the hosting layer.
Set a basic firewall that allows only what you need
On Ubuntu, UFW is the usual starting point. The principle is simple. Allow only the ports required for SSH, web traffic, and SSL. Don't leave unrelated services exposed because “they might be useful later”.
A practical firewall mindset looks like this:
- SSH only: Keep remote admin access restricted to what's required.
- HTTP and HTTPS: These are needed for site access and certificate handling.
- Everything else closed: If you're not actively using a service, don't expose it.
That one habit prevents a lot of avoidable risk.
Security on a VPS is mostly about removing unnecessary doors, not building a giant fortress.
Use Fail2Ban as your automatic bouncer
Fail2Ban watches logs and blocks repeated abusive behaviour. It's especially useful for SSH and web authentication attempts. Once it's in place, the server can respond to noisy login attacks without you sitting there tailing logs.
A sensible first build usually includes jails for SSH and relevant web services. You don't need an elaborate security stack on day one. You need dependable basics that are configured properly and checked occasionally.
For WordPress itself, also tighten the application layer:
- Use strong admin credentials
- Remove plugins you don't use
- Disable anything legacy that serves no purpose in your setup
- Keep themes and plugins lean
That last point matters more than many people think. A bloated plugin stack often creates both security exposure and performance headaches.
Installing WordPress with cPanel or a Manual Stack
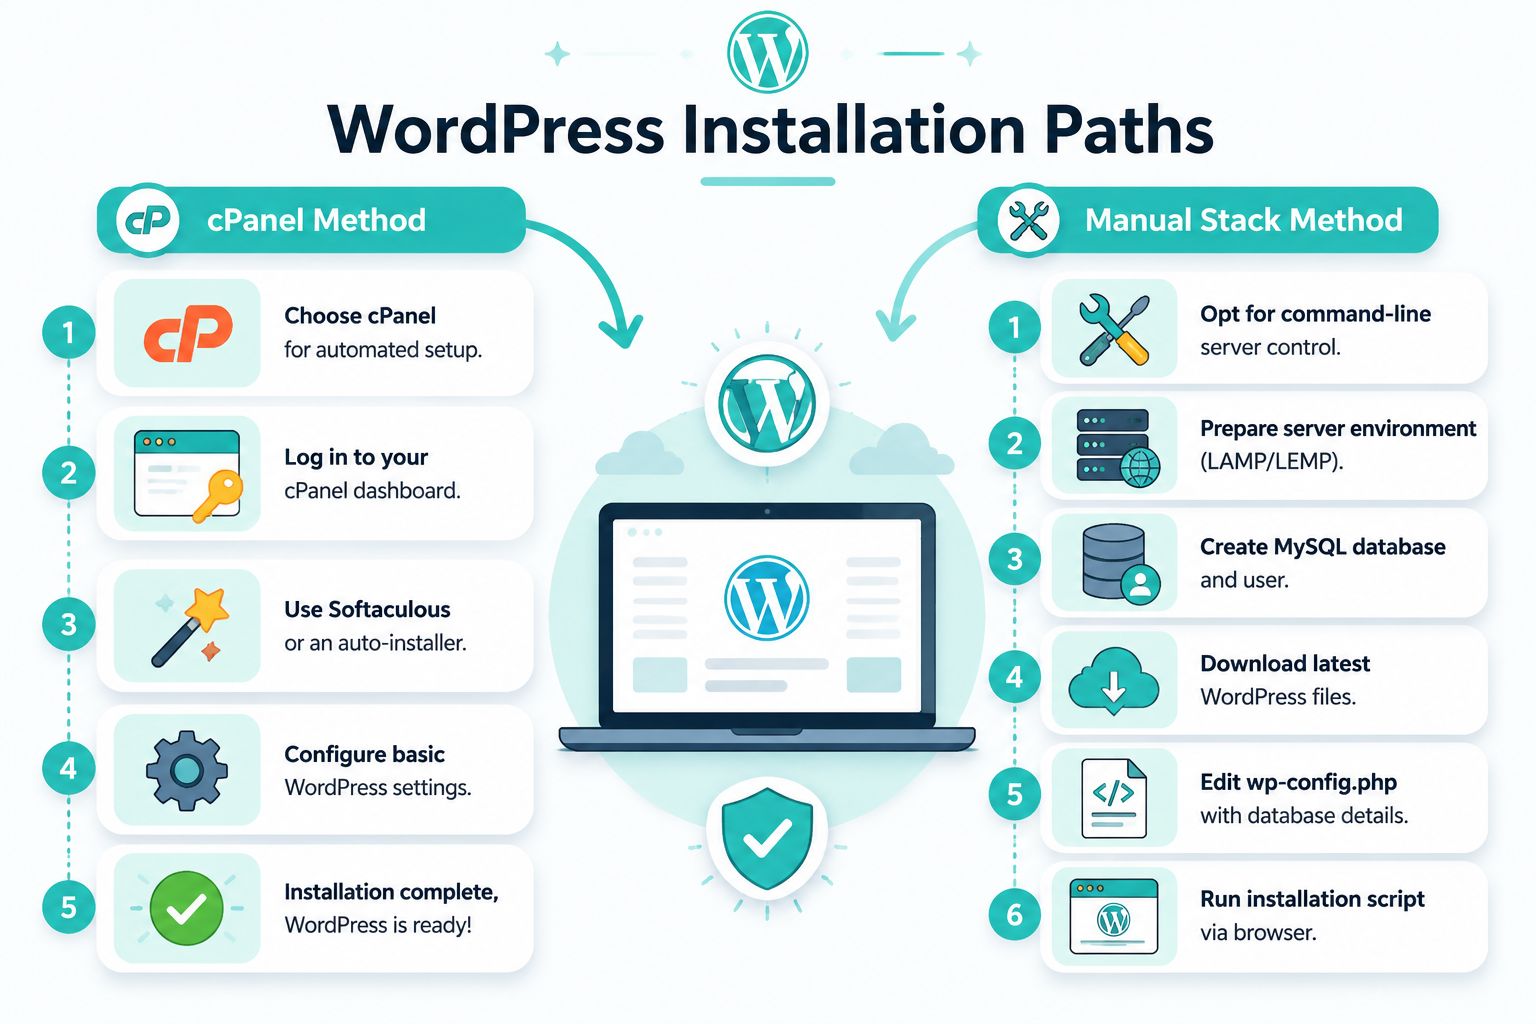
This is the point where your earlier choice pays off. If you chose cPanel, installation is quick and forgiving. If you chose a manual stack, the work is more technical but gives you tighter control over how WordPress runs.
The quick path with cPanel
For most first-time VPS owners, the cPanel route is the least painful. Log in, open the WordPress installer, set the site URL, create the admin login, and complete the install. If your host provides Softaculous or a similar installer, that covers most of the repetitive work.
If you want a visual walkthrough of the panel-based process, UpTime's guide on creating a website with cPanel and WordPress is the right reference.
The advantage here isn't just speed. It's consistency. The panel handles common tasks in the expected order, which reduces the chance of missing something obvious like a database user, document root, or SSL request.
The manual path on Apache or Nginx
If you're installing manually, follow the sequence that works. Install the web stack first, then prepare the WordPress files, then harden the database, then finish the browser-based install.
The standard method is consistent across practical guides. Install Apache or Nginx, MariaDB or MySQL, and PHP-FPM. Create the WordPress directory. Set ownership to www-data:www-data. Use 755 permissions for directories and 644 for files. Run mysql_secure_installation. That sequence is summarised in this manual WordPress VPS setup guide.
A simple manual workflow looks like this:
Install the stack
Apache or Nginx, MariaDB or MySQL, and PHP-FPM belong first.Prepare the document root
Put the WordPress files in the correct site directory before touching the browser installer.Set ownership and permissions correctly
www-data:www-data, directories at755, files at644.Create and harden the database
Don't skipmysql_secure_installation.Configure the virtual host or server block
Make sure the site points at the WordPress directory.
Skipping database hardening is one of those mistakes that doesn't hurt immediately. It hurts later, when you've forgotten you left it half-finished.
Finish the install properly
A lot of people think WordPress is broken when the actual problem is DNS cutover timing. You update the domain's A record, the server is ready, but some resolvers still haven't caught up. From the VPS side it looks fine. From the browser side it may still look inconsistent for a while.
There are two final checks that save time:
- Check service status first if the installer won't load
- Confirm the document root contains WordPress
- Test the web server config and reload it
- Then look at DNS propagation before changing random settings
Once the install wizard appears, the rest is straightforward. Complete the admin details, request your SSL certificate, and make sure the site loads over HTTPS before handing it over to users or clients.
Tuning WordPress Performance for Australian Audiences
A VPS doesn't make WordPress fast by itself. It gives you the room to make it fast.
That's an important distinction, especially in Australia. Generic hosting advice often stops at “pick a nearby server”. That's not enough. The more useful question is how you tune WordPress for domestic geography, mobile-heavy browsing, and plugin-driven workloads. The gap is real, and this performance note on WordPress VPS setup for nearby regions, object caching, CDN use and PHP choice points directly at it.
Why bigger isn't always faster
I see this mistake a lot. Someone upgrades the VPS because the site feels slow, but the actual problem is uncached dynamic requests, oversized images, too many plugins, or poor PHP handling.
A larger VPS helps when you've outgrown the current one. It doesn't help much when WordPress is doing unnecessary work on every request. In those cases, caching, image optimisation, and plugin reduction usually improve the result more than vertical scaling alone.
The settings that usually move the needle
For Australian audiences, a sensible performance stack often includes:
- Page caching: Reduce the number of fully dynamic page builds.
- Object caching: Cut repeat database work on logged-in or dynamic areas.
- Modern PHP: Keep WordPress on a supported and efficient PHP version.
- CDN for static assets: Useful when your audience is spread across states or you serve visitors outside Australia too.
- Image control: Large hero images are still one of the most common self-inflicted slowdowns.
If your environment uses LiteSpeed, you can get strong gains from LiteSpeed Cache when it's configured properly rather than left on default settings. This LiteSpeed Cache settings guide for cPanel is a practical reference for that layer.
A realistic tuning order
Don't tune everything at once. Work through it in a stable order.
First, enable server-level or application-level caching that matches your stack. Then clean up the plugin list. After that, optimise images and check whether object caching makes sense for your workload. WooCommerce, memberships, and busy admin areas usually benefit more than a simple brochure site.
If you're on a hosting stack that includes tools such as AccelerateWP, use them deliberately. Server-level optimisation and object caching are useful because they reduce pressure on PHP and the database, which matters on dynamic WordPress builds. What doesn't work well is throwing every performance plugin you can find at the site and hoping they cooperate.
Fast WordPress usually comes from fewer moving parts doing the right work, not more tools stacked on top of each other.
Register your new domain name at competitive market prices including free domain add-ons like privacy, DNS Hosting, Custom Nameservers and Forwarding.
Always the best price and no nasty renewal price hikes.
Register A Domain Name
Ongoing VPS Management and Best Practices
A WordPress VPS setup is never really “finished”. It settles into maintenance. That's normal, and it's a good thing when the routine is clear.
The area most guides handle poorly is backup realism. They tell you to enable backups, then stop there. The harder and more important question is whether you've proved that a restore works. That gap is highlighted in this article on securing WordPress on a VPS with proper backup recovery testing, which also notes the Australian Cyber Security Centre's emphasis on resilience basics.
Backups only count if restores work
A usable backup strategy needs more than automation. It needs validation.
If your host provides nightly off-site backups, that's useful. Keep them enabled. But don't assume they're enough until you've restored one into a safe environment and checked the important parts:
- Themes load correctly
- Plugins activate without fatal errors
- Media files appear where expected
- Forms, logins, and checkout flows still work
- The restored database matches the site state you expected
That restore test is what turns “we have backups” into “we can recover”.
If you want a practical hosting-side checklist for regular upkeep, UpTime has a WordPress maintenance resource worth bookmarking.
What to monitor after launch
You don't need enterprise observability on a small business VPS. You do need a short list of things someone verifies.
Watch these consistently:
- Site availability
- Disk usage
- Backup completion
- SSL renewal status
- Plugin and core updates
- PHP or web server errors
For agencies, I'd add one more. Watch admin usability. A site can be technically “up” while the dashboard is miserable to use because a plugin update changed the load pattern.
Migrations without the panic
If you're moving an existing WordPress site onto a new VPS, keep the process conservative. Build the destination first, test the copy on a temporary path or staging setup, reduce avoidable changes during the move, and only then cut the site over.
What works well in practice:
- Copy the files and database
- Test the site before DNS cutover
- Install SSL and verify HTTPS
- Put a freeze on major content edits during the final move
- Monitor closely after cutover
The main thing that doesn't work is rebuilding and migrating at the same time. Keep those jobs separate whenever possible. A stable migration is easier to troubleshoot than a migration mixed with theme changes, plugin swaps, and server experiments.
If you want an Australian-hosted path that keeps WordPress close to local users while avoiding a fully DIY server build, UpTime Web Hosting offers local hosting services, managed VPS options, and supporting tools that fit a practical WordPress VPS setup.