Moving your website to a new host can feel overwhelming, a high-stakes project where a single misstep can lead to costly downtime, lost data, or a sudden drop in search engine rankings. A successful transition doesn't happen by chance; it requires a strategic plan and careful execution. This detailed website migration checklist is your 10-step blueprint, created specifically for Australian businesses to ensure a smooth, secure, and seamless move.
Following this guide will give you the structure needed to manage the entire process, from the initial audit to post-launch monitoring. We break down each critical stage, covering everything from creating complete backups of your files and databases to verifying your new server's compatibility. You'll learn how to handle DNS changes without disrupting user access and how to preserve the SEO value you've worked so hard to build.
Whether you're migrating a WordPress blog, a busy eCommerce store, or a custom application to an Australian provider like UpTime Web Hosting, these actionable steps will give you the confidence to proceed. We've packed this listicle with practical tips, real-world examples, and clear instructions tailored to the local business environment. Let's start the process and make your next move your best one.
1. Pre-Migration Audit: Map Everything Before You Move
Before you even think about moving a single file, a successful website migration begins with a thorough audit. This foundational step involves creating a complete map of your digital assets, configurations, and dependencies. Overlooking this stage is the most common reason migrations fail, leading to unexpected downtime, data loss, and costly post-launch fixes.
Think of the audit as creating a detailed inventory and a project plan rolled into one. Your goal is to document every component of your current website, from visible pages and images to hidden custom code and server settings. This process uncovers potential compatibility issues and informs every subsequent step in your website migration checklist. Before you begin your migration, conducting thorough digital marketing audits can provide a complete understanding of your current site's performance and help identify all elements that need to be transferred.
Key Audit Actions
To get started, focus on cataloguing these critical areas:
- Content & URL Structure: Use a crawling tool to generate a complete list of every page, image, PDF, and script on your site. For example, you can use the free version of Screaming Frog to crawl up to 500 URLs, creating an essential sitemap for setting up 301 redirects later.
- Technology Stack: Document your CMS (e.g., WordPress, Joomla), its version, and all plugins or extensions. Note plugin versions and check their 'last updated' date; an abandoned plugin is a security risk and may not be compatible with modern server environments like those at UpTime Web Hosting.
- Database & Configurations: Record the database name, user details, and any special server configurations (e.g., PHP version, memory limits). For WordPress users, you can find this in your
wp-config.phpfile. - DNS & SSL: Take screenshots of your current DNS settings within your domain registrar's control panel. This provides a vital reference point for when you update your records to point to the new server. Note your SSL certificate type and expiry date.

Performance you can feel, backed by clients who depend on it. Read how our support and uptime create long‑term customer success.Power Your Business with Better Hosting
2. Select Target Hosting and Verify Compatibility
With your audit complete, the next critical step in your website migration checklist is choosing the right destination for your website. Selecting an appropriate hosting environment isn't just about finding a new server; it's about ensuring your site’s technology stack, performance needs, and future growth are fully supported. A mismatch between your website’s requirements and your new hosting plan can lead to performance bottlenecks, broken features, or complete operational failure post-migration.
The goal here is to find a hosting solution that not only houses your site but improves its performance and security. This involves a careful analysis of your current resource usage and a projection of future needs. Before you move forward, it is essential to create complete and verifiable backups. Understanding the different types of backup will ensure you have a fallback option that protects all your files and database information during the transition. A well-chosen hosting environment simplifies the migration process and provides a stable foundation for your business online.
Key Compatibility Actions
Focus on these areas to confirm your new hosting environment is the perfect fit:
- Platform & Technology Stack: Confirm the new server supports your core technology. For instance, if you're moving a WordPress site, choosing an optimised plan with features like AccelerateWP can dramatically improve speed. Likewise, applications built on ASP.NET with an MSSQL database require a specialised Windows hosting environment, a key offering at UpTime Web Hosting.
- Resource Allocation: Compare your current CPU, RAM, and storage usage against the resources offered in the new plan. If your audit showed high traffic spikes, consider a VPS or managed hosting solution that provides more dedicated resources than standard shared hosting.
- Software Versions: Verify that the server's PHP and database versions (e.g., MySQL, MariaDB) are compatible with your website's codebase, CMS, and plugins. For example, an eCommerce store running an older version of Magento may need a specific PHP version (like 7.4) that a modern host might not support by default, so it's vital to check this beforehand.
- Email & SSL Needs: Check if the new provider’s email hosting solution meets your business requirements. Confirm that your existing SSL certificate can be transferred and installed on the new server, or if you will need to issue a new one. You can find more information about a range of solutions from leading Australian-owned web hosting companies to make an informed decision.
3. Backup Your Entire Website and Database
Before you make any changes, the most critical safety net in your website migration checklist is creating a complete, restorable backup. This non-negotiable step involves saving an exact copy of all your website files, databases, and associated configurations. A validated backup is your ultimate undo button, providing a clear path to recovery if the migration encounters catastrophic issues, preventing data loss, and minimising potential downtime.
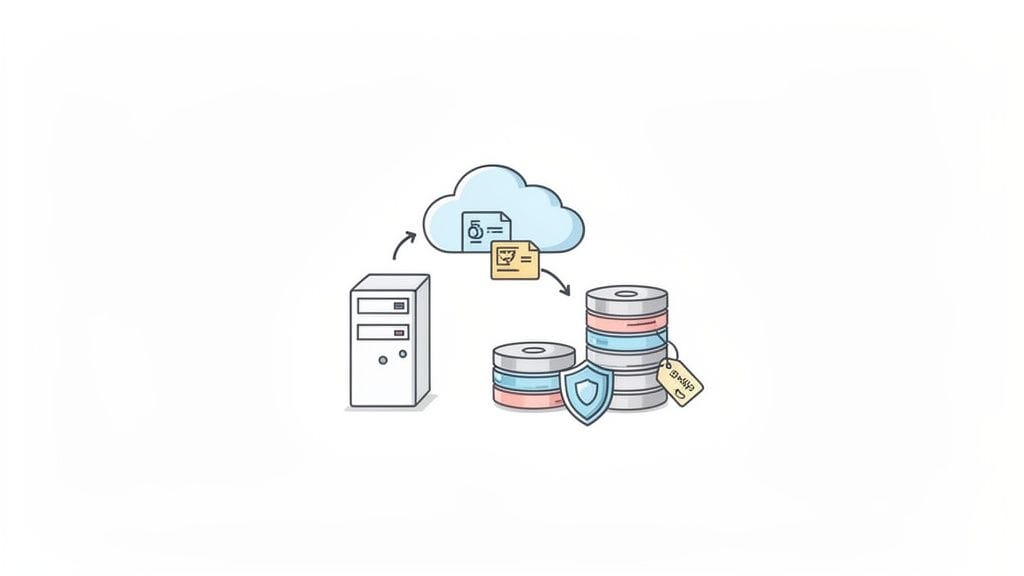
Think of it as insurance for your digital assets. For an eCommerce store, this means securing customer order history and product information. For a service-based business, it protects lead-capture forms and client data. For example, a WordPress site with a 10GB database could lose years of content and plugin settings without a proper backup. Similarly, an ASP.NET application with a large MSSQL database requires a verified export to ensure all business-critical information can be restored on the new server.
Key Backup Actions
To ensure your data is secure, focus on creating and validating copies of these core components:
- Website Files: Create a full backup of your
public_htmldirectory (or equivalent). This includes your CMS core files, themes, plugins, and images. For instance, in cPanel, you can use the "Backup" tool to generate a full account backup or use the "File Manager" to compress thepublic_htmlfolder into a.ziparchive. - Database(s): Export a complete copy of your website's database. For most sites on our cPanel hosting, this can be done via phpMyAdmin by selecting your database and using the 'Export' function to download an
.sqlfile. This file contains all your pages, posts, user data, and settings. - Email Configurations & Accounts: If you are migrating your email hosting, be sure to back up email accounts, forwarders, and autoresponders. While UpTime Web Hosting makes this process smooth, having a record of your setup provides peace of mind.
- Test the Restoration: A backup is only useful if it works. Before proceeding, test your backup files by restoring them on a separate, non-critical environment, like a local server or a subdomain. This confirms the integrity of your backup files. Our Knowledge Base offers guides on how to do this effectively.
Host your website with our 5-star rated, cPanel website hosting plans.
Super fast servers, with security included and hosted in your choice of Australian Data Center.
View cPanel Plans
4. Domain Registration, DNS Preparation, and Cutover
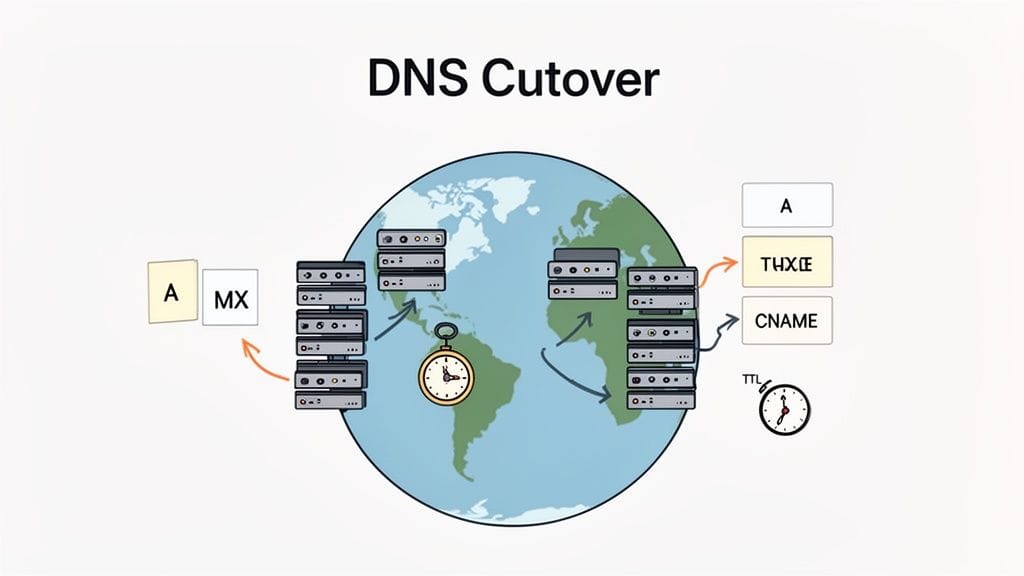
The DNS cutover is the moment of truth in your website migration checklist. This is when you officially tell the internet where to find your website's new home. Proper preparation is crucial to minimise downtime, preserve email deliverability, and ensure a smooth transition for your visitors. It involves meticulously documenting your current settings, strategically updating records, and carefully monitoring the switch.
This step manages the behind-the-scenes internet plumbing that directs users from your domain name to your server. For example, a small business registering a new .au domain with UpTime Web Hosting while keeping their old site live temporarily needs a precise plan. Similarly, an eCommerce store must update its hosting records without interrupting its email service. A well-executed DNS strategy prevents lost sales, missed emails, and customer frustration. For those moving their domain name to a new provider, understanding the specifics of a domain name transfer is essential for a seamless process.
Key Cutover Actions
To ensure a low-downtime cutover, focus on these critical tasks:
- Document and Reduce TTL: Before making any changes, take screenshots of all your current DNS records (A, CNAME, MX, TXT). About 24-48 hours before the planned migration, lower the Time-To-Live (TTL) value on your key records to a low value, like 300 seconds (5 minutes). This tells servers to check for updates more frequently, speeding up the propagation of your new settings.
- Pre-configure New DNS Records: At UpTime Web Hosting, set up all your DNS records in your new control panel before you change your nameservers. This ensures that as soon as servers start looking at the new location, the correct information is already there, preventing "site not found" errors.
- Execute the Cutover: During a low-traffic period, like late at night or over a weekend, update your domain's nameservers to point to UpTime Web Hosting. This is the main switch. If you are only changing hosting, you will update the A record to point to your new server IP address.
- Monitor and Verify: Use an online DNS checker to watch your DNS changes propagate across the globe. Check that your website, email, and any subdomains are working correctly from different networks. Keep your old hosting active for at least 48 hours as a safety net, allowing for a quick rollback if any major issues arise.
5. Set Up Email Configuration and Testing
An often-overlooked but critical part of any website migration is managing your email services. A smooth transition ensures your business communication continues without interruption, preventing lost sales enquiries, client messages, and internal correspondence. This step involves meticulously recreating your email setup on the new server and verifying that everything works perfectly before making the final switch.
Failing to properly configure and test email can lead to messages bouncing, ending up in spam folders, or being lost entirely. For any business, especially an Australian eCommerce store relying on order confirmations or a professional service firm where client communication is constant, this is a major risk. Your goal is to ensure that from the moment your DNS updates propagate, every email sends and receives flawlessly, maintaining business continuity. To get a head start, you can learn how to set up your business email with UpTime Web Hosting to understand the required settings.
Key Email Configuration Actions
Focus on these areas to ensure a seamless email transition as part of your website migration checklist:
- Account & Forwarder Replication: Create every email account (e.g.,
info@yourbusiness.com.au,sales@yourbusiness.com.au) on the new UpTime Web Hosting server. Replicate all existing email forwarders and auto-responders to ensure no messages are missed during or after the migration. - Authentication Record Setup (SPF, DKIM, DMARC): Before changing your MX records, set up your SPF and DKIM records in your new server's DNS zone. This pre-emptive action tells receiving mail servers that your new host is authorised to send email on your behalf, dramatically reducing the chance of your emails being marked as spam. Our Knowledge Base provides step-by-step guides on configuring these for Australian domains.
- Comprehensive Sending & Receiving Tests: Send test emails from your newly created accounts to external addresses like Gmail and Outlook. Crucially, also reply to these test emails to confirm that receiving works. Test webmail access on multiple browsers and configure a test account on mobile devices to confirm client settings.
- Prepare Staff Documentation: Create a simple guide for your team detailing the new mail server settings (IMAP/POP3 and SMTP), login credentials, and a link to the webmail portal. This minimises support requests and frustration on launch day.
6. Configure SSL Certificates and Security Settings
Securing your new website environment is a non-negotiable step in any modern migration. After moving your files and database, your immediate priority should be to install and correctly configure an SSL certificate. This encrypts the data exchanged between your website and its visitors, protecting sensitive information and building user trust. Failure to secure your site with HTTPS can lead to security warnings in browsers, lost customer confidence, and negative SEO impacts.
This process involves more than just activating SSL; it requires a holistic approach to website security. On your new server, you'll need to implement a suite of protective measures, including firewalls, malware scanning, and security headers. These elements work together to defend your site against common threats, ensuring its integrity and the safety of your users' data from the moment it goes live. You can learn more about installing an SSL certificate in our Knowledge Base.
Key Security Actions
Focus on these critical security measures for a robust post-migration setup:
- Install an SSL Certificate: Most modern hosting environments, like those at UpTime Web Hosting, offer free Let's Encrypt SSL certificates that can be installed in just a few clicks. For an eCommerce store handling payments, a purchased Organization Validation (OV) or Extended Validation (EV) certificate might be necessary for PCI DSS compliance.
- Force HTTPS and Update Links: Once SSL is active, you must configure your server to redirect all HTTP traffic to HTTPS using a 301 redirect. It's also vital to run a search-and-replace on your database to update all internal links, ensuring they use the
https://protocol to avoid mixed-content errors. - Implement Security Headers: Configure advanced security headers like HTTP Strict Transport Security (HSTS). This tells browsers to only communicate with your site over a secure HTTPS connection, which helps prevent protocol downgrade attacks and cookie hijacking.
- Enable a Web Application Firewall (WAF): A WAF acts as a protective shield, filtering and monitoring traffic to block malicious requests before they reach your website. Our hosting plans at UpTime Web Hosting include robust WAF protection to defend against common exploits, brute-force attacks, and DDoS attempts.
Register your new domain name at competitive market prices including free domain add-ons like privacy, DNS Hosting, Custom Nameservers and Forwarding.
Always the best price and no nasty renewal price hikes.
Register A Domain Name
7. Migrate Website Files and Database Content
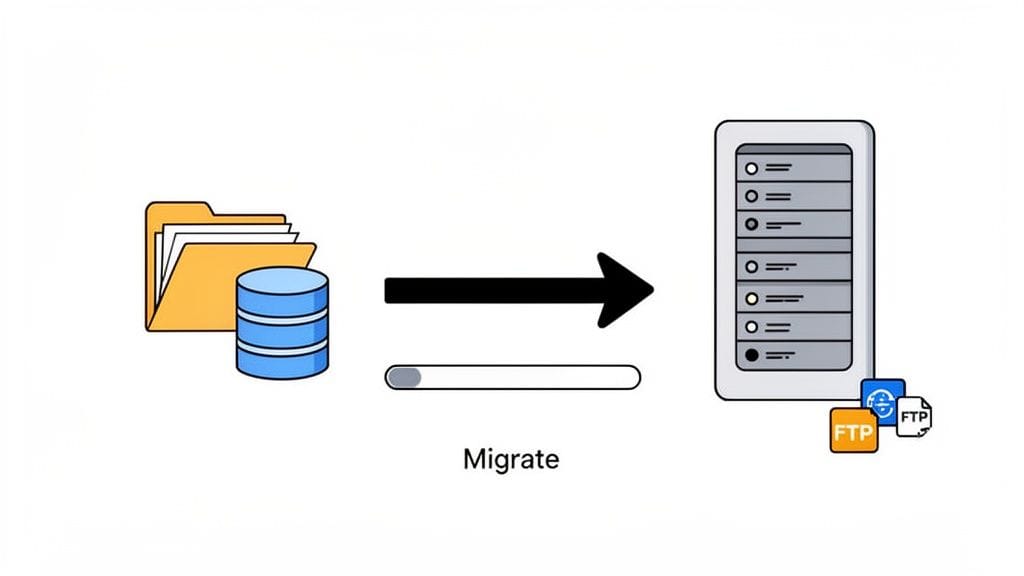
With your new hosting environment prepared and tested, it's time for the core action of your migration: moving the actual website files and database. This step involves transferring every component of your site, from your homepage content and product images to the underlying database that stores user data and settings. A careful, organised transfer is fundamental to ensuring your website functions correctly on its new server.
This process is a critical part of any website migration checklist, as errors here can lead to a broken site, missing images, and data corruption. The goal is to replicate your site's structure and content perfectly on the new host, like UpTime Web Hosting, before making the final switch.
Key Migration Actions
Focus on these actions to ensure a smooth and complete transfer of your site’s assets:
- File Transfer: Use an FTP/SFTP client like FileZilla to connect to your old and new servers and transfer all website files. For WordPress users, plugins like All-in-One WP Migration can bundle files and the database into a single package for easy transfer. As a practical example, this can simplify moving a 5GB site with thousands of images.
- Database Migration: Export your database from the old host, typically as a
.sqlfile. You can then import this file into the new database you created on your UpTime Web Hosting server via phpMyAdmin or the command line. - Verify Integrity: After the transfer, it's essential to verify everything. Compare file counts and total directory sizes between the old and new servers. For example, check that the
wp-content/uploadsfolder on the new server has the same number of files as the old one. - Update Configuration: Your website's configuration file (e.g.,
wp-config.phpfor WordPress) must be updated with the new database name, username, and password. Forgetting this step will result in a "database connection error." Disable any caching plugins before and during the migration to avoid serving old, incorrect data.
8. Test Website Functionality and Performance
Once your site is copied to the new server, the most critical validation phase of your website migration checklist begins: comprehensive testing. This isn't just a quick check to see if the homepage loads; it's a meticulous process of verifying that every single feature, link, and form works exactly as it did before. Skipping this step is like launching a ship without checking for leaks—you are setting yourself up for user complaints, lost sales, and a frantic post-launch scramble to fix issues.
The goal is to simulate real user interactions and compare the new site's behaviour against the pre-migration baseline. This involves functional testing (Does it work?) and performance testing (How fast is it?). For an Australian eCommerce store, this means ensuring the checkout process is flawless with Australian shipping options and payment gateways. For a service-based business, it's about confirming that contact forms and booking systems are fully operational. This is your final chance to catch and resolve problems in a safe, private environment before your customers see them.
Key Testing Actions
To organise your testing, create a detailed checklist covering these essential areas:
- Functionality & Features: Methodically test every interactive element. Check that contact forms submit correctly, search functionality returns accurate results, and any custom scripts are working. For an eCommerce site, process a test transaction using a valid Australian address to confirm shipping and tax calculations.
- Performance Benchmarking: Use tools like Google PageSpeed Insights and GTmetrix to analyse the new site’s load times from a Sydney-based test server. Compare these metrics to your pre-migration benchmarks. A well-configured server at UpTime Web Hosting should ideally result in improved performance for your local audience.
- Cross-Browser & Device Compatibility: View your site on multiple browsers (Chrome, Firefox, Safari) and various devices, including desktops, tablets, and smartphones. Confirm that the responsive design is intact and that there are no layout issues on any platform.
- Links & SEO Elements: Run a crawl on the temporary URL to find broken internal links and missing images. Manually check that key SEO elements like page titles, meta descriptions, and canonical tags have been preserved correctly.
- Integrations & Email: Test all third-party services individually. For example, check that your connection to Australia Post's shipping API is working. Also, test any action that should trigger an automated email, such as a form submission confirmation, to ensure your site's email sending functions are configured properly on the new server.
Experience Microsoft 365 Business Standard for free for 30 days.
Up to 25 users with full access to email, OneDrive and Teams. Includes full versions of desktop apps of Outlook, Word, Excel, PowerPoint and more.
Try Microsoft 365
9. Update Configuration Files and Custom Settings
Your website’s configuration files act as its central nervous system, telling it how to connect to the database, where to find key resources, and how to interact with third-party services. During a migration, these settings become invalid because they still point to the old server's paths and credentials. Updating them is a critical, detail-oriented task that ensures your site functions correctly in its new environment.
Failing to update these files is a common cause of post-migration errors, from "Error Establishing a Database Connection" messages to broken payment gateways. This step involves methodically reviewing and modifying files like wp-config.php or web.config to align with the new server details provided by your host, such as those for UpTime Web Hosting. It’s a precise operation where one wrong character can bring the entire site down, making it a vital part of any successful website migration checklist.
Key Configuration Actions
To ensure a smooth transition, focus on updating these specific areas on your new server first:
- Database Connection Strings: This is the most common and critical update. For a WordPress site, you will need to edit the
DB_HOST,DB_USER, andDB_PASSWORDvalues in yourwp-config.phpfile to match the new database details. An ASP.NET application will require updating the connection string in theweb.configfile to point to the new MSSQL server. - File Paths and Directory Structures: Hardcoded file paths in scripts or themes can cause broken images and missing stylesheets. For example, a path like
/home/old_user/public_html/must be updated. It's best practice to replace them with relative paths or dynamic PHP functions likeget_stylesheet_directory_uri()in WordPress. - API Endpoints & Credentials: If your site integrates with external Australian services like eWAY for payments or Australia Post for shipping, their API credentials might need to be updated or re-verified in your site’s admin area to ensure they function correctly on the new server.
- Environment Variables: Best practice dictates using environment-specific files or variables to manage sensitive data. This avoids hardcoding credentials directly into version-controlled files. Ensure your new server environment is set up with the correct variables for the database, API keys, and other secure tokens. Our Knowledge Base has guides to assist with this.
10. Monitor, Validate, and Resolve Post-Migration Issues
Your website migration isn’t truly complete once the DNS has been updated. The period immediately following the cutover is critical for identifying and fixing any issues that weren't caught during testing. Active monitoring ensures that your site functions correctly for real-world visitors, protecting your user experience, SEO rankings, and business operations from post-launch problems.
This validation phase is your final quality assurance check. It involves systematically reviewing every aspect of the live site, from server performance to specific user pathways like checkout processes or form submissions. For an Australian business, this means checking that everything works for your local audience. This proactive approach allows you to address bugs, performance bottlenecks, or configuration oversights before they cause significant disruption, making it an essential final step in any professional website migration checklist.
Key Monitoring & Validation Actions
Immediately after going live, shift your focus to actively observing and verifying the new environment's stability and performance.
- Error Log Analysis: Check your server error logs daily for the first week. Within UpTime Web Hosting's cPanel, you can find the "Errors" icon, which shows HTTP errors (like 404s) and server-side script issues. This is the fastest way to spot broken links or plugin compatibility problems.
- Critical Functionality Testing: Manually test all core functions of your website every day for at least one week. For an Australian eCommerce store, this means completing a test purchase with a local postcode and payment method. For a blog, it means submitting a comment and testing the search bar.
- Performance & Resource Monitoring: Keep a close eye on your server resources through cPanel's "Resource Usage" tool. Look for spikes in CPU or RAM, which could indicate a poorly optimised plugin or a traffic surge your plan can't handle. Compare page load times against your pre-migration benchmarks to confirm performance has improved for Australian users.
- External & User Feedback: Set up uptime monitoring to receive instant alerts if your site goes down. Systematically collect and track any issues reported by your users or team members. Also, check Google Search Console for any new crawl errors or indexing problems that Google’s bots discover, paying close attention to any mobile usability issues.
10-Step Website Migration Comparison
| Item | Implementation complexity | Resource requirements | Expected outcomes | Ideal use cases | Key advantages |
|---|---|---|---|---|---|
| Audit Current Website and Create Migration Plan | High — thorough, time‑intensive analysis | Skilled personnel, site crawling/tools, documentation time | Complete inventory and detailed migration plan; fewer surprises | Complex sites, multi‑domain, heavy custom code, eCommerce | Prevents missed components; early compatibility detection; clear stakeholder timeline |
| Select Target Hosting and Verify Compatibility | Medium — requires technical testing and analysis | Staging environment, provider reports, compatibility tests | Matched hosting environment, informed resource planning, smoother cutover | Platform changes, performance‑sensitive sites, ASP.NET or managed WordPress moves | Ensures feature parity; avoids post‑migration surprises; supports scalability |
| Backup Your Entire Website and Database | Low–Medium — straightforward but size‑dependent | Storage space, backup tools, off‑site copies, restore testing | Full recoverable state and rollback capability | All migrations, high‑risk data stores, regulatory/compliance needs | Enables complete recovery; rollback safety; protects against data loss |
| Domain Registration, DNS Preparation, and Cutover | Medium — DNS knowledge and timing coordination | DNS management access, monitoring tools, stakeholder coordination | Controlled domain transition with minimal downtime and email continuity | Domain transfers, nameserver changes, multi‑domain cutovers | Controlled cutover via TTL adjustments; rollback options; maintains email flow |
| Set Up Email Configuration and Testing | Medium–High — authentication and client configs can be complex | Mailbox storage, DNS access, client/device testing, time for migration | Reliable email deliverability and uninterrupted business communications | Businesses relying on email, transactional email services, offices migrating accounts | Prevents lost emails; improves deliverability with SPF/DKIM/DMARC; continuity |
| Configure SSL Certificates and Security Settings | Medium — certificate and security tooling setup | SSL certs (or LetsEncrypt), WAF/DDoS tools, monitoring, possible costs | Encrypted traffic, improved trust/SEO, reduced attack surface | eCommerce, sensitive‑data sites, PCI or compliance‑required sites | Encrypts data; builds trust; protects against common web attacks |
| Migrate Website Files and Database Content | Medium–High — transfer risks for large/complex sites | Bandwidth, migration tools/plugins, staging, validation time | Complete content transfer with preserved structure and validated imports | Full site moves, WordPress/ASP.NET/eCommerce migrations | Comprehensive transfer methods; automation reduces manual errors; flexible approaches |
| Test Website Functionality and Performance | Medium–High — thorough, time‑consuming testing | Testing tools, cross‑browser/device access, performance/load tools | Identified defects pre‑launch and validated performance baselines | High‑traffic sites, eCommerce, multi‑browser audiences, API‑dependent sites | Ensures feature parity; prevents UX regressions; verifies performance gains |
| Update Configuration Files and Custom Settings | High — technical and error‑prone updates | Developer access, version control, staging, careful validation | Correct environment connectivity and functioning application settings | Custom applications, hardcoded paths, webhook/API integrations | Ensures correct endpoints/credentials; avoids hardcoded reference errors |
| Monitor, Validate, and Resolve Post‑Migration Issues | Medium — ongoing effort after cutover | Monitoring tools, support staff, ticketing and logging systems | Rapid detection and resolution of issues; performance comparison to baseline | All migrations, especially high‑availability or commercial sites | Quick issue identification and remediation; maintains user experience; data for improvements |
Your Migration is Complete: What's Next?
Congratulations, you've successfully navigated the intricate process of moving your website. By diligently following this detailed website migration checklist, you've accomplished a major technical project, transferring your digital assets to a new, more robust hosting environment. This isn't merely the end of a task list; it’s the beginning of a new phase for your online presence, primed for better performance, security, and growth.
The journey from initial audit to post-launch monitoring is filled with critical checkpoints. You've backed up your data, inventoried your content, and prepared your DNS settings. You've managed the technical transfer of files and databases, configured your SSL certificate for security, and crucially, implemented redirects to protect your hard-earned SEO rankings. Each step, from planning to execution, was vital for a smooth transition.
Key Insight: A successful migration isn't just about moving files. It's a strategic process of preserving value-your SEO authority, user experience, and brand continuity-while unlocking new performance capabilities. The real work begins now, by making the most of your new platform.
From Checklist to Growth: Your Actionable Next Steps
With your site now settled in its new Australian home, your focus should shift from transition to optimisation. The foundation you've just built is ready to support your business goals. Here are the immediate steps you should take to capitalise on your successful migration:
- Establish a Performance Baseline: Your old hosting environment had a certain performance profile. Now is the time to establish a new one. Use tools like Google PageSpeed Insights and GTmetrix to benchmark your site's speed on its new server. This data will be invaluable for measuring the impact of any future optimisations.
- Explore Your New Hosting Features: If you've moved to a provider like UpTime, you now have access to a suite of powerful tools. Investigate features like AccelerateWP to supercharge your WordPress site or review the security settings in your cPanel. Familiarise yourself with the support resources, such as our extensive Knowledge Base, to become a power user of your own platform.
- Refine Your Backup Strategy: While you performed backups for the migration, now is the time to formalise a regular, automated backup schedule. A good strategy involves daily automated backups with at least a 30-day retention period, ensuring you can always roll back if needed. Our team at UpTime Web Hosting can assist you in setting this up.
- Conduct a Content and SEO Health Check: After about a month, perform a thorough SEO audit. Use Google Search Console to check for any new crawl errors, monitor your keyword rankings, and analyse your site's visibility. This is also an excellent opportunity to review your content inventory and identify pages that could be updated or improved to better serve your Australian audience.
The Long-Term Value of a Meticulous Migration
Completing this website migration checklist does more than just get your site from point A to point B. It instils a discipline of proactive website management. You’ve taken a deep dive into your site’s structure, dependencies, and performance metrics, gaining insights that are crucial for future decisions. This process protects your business from the significant risks of a botched migration, such as lost search rankings, broken user pathways, and extended downtime, which can directly impact your revenue and reputation.
By taking the time to plan and execute carefully, you've set your website on a path for sustained success. You can now operate with the confidence that your site is secure, fast, and supported by a reliable infrastructure. Welcome home.
Ready to ensure your next website migration is your last one for a long time? A successful move starts with choosing the right destination. UpTime Web Hosting offers fast, reliable, and secure Australian web hosting with expert local support ready to guide you through every step of your journey. Experience the performance and peace of mind that comes with a premium local provider by visiting UpTime Web Hosting today.