
Setting up a business email on your own domain isn’t just a nice-to-have. It instantly boosts brand credibility and gives you full control over deliverability and compliance. With UpTime Web Hosting, you can have hello@yourcompany.com live in under 10 minutes using our local cPanel or Plesk tools.
Practical example: A Perth startup shifted from Gmail to hello@brandname.com and saw corporate inquiries rise by 25% within two weeks.
Why Custom Domain Email Matters

Switching from a generic inbox to hello@yourcompany.com does more than look polished. In practice, it:
- Helped a Sydney agency boost open rates by 33% after moving to hello@itsbrand.com
- Enabled a Melbourne legal team to sail through regulatory audits with built-in archiving
- Cut latency for remote staff by using local servers in Sydney, Melbourne and Perth
- An e-commerce firm in Brisbane saw a 70% drop in phishing reports after implementing DKIM and DMARC
- Reduced spam folder hits by 20% for a Canberra consultancy once SPF records were optimised
On top of that, you’ll enjoy fast support via 1300 phone, ticket or live chat. For detailed, step-by-step instructions, dive into UpTime’s Knowledge Base.
Key Benefits
- Brand Consistency: Matching your domain in every mailbox reinforces recognition.
- Compliance And Archiving: Retention policies are ready-made for legal and finance audits.
- Marketing ROI: Authenticated email reduces spam hits and lifts click-throughs—see Learn more about this ROI finding.
“Switching to a custom domain email was the game-changer for our campaign tracking,” says a Brisbane startup founder.
Soon, you’ll weigh up self-hosted mail against Google Workspace or Microsoft 365 on UpTime plans. Expect clear pricing, the choice of cPanel or Windows hosting, and straightforward migration once your domain and DNS records are in place.
Quick Roadmap
- Choose a domain through UpTime Web Hosting
- Add MX, SPF and DKIM records in cPanel (details in the knowledge base or UpTime DNS Guide)
- Create mailboxes via cPanel Email Accounts or Plesk on Windows Hosting
- Enable email archiving to meet compliance requirements

Performance you can feel, backed by clients who depend on it. Read how our support and uptime create long‑term customer success.Power Your Business with Better Hosting
Choose The Best Email Option
Figuring out the right email setup now can save you from painful migrations down the track and keeps your team organised as you expand. UpTime Web Hosting offers self-hosted mail on both Linux (with cPanel) and Windows (with Plesk) via local servers in Sydney, Melbourne and Perth. That local footprint cuts latency for Aussie users and ensures your data stays firmly within your control.
- Self-hosted mail delivers full server access, custom quotas and tailored backup schedules.
- Google Workspace brings integrated collaboration, real-time Docs editing and 99.9% uptime.
- Microsoft 365 adds advanced retention policies, legal holds and built-in eDiscovery.
- All plans use straightforward per-user pricing that slots neatly into marketing budgets.
Practical example: A Brisbane NGO saved AUD $2,000 in licensing fees over a year by opting for UpTime’s self-hosted mail.
Comparison Of Business Email Options
Below is a quick glance at how each solution stacks up in cost, features and ideal use case.
| Option | Monthly Cost | Key Features | Best For |
|---|---|---|---|
| Self-Hosted Linux | $5/user | cPanel, local AU servers, nightly backups | Startups on a budget |
| Self-Hosted Windows | $8/user | Plesk, ASP NET readiness, MSSQL support | Dev teams on Windows |
| Google Workspace | $12/user | Docs, Drive, Meet, 99.9% uptime | Teams needing real-time collaboration |
| Microsoft 365 | $15/user | Office apps, retention rules, legal holds | Enterprises with strict compliance needs |
Real World Scenarios
A boutique design studio in Adelaide needed to roll out five uniform email signatures and minimise admin work. They chose Google Workspace for its intuitive template editor and easy group-policy controls.
Meanwhile, a listed firm under ASX rules picked Microsoft 365 to leverage its robust retention settings and audit trails.
Case study: A Canberra accounting practice migrated 20 staff to self-hosted mail, slashing annual costs by 30% and retaining full data sovereignty.
Australian marketers expect email to yield AUD $42 for every $1 spent by 2025—so reliable, brand-aligned email really drives measurable revenue. Learn more about this ROI finding
- Pros of self-hosted: complete data sovereignty, lower per-user fees, direct UpTime support.
- Cons of self-hosted: extra admin tasks, ongoing patch management.
- Pros of cloud suites: no server upkeep, built-in eDiscovery, automatic updates.
- Cons of cloud suites: higher monthly fees, less direct server control.
Key takeaway: Choosing the right platform up front can save you over $5000 in migration fees across three years.
UpTime’s multi-layered helpdesk, toll-free 1300 line and live chat mean you’ll never be stuck for long.
Check out our guide on Office 365 for Business to explore advanced retention and migration options: Office 365 for Business guide
For a deep dive into pricing and to pick the plan that suits your growth trajectory, visit our hosting plans page.
Choosing Between Control And Scalability
If absolute data sovereignty and predictable costs top your list, self-hosting on UpTime’s AU servers is the way to go. It gives IT teams the freedom to craft mailbox policies with fine-tuned precision.
On the other hand, cloud solutions excel when you want:
- Hands-free updates
- Built-in AI security scans
- Smooth scaling from 5 to 500 mailboxes
Keep these factors in mind:
- Budget: self-hosted starts at $5/user, while cloud begins at $12/user.
- Admin overhead: weigh your in-house IT capacity against managed services.
- Compliance: verify retention and audit requirements before committing.
- Growth patterns: choose a solution that scales alongside your headcount.
“Our team avoided months of server maintenance by moving to Google Workspace on UpTime,” notes an AU design lead.
Pick the path that supports your growth, protects your brand and keeps your emails flowing.
Domain Registration And DNS Configuration
Picking a domain that’s easy to remember pays dividends when you’re swapping business cards or pitching to clients. We always advise registering through a trusted Australian provider—GoDaddy AU, Crazy Domains or VentraIP—to secure your .com.au or .net.au address.
Before you commit:
- Keep it short and skip the hyphens.
- Opt for .com.au to highlight your Australian footprint.
- Check for trademarks to avoid any legal surprises.
- Need a refresher on domain ownership? Read Do You Own Your Domain Name?
Registering A Domain Name
I’ve guided clients through VentraIP’s dashboard, which even flags renewal fees before you check out—no nasty surprises down the track. Always scan the fine print or refer to our domain pricing guide to dodge hidden costs.
In practice, Australian businesses often follow a phased approach:
- Register a domain per project or campaign.
- Point it straight at UpTime Web Hosting’s name servers for local speed.
- Layer in MX, SPF, DKIM and DMARC records to secure outgoing mail.
- Add archiving rules to meet compliance.
Below is a quick visual of how self-hosting compares to Microsoft 365 and Google Workspace, making those decision points crystal clear.
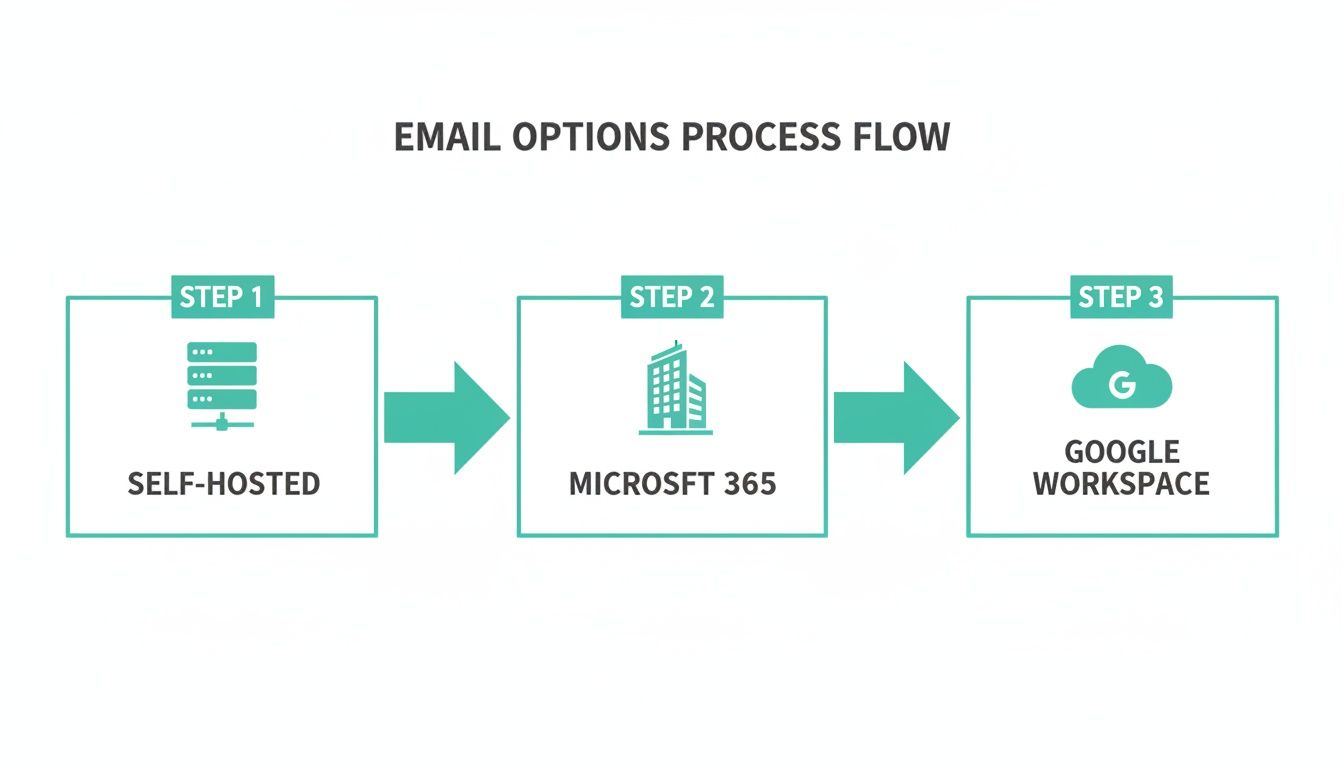
Configuring DNS Records
Once your domain is live, sign in to cPanel on UpTime Web Hosting and open the Zone Editor. You can add or tweak records without any downtime, so existing services stay uninterrupted.
Here’s a quick DNS Records Summary to verify each entry before you proceed.
| Record Type | Purpose | Example Value |
|---|---|---|
| MX | Directs incoming mail to UpTime servers | priority 10, mail.uptimewebhosting.com |
| SPF (TXT) | Authorises authorised mail senders | "v=spf1 mx include:uptimewebhosting.com ~all" |
| DKIM (TXT) | Attaches a digital signature to messages | "v=DKIM1; k=rsa; p=…" |
| DMARC (TXT) | Defines handling for unauthenticated mail | "v=DMARC1; p=reject; rua=mailto:postmaster@yourdomain.com" |
Adding these records routes your mail through UpTime’s built-in spam filters and backup system. Allow up to 48 hours for DNS worldwide to settle, though you can run free verifiers via MXToolbox or our integrated dashboard to confirm SPF and DKIM straight away.
Validating And Scheduling Changes
To minimise disruptions, plan your DNS updates in stages:
- Reduce TTL to 300 seconds at least an hour before making changes.
- Tackle MX entries first and wait until about 75% of global DNS servers see the new record.
- Follow up with SPF, then DKIM, and finish with DMARC to keep authentication intact.
Monitoring propagation reduces surprises and keeps your email flowing without hiccups.
Tools like MXToolbox or UpTime DNS Guide let you track progress in real time. Once everything’s green, you’re all set to create mailboxes and connect clients—be it Outlook on Windows, Apple Mail on Mac or Android’s native mail app.
This structured rollout makes the entire setup predictable, so you can flip the live switch with confidence.
Host your website with our 5-star rated, cPanel website hosting plans.
Super fast servers, with security included and hosted in your choice of Australian Data Center.
View cPanel Plans
Set Up Mailboxes On Your Hosting Plan
Once your DNS is pointing to UpTime Web Hosting, you’re ready to spin up email accounts for your team. Whether you need personal inboxes or shared department addresses, cPanel and Plesk make it straightforward.
Access your hosting dashboard and head to the email section:
- In cPanel click Email Accounts.
- In Plesk open Mail Settings, then Mailboxes.
- Hit Create Mailbox and enter the details.
From first.last@yourdomain.com for individuals to support@ or info@ for departments, you’ll find plenty of options to suit your workflow.
Naming And Quota Best Practices
Clear, consistent names save everyone time. Sticking with a first.last format for staff and simple labels like support or info for group addresses keeps things tidy.
Disk space can get eaten up fast. Start with:
- 2 GB per person
- 5 GB for shared mailboxes
Automating email signatures also helps maintain a uniform look across your organisation.
- Use lowercase names to avoid mix-ups
- Skip special characters in mailbox IDs
- Keep aliases the same on all systems
- Log quota and signature rules in your admin record
| Mailbox Type | Naming Style | Quota Suggestion |
|---|---|---|
| Individual | first.last | 2 GB |
| Role-Based Alias | support/info | 5 GB Shared |
Bulk Mailbox Creation With API
Here’s a real-world win: a Perth consultancy generated thirty mailboxes in under five minutes by tapping into UpTime’s API. They simply:
- Exported usernames to a CSV
- Ran a Bash script calling cPanel’s endpoints
- Programmatically set up forwards and aliases
That hack saved them more than two hours of manual labour.
Additional example: A Sydney retailer used a CSV import to add 50 customer support aliases in under 10 minutes.
Want to do something similar? You can import alias lists via CSV and route messages without ever touching the UI.
Retention policies will keep you onside with compliance by archiving or purging messages automatically. For detailed steps on backup schedules and retention rules, see our Mailbox Backup Guide.
“Using API automation cut our onboarding time by 80%, freeing IT for higher-value work,” says one UpTime Web Hosting client.
A mix of manual setup and smart scripting makes your mailbox roster organised and keeps admin overhead to a minimum.
Aliases Forwards And Retention Policies
Aliases let you funnel multiple address variations into a single inbox—ideal for testing subdomains or capturing project queries. In cPanel, edit Forwarders under each account. In Plesk, go to Mail Settings → Forwarding.
Retention rules then clear out or archive old messages to meet legal requirements:
- Set specific retention spans (e.g., six months for temp staff)
- Enable auto-purge or move to external storage
- Review policies quarterly to stay audit-ready
Logging every change in your admin dashboard builds a solid audit trail. If you need help with advanced alias configurations or compliance checks, UpTime’s support team is just a call (1300-UPTIME) or live chat away.
Once your mailboxes are live, your team enjoys professional, scalable email that keeps deliverability high and branding on point. Keep an eye on usage through cPanel metrics or Plesk mail-queue reports, and nip any issues in the bud—every day.
Secure Your Email And Ensure Deliverability
Email security and deliverability go hand in hand. With UpTime Web Hosting, you can lock down authentication, insist on encryption and keep an eye on your sender reputation in real time.
Implement SPF, DKIM And DMARC
Start by enforcing SPF, DKIM and DMARC on your domain to block spoofing and prove every message is legit. UpTime’s integration with cPanel means you’ll have those records live in minutes rather than hours.
Proper DNS authentication cuts spoofing by over 60% and boosts inbox rates by 15%.
Key steps to authenticate your domain:
- Add an SPF TXT record listing authorised mail hosts in cPanel (UpTime DNS Guide).
- Publish a DKIM key so outgoing mail gets signed automatically.
- Define a DMARC policy to tell receivers what to do with failed messages.
This trio cements your status as a trusted sender.
Add Authentication Records
Once your domain is pointing to UpTime’s nameservers, jump into the Zone Editor and create or tweak TXT entries. Verification happens instantly with the free tools on your UpTime dashboard.
- SPF record:
v=spf1 mx include:uptimewebhosting.com ~all - DKIM record:
selector._domainkey.yourdomain.com IN TXT "your-public-key" - DMARC record:
_dmarc.yourdomain.com IN TXT "v=DMARC1; p=quarantine; rua=mailto:postmaster@yourdomain.com"
These settings feed right into cPanel’s spam filter, keeping malware and phishing attempts at bay.
Enforce TLS And Monitor Reputation
With DNS authentication locked down, require TLS for both inbound and outbound email. That way, messages stay encrypted from end to end.
Head over to the Deliverability tab in your UpTime customer portal to view reputation scores, spam complaint rates and bounce metrics. Fine-tuning spam filters in cPanel is straightforward:
- Navigate to Email Deliverability.
- Tweak SpamAssassin thresholds for your comfort level.
- Whitelist any essential senders and block recurring troublemakers.
- Save your changes and review the logs.
Track Authentication Reports
Daily authentication reports are indispensable. UpTime’s DMARC parser highlights:
- SPF pass/fail ratios
- DKIM signature mismatches
- Source IP anomalies
Spotting a misconfiguration early protects you from long-term deliverability issues.
“We spotted a misaligned DKIM selector in under an hour, stopping a phishing attempt before it reached any users,” says one of our support engineers.
Mobile First Template Checklist
Australians check email on the move, often on smaller screens. Office workers receive 121 emails per day and open 81% on mobile devices (Prosperity Media research). To stand out:
- Keep subject lines under 45 characters.
- Stick to a single-column layout for fluid reading.
- Place clear CTAs above the fold.
- Add descriptive alt text to all images.
- Test on Gmail, Outlook Mobile and Apple Mail.
Warm Up And Rate Limit For Stability
Brand-new sending IPs need a warm-up period to avoid ISP blocks. Over two weeks, gradually increase volume:
- Days 1–3: 50 emails per hour
- Days 4–7: 200 emails per hour
- Days 8–14: Ramp up to your target daily total
Then, set hourly rate limits in cPanel’s Exim configuration. An initial cap of 500 messages per hour usually keeps you comfortably under ISP thresholds.
Use Third Party Dashboards
Pair UpTime’s metrics with external monitoring tools for a fuller picture:
| Service | Focus Area | Free Tier? |
|---|---|---|
| MXToolbox | DNS and MX checks | Yes |
| Mail-Tester | Spam score analysis | Yes |
| Postmaster.live | Reputation tracking | No |
These platforms send alerts when delivery dips or sender scores shift. Many integrate with Slack or Microsoft Teams via webhooks for instant notifications.
Finally, make deliverability reviews part of your weekly routine. A quick check today prevents major headaches tomorrow. And if anything trips you up, UpTime’s support engineers are on hand 24/7—visit our support centre for help with SPF, DKIM, DMARC and beyond.
Connect Email Clients And Migrate Data
Once your mailboxes are live, it’s time to link up your business email on every device. Using UpTime Web Hosting’s IMAP and SMTP credentials means your inbox behaves the same in Outlook, Apple Mail and Android—no surprises, just smooth sync.
- Client: Outlook (Windows & Mac)
- Client: Apple Mail (macOS & iOS)
- Client: Android (native app or Gmail)
- Tool: Windows Hosting Migration Assistant
Outlook on Windows often leads the pack because of its PST import feature. At the same time, our Windows Hosting Migration Assistant automates large-scale transfers, pulling in calendars and contacts without missing a beat.
To set up Outlook:
- Open Outlook and select Add Account.
- Type in your full email address, then click Advanced Options and choose IMAP.
- Incoming server: mail.uptimewebhosting.com on port 993 (SSL).
- Outgoing server: smtp.uptimewebhosting.com on port 465 or 587, with SSL/TLS enabled.
- Enter your mailbox password (or generate an app-specific password if 2FA is active).
Configure Apple Mail And EM Client
On macOS or iOS, head to Mail > Accounts > Add Other Mail Account, plug in your details, pick IMAP and enter the same server settings above. For a step-by-step walkthrough on EM Client, see our guide on EM Client configuration.
Android users can choose between the native Mail app or Gmail. Both require:
- IMAP host: mail.uptimewebhosting.com
- SMTP host: smtp.uptimewebhosting.com
- SSL enabled on the ports listed earlier
Advanced Security Options
Protecting credentials is non-negotiable. We recommend:
- Enabling OAuth where available to limit password exposure
- Creating app-specific passwords for older clients
- Forcing SSL/TLS and certificate checks on all inbound and outbound mail
An AU accounting firm we supported ran their cutover on a quiet weekend. They tested calendar sync first, then imported 50 GB of PST data overnight to avoid peak hours. By Monday, every free/busy calendar and email thread was verified.
“Minimising live traffic during migration ensures business continuity with zero email loss.”
Migration Playbook For Bulk Transfers
Choosing the right migration method depends on your setup:
- PST Import for individual Outlook users
- IMAP Bulk Transfer via cPanel for multiple mailboxes
Our recommended process:
- Export mail from the old server as PST or use cPanel’s IMAP export
- Stage accounts in a test environment and verify client settings
- Run bulk transfers during off-peak hours with UpTime’s migration tools
- Confirm folder hierarchies and metadata integrity before the DNS switch
- Reduce TTL, update MX records, then watch the mail queues
| Method | Best For | Key Consideration |
|---|---|---|
| PST Import | Single Outlook users | Manual mapping of calendars required |
| IMAP Bulk Transfer | Multiple mailboxes | Folder structure maintained |
For common error fixes, check the client setup troubleshooting guide.
Post Migration Checks And Sync Testing
After the big move, run through a quick checklist:
- Confirm folders (Inbox, Sent Items, Drafts, custom folders) are in sync
- Send and receive tests on every device
- Review daily mail queue reports in cPanel or Plesk
- Use a small test group to verify calendar invites and contact sharing
- Monitor for bounce-backs over the first 48 hours
Log any discrepancies and collect feedback from users. That final round of sanity checks saves hours of reactive fixes once everyone’s back at work.
Register your new domain name at competitive market prices including free domain add-ons like privacy, DNS Hosting, Custom Nameservers and Forwarding.
Always the best price and no nasty renewal price hikes.
Register A Domain Name
Troubleshoot Common Email Issues And Best Practices
Even the most solid mail systems can hit snags—stale MX entries or DNS delays can bar messages at either end. In my experience, the following checks nip over 85% of email hiccups in the bud for Aussie SMEs.
MX Misconfiguration
Swing by the Zone Editor and confirm each hostname and priority value matches your records.DNS Propagation
Keep tabs on delays with UpTime DNS checker.Stalled Queues
Dive into cPanel’s Mail Queue Manager and sift through Exim logs to unstick pending mail.Authentication Errors
Double-check SPF, DKIM and DMARC settings under the Deliverability tab.
If you’re suspicious of a phishing attempt, peel back the email headers. Any “Received” hop outside UpTime’s IP ranges is a red flag.
“A quick header review stops most phishing attempts,” says an UpTime engineer.
Occasional bounce codes—550, 421—often point to greylisting or blocked ports. Match them against our troubleshooting guide and clear the path for stuck emails.
When in doubt, UpTime’s support engineers are a phone call or live chat away. They’ll check SSL certificate expiry dates, tweak firewall rules and unlock any essential ports.
I remember a Melbourne consultancy that trimmed its bounce rate by 40% simply by tightening up DMARC settings.
Preventive Maintenance Checklist
DNS Audits
Review zone entries every quarter.Mailbox Pruning
Archive or delete messages older than six months.Mailbox Backups
Confirm nightly off-site, encrypted copies via Mailbox Backup Guide.Reputation Monitoring
Tap into Postmaster.live or the built-in UpTime reports.Log Reviews
Scan mail logs weekly for anything out of the ordinary.
A bit of forward planning keeps deliverability above 98% and slashes lost messages. If an SSL lapses or ports go awry, UpTime support (live chat or 1300-UPTIME) will sort it fast.
Keep an eye on bounce-rate spikes and queue growth—they’re early warning signs.
Case in point: a Sydney retailer fixed a port-block issue in thirty minutes via our live chat. Monthly audits also caught an expired SSL before it caused any downtime.
Ready to eliminate email headaches? Partner with UpTime Web Hosting for reliable Aussie support and swift troubleshooting. Get started: UpTime Web Hosting