When you're wrestling with website connectivity problems, one of the first things to try is a DNS flush. It's a simple command that clears out the old, stored website addresses on your device, forcing it to grab the latest ones. This little trick can solve a surprising number of issues, especially when you can't see recent changes to a website.
Why and When You Need to Flush Your DNS Cache
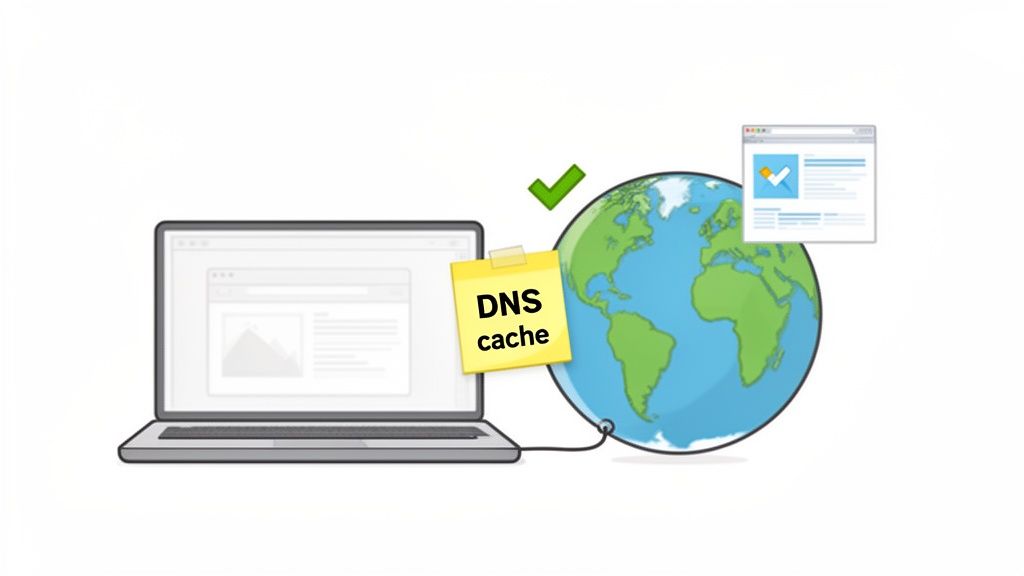
Have you ever moved your website to a new host or made a significant update, only to stare at the old version on your screen? It’s a frustratingly common scenario, and nine times out of ten, a stale DNS cache is the culprit.
Think of the DNS cache as your computer’s local address book for the internet. It saves the IP addresses of sites you visit so it can connect faster next time. While this is great for speed, it becomes a problem when a site’s IP address changes. Your computer, clinging to its old notes, will keep trying to visit the old, now-incorrect location. Flushing your DNS is like telling your computer to toss out that outdated address book and fetch a fresh one.
Common Scenarios for a DNS Flush
Knowing when to perform a DNS flush is half the battle. It’s not something you’ll need to do every day, but it should be your go-to first step for troubleshooting a few specific web-related headaches.
It’s probably time for a flush if you're experiencing any of these:
- Website Migration Delays: After you’ve moved your site to a new server, like our Australian servers at UpTime Web Hosting, your computer might stubbornly hold onto the old server details. A quick flush forces it to find the new location. For example, if your site
example.commoved from IP1.2.3.4to5.6.7.8, flushing your DNS cache is the first step to seeing the new version. - Stubborn 404 Errors: You know for a fact a webpage exists, but your browser is adamant it doesn't. Outdated DNS records are often the reason. Clearing the cache makes your computer double-check the page's real address.
- Security Concerns: In a nasty trick called DNS spoofing, attackers can poison your cache to redirect you to fraudulent websites. If you’ve been on sensitive sites, flushing your DNS afterwards is a good security habit.
A DNS flush is often the simplest solution to what seems like a complex connectivity problem. Before diving into deeper diagnostics, clearing the cache should be your go-to move. It resets the connection slate, ensuring you're working with the most current data.
Of course, a DNS flush is just one tool in your troubleshooting kit. If you're still hitting roadblocks, it’s a good idea to understand how to test for packet loss, which can help identify wider network problems.
And if issues keep popping up, the problem might not be with your local machine at all. Our guide on what to do when your DNS server is not responding can help you figure out the next steps.

Performance you can feel, backed by clients who depend on it. Read how our support and uptime create long‑term customer success.Power Your Business with Better Hosting
Flushing DNS on Windows and macOS
Alright, now you know why you'd want to flush your DNS. Let's get into the practical side of things.
The process is a little different depending on what computer you're using, but the end goal is always the same: clearing out old, stale records so your machine can grab the fresh ones.
Whether you're on a Windows PC or a MacBook, the commands are pretty simple. This is often the first thing we'll ask you to do if, for example, you've just moved your website to us at UpTime Web Hosting but can't see the new version or log in to cPanel.
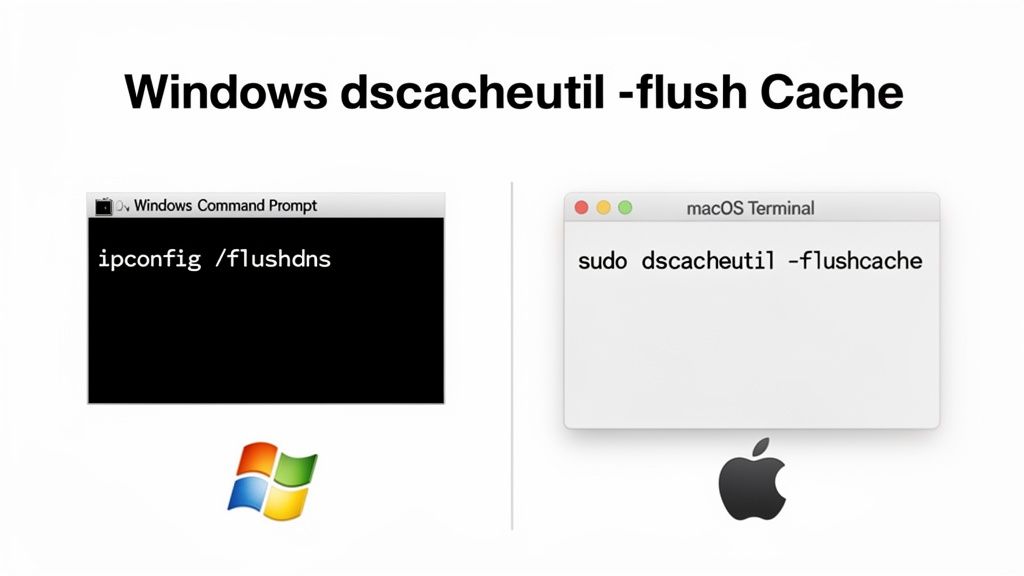
Flushing DNS on All Windows Versions
Good news for Windows users: the command is the same whether you're on Windows 7, 10, or 11. The only trick is that you need to run it with the right permissions.
You'll need to open the Command Prompt as an administrator. This gives the command the authority it needs to actually change things on your system.
Just search for "cmd" in your Start Menu, right-click on "Command Prompt," and hit "Run as administrator." You'll know it worked when the classic black terminal window pops up.
Now, type this command and press Enter:
ipconfig /flushdns
This simple command goes straight to the DNS resolver cache and clears everything out. No fuss, no complicated steps. It just works.
You should get a confirmation message that says, "Successfully flushed the DNS Resolver Cache." That's your sign that the job is done.
Flushing DNS on Modern macOS Versions
If you're on a Mac, the process is just as quick, but the command looks a bit different. For most modern versions of macOS—like Ventura, Monterey, Big Sur, and Catalina—you'll be using the Terminal app.
The easiest way to find it is with Spotlight Search (Cmd + Space), then just type "Terminal."
Once it's open, you'll need a command that starts with sudo.
Pro Tip: Wondering what
sudomeans? It’s short for "superuser do" in the macOS and Linux world. It lets you run a command with administrator privileges, which is essential for system-level tasks like clearing out the DNS cache.
For modern Macs, copy and paste this entire line into the Terminal and press Enter:
sudo dscacheutil -flushcache; sudo killall -HUP mDNSResponder
It'll ask for your Mac's password. Don't worry if you can't see the characters as you type them—that’s a normal security feature. Just type your password and hit Enter.
Unlike Windows, your Mac won't give you a nice "success" message. As long as the command prompt reappears without an error, you can be confident it worked.
While flushing your computer's DNS is a big step, your web browser can be stubborn and hold onto its own cache. For a completely clean slate, it’s always a good idea to perform a hard refresh in your browser too. We have a guide on how to hard refresh your browser in our knowledge base, which will make sure both your computer and browser are looking for the latest version of your website.
What About Linux, Browsers, and Routers?
Sometimes, the problem isn’t with your computer's main DNS records but with other caches layered on top. Think of it like a chain of command. Your web browser and even your internet router maintain their own temporary address books, and these can also become outdated.
This section will walk you through clearing these often-overlooked caches, starting with Linux systems before moving on to browsers and routers.
How to Flush DNS on Linux
For Linux users, particularly if you're on a modern distribution like Ubuntu, the process is managed through systemd. The systemd-resolve service handles all the network name resolution, and thankfully, flushing its cache is a straightforward terminal task.
First, open up your terminal.
Then, run the following command to clear out the old records:
sudo systemd-resolve --flush-caches
Once you've run that, you can double-check that the cache has actually been cleared by looking at its statistics. This follow-up command will show you the current cache size, which should now be sitting at zero.
sudo systemd-resolve --statistics
This quick two-step process is a common fix I use all the time, especially for developers and sysadmins who need to see DNS changes reflected immediately.
Clearing Your Browser DNS Cache
Here's something that catches a lot of people out: even after you've flushed your operating system's DNS cache, your web browser might still be clinging to the old information. Each major browser has its own way of clearing this data, which is especially useful for web developers trying to figure out front-end bugs.
- Google Chrome: Chrome has a handy internal tool for this. Just type
chrome://net-internals/#dnsinto your address bar and hit Enter. You’ll see a page load with a single button: “Clear host cache.” Click it, and you’re done. Chrome’s stored DNS entries are instantly gone. - Mozilla Firefox: With Firefox, the DNS caching is tied into its general cache. To clear it, head to Settings > Privacy & Security, find the "Cookies and Site Data" section, and click "Clear Data." Just make sure "Cached Web Content" is ticked, then click "Clear."
- Microsoft Edge: Since Edge is built on the same foundation as Chrome (Chromium), the process is identical. Pop
edge://net-internals/#dnsinto the address bar, and click the “Clear host cache” button. It’s a quick fix for any browser-specific DNS weirdness.
Flushing your browser's cache is a critical troubleshooting step, especially when a website isn't displaying correctly right after you’ve made DNS changes. It helps you isolate the problem, confirming whether the issue is just your browser's memory or something further up the chain.
Resetting Your Router DNS Cache
The final piece of the puzzle, and often the most stubborn, is your router. It’s the gatekeeper for all your devices connecting to the internet, and it keeps its own DNS cache to speed things up for everyone on your network. If this cache is stale, every single device in your home or office will be pointed to the old IP address.
For most small business owners and home users, the solution is surprisingly simple and completely safe: just turn it off and on again. But there’s a right way to do it.
- Start by unplugging your router from the power outlet. Don't just flick a switch.
- Now, wait for at least 60 seconds. This part is crucial. It gives the internal capacitors enough time to fully discharge, which is what clears all the temporary memory—including that pesky DNS cache.
- Plug the router back in and give it a few minutes to fully reboot and reconnect.
This simple power cycle forces the router to fetch fresh DNS information for its next request. If you've tried everything else and are still running into trouble, our guide on what to do if you can't connect to this network has more troubleshooting steps you can take.
Host your website with our 5-star rated, cPanel website hosting plans.
Super fast servers, with security included and hosted in your choice of Australian Data Center.
View cPanel Plans
Understanding DNS Propagation and Proactive Changes
Flushing your local DNS cache is a great first step, but it only solves half the problem. The bigger piece of the puzzle is global DNS propagation. This is the process where Internet Service Providers (ISPs) all around the world slowly update their own records with your website’s new information. It’s the reason you can flush your cache and still not see your new site for a little while longer.
Think of it as a ripple effect spreading across the internet. It’s not instant. After you make DNS changes—like when you've just figured out what to do after buying a domain and are setting up its records for the first time—this waiting period is completely normal.
This timeline gives you a good visual of where to start clearing things out, from your computer’s operating system right through to your browser and finally, your router.
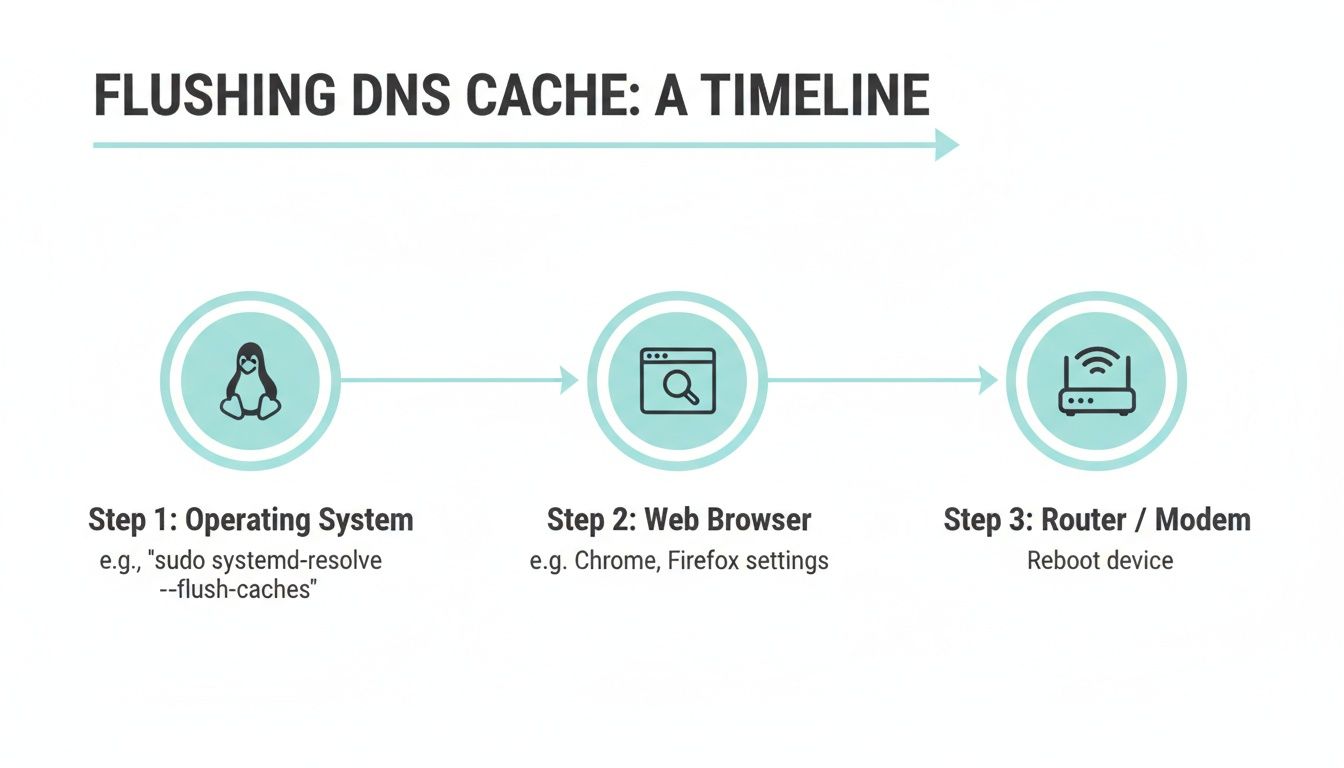
As you can see, a full DNS refresh is a layered approach. It’s more than just a single command; you need to clear out all the old, cached data to make sure you’re seeing the latest version of your site.
Speeding Up the Waiting Game
So, how long does this global update really take? Generally, DNS changes can take anywhere from 24 to 48 hours to fully propagate worldwide. These days, though, it's often much quicker, sometimes wrapping up within 4 to 8 hours.
However, we see some unique delays here in Australia due to how local ISPs manage their networks. Some providers will deliberately hold onto old DNS records for an hour or more to reduce traffic, even if you've set a short TTL (Time To Live). It's just part of the local internet landscape.
Here’s a pro-tip straight from our UpTime Web Hosting support desk: get proactive. Before you make a big DNS change in cPanel, lower the record's TTL first. A bit of planning can dramatically slash your propagation time.
Instead of waiting for problems to pop up after you've made the change, this one simple action can minimise downtime and stop those "my site is down!" support tickets before they even start.
Here’s the strategy we recommend to our clients:
- Figure out which DNS record you need to change.
- About 24 hours beforehand, log into your cPanel and find that record's TTL setting.
- Change it from the default of 14400 seconds (4 hours) down to 300 seconds (5 minutes).
Doing this tells ISPs everywhere to check back for updates far more frequently. So, when you finally make the actual DNS change, the new information spreads like wildfire because their servers are already primed to look for it.
We've put together a more detailed guide on what DNS propagation is if you want to dive deeper into how this all works.
The difference a little planning makes is significant. By lowering your TTL values before a change, you're essentially telling the global network of servers to get ready, which speeds everything up once you pull the trigger.
Standard vs Proactive DNS Change Timeline
| Action | Standard Approach (Default TTL) | Proactive Approach (Lowered TTL) |
|---|---|---|
| Preparation | No changes made before the DNS update. | 24 hours prior, TTL is lowered from 4 hours to 5 minutes. |
| DNS Update | The A record or nameserver is changed. | The A record or nameserver is changed. |
| Propagation | ISPs check for updates every 4 hours, causing delays up to 48 hours. | ISPs check for updates every 5 minutes, speeding up propagation significantly. |
| Outcome | Potential for extended downtime and inconsistent access for users globally. | Downtime is minimised, and the new site becomes visible much faster. |
Taking that small, proactive step ensures a much smoother transition, whether you're migrating your website, launching a new one, or just pointing a domain to a new server.
How to Confirm Your DNS Changes Worked
So, you’ve flushed the cache on your computer, browser, and maybe even your router. The big question now is: did it actually work? You could sit there hitting refresh, but there are much better ways to know for sure.
The most reliable method is to use a global DNS checking service. These online tools are brilliant because they show you, in real-time, how your website's new details are spreading across servers all over the world.
Using Online DNS Checkers
Online propagation checkers are an essential tool in any web professional's kit. They work by pinging your domain name from dozens of locations globally, showing you exactly which IP address each server is seeing.
A go-to option for this is DNSchecker.org. It's simple and effective. Just pop in your domain name, select the record type you changed (it’s usually an 'A' record for a website move), and hit search. You’ll get a map dotted with ticks and crosses, giving you a clear visual on which locations have the correct new info and which are still catching up. It’s the quickest way to get a clear picture of your propagation progress.
Troubleshooting Lingering Issues
But what if you've flushed everything, the DNS checker is showing green ticks everywhere, and you still can't see the new website? It's a frustrating scenario, but it almost always points to an issue much closer to home – usually on your local machine or a misstep in your hosting setup.
Here are the first places I'd look:
- Your
hostsfile: This is a small but powerful file on your computer that can manually override public DNS. Developers often use it to test websites before they go live. If there’s an old entry for your domain hanging around in this file, it will always win against the new DNS information. We have a great guide on using the hosts file to test websites that walks you through how to check it. - cPanel Zone Editor Errors: It happens to the best of us – a simple typo in your DNS records inside cPanel can bring everything to a halt. It’s always worth double-checking the Zone Editor to make sure the IP address is perfect and there are no sneaky extra spaces or incorrect characters.
- Firewall or Security Software: Every now and then, an overzealous firewall or antivirus program can interfere with how your computer gets its DNS information, effectively blocking it from seeing the new server.
When you're pulling your hair out over a stubborn DNS issue, always remember to check the simple, local stuff first. It's easy to assume a massive outage is to blame, but more often than not, the fix is right on your own computer.
Recent data shows just how often things can go sideways on the wider internet. In a single week in January 2026, there were 263 global network outage events affecting ISPs and cloud providers, a 3% jump from the week before. This is a stark reminder for Australian businesses why keeping your DNS records accurate is so critical. You can read more about these internet health findings and how they impact online services.
Still Have Questions About Flushing DNS?
After running through the steps, it's pretty common to still have a few questions. We get asked about this process a lot, so I've put together some quick answers to the questions that pop up most often in our support tickets.
How Often Should I Flush My DNS Cache?
Honestly, you shouldn't need to do it very often. Flushing your DNS isn't like regular computer maintenance; it's more of a specific tool for a specific problem.
You only really need to think about it when you're troubleshooting something. For example, if you can't get to a website you know is online, or if you've just moved your site and you're not seeing the new version, that's the perfect time to flush your DNS. Otherwise, it’s best to just leave it be.
Is It Safe to Flush DNS on My Computer?
Yes, it’s 100% safe. Flushing your DNS is a completely non-destructive action. All it does is clear out a temporary "address book" your computer keeps for websites.
Running the command won't harm your operating system, mess with your personal files, or break any of your applications. As soon as you flush it, your computer simply starts rebuilding the cache with fresh, up-to-date information the next time you visit a website.
A lot of people get nervous about running commands in a terminal, but a DNS flush is one of the safest troubleshooting steps you can take. Think of it like clearing your browser history—it just gets rid of old data without affecting your system’s stability at all.
For more tips on fixing connection problems, our knowledge base has a great article on troubleshooting "can't connect to this network" errors, which often go hand-in-hand with DNS issues.
Why Can My Colleague See the New Website But I Can’t?
This is a classic sign of a local caching issue, and it happens all the time. Every computer, network, and even your web browser caches DNS information separately to make browsing faster.
What’s likely happened is that your colleague's computer has already requested and received the new DNS record for the website. Your machine, on the other hand, is still clinging to the old, outdated address it has stored in its local cache. Flushing the DNS on your computer is the quickest way to solve this, as it forces your machine to go and grab the same new information your colleague is seeing.
If you’re tired of wrestling with DNS issues and just want fast, reliable Australian hosting with local experts who can help, UpTime Web Hosting is here for you. Our secure, high-performance platform makes sure your website is always online and loading quickly for your customers. Explore our hosting plans today!