Setting up your business email on your iPhone shouldn’t be a headache. For UpTime Web Hosting customers, there's a super-fast way to get it done using an automatic setup profile straight from cPanel. This little trick pre-configures everything for you, from server names to the right security settings, getting you connected in just a couple of minutes.
Your Quickest Path to a Working Inbox
Getting your professional email address synced to your iPhone should be simple. While you could go through the manual setup process, there's a much faster and more reliable path for anyone with UpTime Web Hosting. The secret lies in an automatic configuration script available directly within your cPanel account. This tool creates a special profile that instantly applies all the correct settings to your iPhone's Mail app.
The biggest win here is accuracy. This method completely sidesteps the risk of human error, like typos in a server name or picking the wrong security port—which are, by far, the most common reasons setups fail. Instead of tapping in server details, you just download and install a file. Easy.
Why Automatic Setup Is Our Top Recommendation
Manually setting up an email account means you're juggling a lot of details: incoming and outgoing server names, specific port numbers, and different encryption methods. If you mistype a single character or forget one tiny detail, you'll be hit with that frustrating "Cannot Get Mail" error.
The cPanel auto-profile bypasses all of that. It’s built to work perfectly with iOS and comes loaded with the exact server information for your hosting account.
Here’s why we always recommend it first:
- It’s Fast: You can go from zero to a fully working inbox in under two minutes.
- It’s Secure: The profile automatically sets up your account with SSL/TLS encryption, protecting your emails from day one.
- It’s Simple: No technical knowledge is needed. If you can tap "Install," you can set up your email.
Given that Apple's Mail app is the go-to for most people, this simplified setup is a massive time-saver. In fact, it dominates the market, accounting for approximately 56-58% of all email client usage both in Australia and globally.
Finding and Installing the Profile
Locating the setup profile is a piece of cake. First, log in to your UpTime Web Hosting cPanel account. Head over to the ‘Email Accounts’ section, find the email address you want to set up, and click the ‘Connect Devices’ button next to it.
Key Takeaway: The ‘Connect Devices’ area in cPanel is your home base for all email configuration details. It not only has the automatic scripts but also lists the manual server settings if you ever need them down the track.
On the next screen, you’ll spot a section called ‘Mail Client Automatic Configuration Scripts’. Just look for the one labelled “iOS for iPhone/iPad/iPod” and give it a tap.
This is where you'll find the installation file for your specific email account.
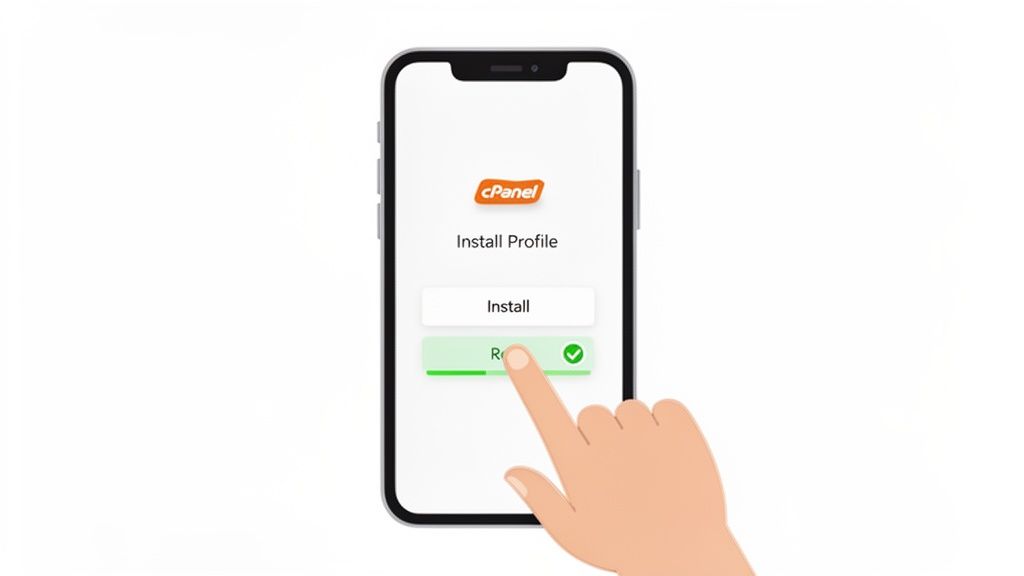
From there, your iPhone will ask you to download and install the configuration profile. Just follow the on-screen prompts, approve the installation, and pop in your email password when it asks. That’s it! Your Mail app will be ready to go immediately. For a more detailed walkthrough, feel free to check out our guide on how to Use Automatic Set Up Mail Client for cPanel.

Performance you can feel, backed by clients who depend on it. Read how our support and uptime create long‑term customer success.Power Your Business with Better Hosting
Navigating the Manual Email Setup Process
While the automatic setup is definitely the quickest way to get your email up and running, sometimes you need to get your hands dirty with a manual setup. Maybe the automatic profile isn't playing nice with your device, or perhaps you just prefer having total control over the settings.
Whatever your reason, setting up your UpTime Web Hosting email on your iPhone is pretty straightforward once you know which details to plug in where.
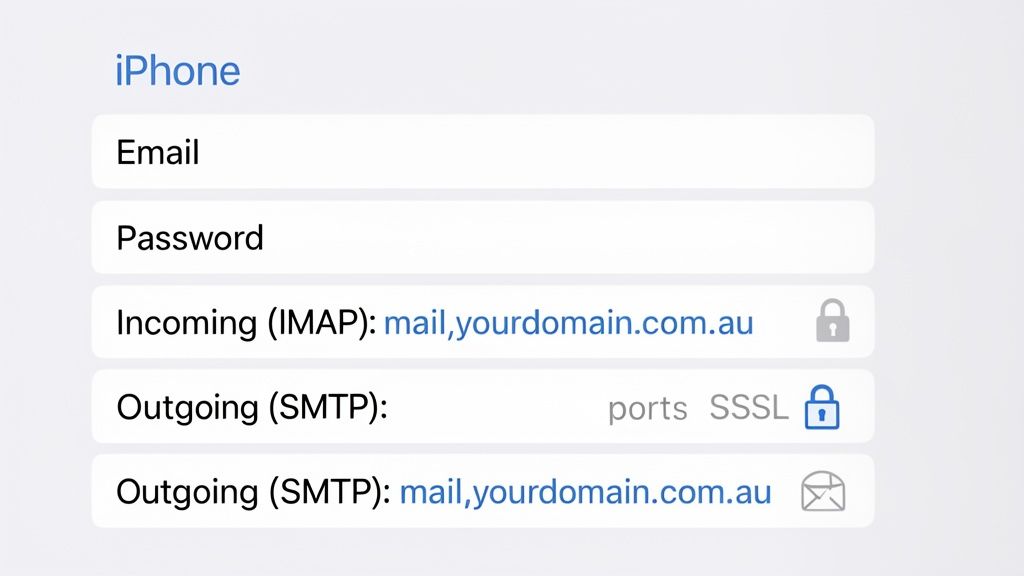
This process is all about telling your iPhone exactly how to talk to our mail servers. You'll need two key pieces of information: the settings for receiving emails (Incoming Mail Server using IMAP) and the settings for sending them (Outgoing Mail Server using SMTP). Nailing these details is the secret to a rock-solid, secure email connection.
Where to Find Your Server Details in cPanel
First thing's first: you need to grab your specific server details from your UpTime Web Hosting cPanel account. This is the same spot where you found the automatic profile, and it lays out all the server names and port numbers you'll need, so there's no guesswork involved.
Here’s the quick way to find them:
- Log in to your cPanel account.
- Head over to the Email Accounts section.
- Find your email address in the list and click the Connect Devices button right next to it.
- Scroll down a bit until you see the 'Mail Client Manual Settings' area. You'll see two boxes, but the only one you need is for Secure SSL/TLS Settings (Recommended). Always, always use the secure settings.
This section gives you the exact server names to pop into your iPhone. For most of our customers, the server name follows a simple pattern: mail.yourdomain.com.au.
Practical Example: If your business website is
www.aussiepieworld.com.au, your mail server name for both incoming and outgoing mail will almost certainly bemail.aussiepieworld.com.au. Easy.
Plugging in the Right IMAP and SMTP Settings
Okay, you've got your server details ready. Now it's time to head over to your iPhone. Navigate to Settings > Mail > Accounts > Add Account > Other > Add Mail Account. You'll enter your name, full email address, and password, and then you'll get to the screen where the magic happens.
This is where you need to be precise. A single typo can stop the whole process in its tracks. To make it simple, we've organised everything you need into a clear table.
Crucial Tip: We see this all the time. Your username is always your full email address (like
sharon@aussiepieworld.com.au), not just 'sharon'. It’s one of the most common mistakes people make during a manual setup.
Here are the secure settings you'll want to use. Just remember to swap out mail.yourdomain.com.au with the actual server name you found in your cPanel.
UpTime Hosting Secure Mail Server Settings
Use these secure IMAP and SMTP settings for manual iPhone mail configuration. Always enable SSL/TLS encryption.
| Setting Type | Protocol | Server Name | Port | Encryption |
|---|---|---|---|---|
| Incoming Mail | IMAP | mail.yourdomain.com.au | 993 | SSL/TLS |
| Outgoing Mail | SMTP | mail.yourdomain.com.au | 465 | SSL/TLS |
These port numbers—993 for IMAP and 465 for SMTP—are the industry standard for keeping email connections secure. Using them ensures your login details and email content are fully encrypted as they travel between your phone and our servers. Honestly, in this day and age, it's a non-negotiable step for protecting your business communications.
Once you’ve entered all the details correctly, your iPhone will take a moment to verify them. If everything checks out, your account will be added, and your emails will start flooding in.
For a complete visual walkthrough, our knowledge base has a fantastic guide you can follow along with. Check it out to Connect your iOS Mail App to your cPanel email account and make sure your setup is perfect.
Why IMAP Is the Modern Standard for Business
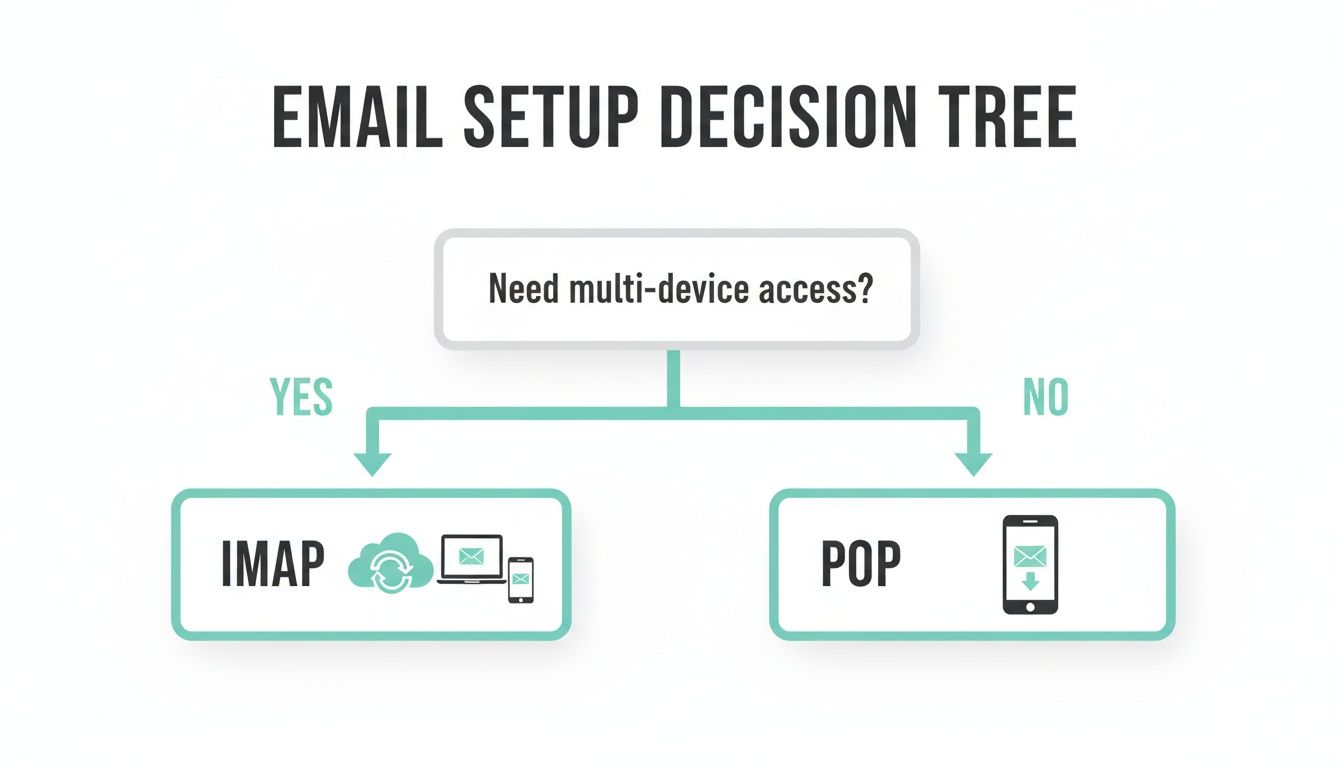
When you’re setting up your email on your iPhone, you'll come across a choice between two protocols: IMAP and POP. They might just sound like technical jargon, but the one you choose has a massive impact on your daily workflow, especially for a business that relies on being connected.
For modern work, the choice is clear: IMAP is the only way to go.
Think of IMAP (Internet Message Access Protocol) as a live, cloud-based copy of your entire mailbox. It keeps everything perfectly synchronised across all your devices in real-time. This means every single action you take on one device is instantly reflected everywhere else.
The Power of Real-Time Syncing
Imagine this real-world scenario: you’re out of the office and read a crucial email from a client on your iPhone. With IMAP, that email is automatically marked as 'read' on your desktop computer back at the office. You fire off a quick reply from your phone, and that message instantly appears in the 'Sent' folder on your laptop, tablet, and webmail.
This seamless experience is the core strength of IMAP. It creates a single, unified source of truth for your email, ensuring you never have to guess what’s been done.
- No More Double-Handling: You won't waste time re-reading or re-filing emails you’ve already dealt with on another device.
- Complete History, Anywhere: Your entire email history—including all your folders, sent items, and drafts—is always accessible, no matter which device you pick up.
- Team Collaboration: If multiple people access the same mailbox (like
info@yourbusiness.com.au), IMAP ensures everyone sees the same real-time status of every conversation.
IMAP in Action: A salesperson replies to a lead from their iPhone on the road. The office manager sees that sent reply instantly on their desktop, preventing them from sending a conflicting response. This simple sync avoids confusion and makes the business look far more organised and professional.
Why POP Is a Relic of the Past
On the other hand, POP (Post Office Protocol) works very differently. It was designed for a time when people used a single computer to check their email. The standard behaviour for POP is to download emails to your device and then delete them from the server.
This creates massive problems for today's multi-device user.
If your iPhone downloads an email via POP, your desktop computer will never see it. Your devices become isolated islands of information with no shared context. It’s a recipe for missed messages, duplicated effort, and immense frustration. Worse, if your device is lost or damaged, those locally stored emails could be gone for good.
IMAP Is Built for a Mobile-First World
The importance of this synchronisation cannot be overstated, especially in Australia. The way we interact with email has fundamentally changed. Mobile devices now account for 41.6% of all email opens globally, and the trend is even more pronounced locally.
For Australian businesses, iPhone users dominate mobile email reading with an astounding 90.5% market share among mobile email clients. This data highlights just how mobile-centric our communication has become.
This shift means your iPhone mail settings need to support a workflow where your phone is just one of many touchpoints for your business communications. IMAP is the technology that makes this possible, ensuring a consistent and reliable experience.
If you ever encounter issues with this synchronisation, our knowledge base provides useful troubleshooting steps for common problems connecting to IMAP to help you get back on track. Ultimately, choosing IMAP ensures your email works for you, not against you, keeping you productive and connected wherever you are.
Host your website with our 5-star rated, cPanel website hosting plans.
Super fast servers, with security included and hosted in your choice of Australian Data Center.
View cPanel Plans
Solving Common iPhone Mail Connection Problems
Even with the right settings, you might still get hit with a frustrating error message on your iPhone. Seeing alerts like ‘Cannot Get Mail’ or ‘Connection to the server failed’ can be a real roadblock, but they’re almost always fixable without having to call for help.
Think of these messages as your iPhone’s way of saying it can't talk to the mail server. The cause is usually just a small, overlooked detail. This section is your go-to guide for sorting it out. We'll walk through the most common hiccups, explain what they really mean, and give you clear steps to get your email flowing again.
Decoding the 'Password Is Incorrect' Error
This is probably the most frequent issue we see, and it almost always happens right after you’ve changed your email password in cPanel. You’ve updated it for security, but now your iPhone is stuck in a loop, constantly asking for a password and refusing to accept the new one.
This happens because the Mail app is still trying to use the old password it has saved. The fix is simple: you just need to update the password stored on your iPhone.
- Head to Settings > Mail > Accounts.
- Tap on your email account.
- Tap Account again and carefully re-enter your new password in both the Incoming and Outgoing Mail Server fields.
Pro Tip: If that doesn't work, there might be a temporary authentication glitch. A surprisingly effective trick is to switch your iPhone to Aeroplane Mode for 30 seconds, then turn it off. This forces all your network connections to reset and can often clear the error.
Fixing 'Cannot Verify Server Identity' Warnings
This warning sounds scarier than it is. It’s a pop-up that says the mail server's SSL certificate isn't trusted. While it sounds like a major security problem, it rarely is.
The usual culprit is a mismatch between the server name you’ve entered in your iPhone settings and the name registered on the server's SSL certificate. For example, you might have used mail.yourdomain.com.au when the server’s official hostname is something like au1.uptime-server.com.
To fix this, make sure the server names in your iPhone settings exactly match what’s listed in your cPanel under Connect Devices > Mail Client Manual Settings. Using the official server name ensures your iPhone trusts the connection.
Resolving Sending and Receiving Failures
Ever been able to receive emails perfectly fine but can't send any out? Or maybe it's the other way around? This almost always points to an issue with one set of server settings, while the other is correct.
Can't Send Mail: If emails are coming in but getting stuck in your outbox when you try to reply, the problem is with your Outgoing Mail Server (SMTP) settings. Go back and double-check the SMTP server name, make sure the username is your full email address, and verify the password. A common mistake here is forgetting to enable authentication for the SMTP server. If you’re still having trouble, our guide on what to do when emails are stuck in your outbox has more detailed solutions.
Can't Receive Mail: If you can send emails without a problem but nothing new is arriving in your inbox, the issue lies with your Incoming Mail Server (IMAP) settings. Carefully review the IMAP server name, port (993), username (your full email address), and password.
Believe it or not, a simple typo is the culprit in over 90% of these cases. Take a deep breath and meticulously check every single character in the server names, email address, and password fields. It’s often the smallest mistake that causes the biggest headache.
Fine-Tuning Your Advanced Mail Settings
Once your email is connected and syncing properly, it's worth taking a few minutes to tweak some advanced settings on your iPhone. These are the little details that can make a big difference to your day-to-day workflow, improving everything from battery life to how your mailboxes are organised.
A lot of people skip this step, but getting these settings just right ensures your email setup is truly optimised for the way you work. Let's walk through the most important ones and why they matter for your business email.
Balancing Immediacy and Battery Life
One of the biggest culprits of a drained iPhone battery is how often it's checking for new mail. You've got two main options here—Push and Fetch—and finding the right balance is key.
- Push: This gives you instant notifications. The moment a new email arrives on our server, it gets "pushed" straight to your iPhone. It’s fantastic for time-sensitive emails where you need to reply immediately, but it does require a constant connection and uses more battery power.
- Fetch: This is the more battery-friendly option. Your iPhone will "fetch" new mail from the server on a schedule you set—every 15 minutes, 30 minutes, or hourly.
Practical Example: For your main business account (
sales@yourcompany.com.au), you might use Push to get leads instantly. For a less critical account (newsletter@yourcompany.com.au), setting it to Fetch hourly can save significant battery life throughout the day. You can find these options under Settings > Mail > Accounts > Fetch New Data.
Fine-Tuning Your Mailbox Behaviours
Ever sent an email from your iPhone, only to look on your computer later and find it’s not in the 'Sent' folder? It’s a common and frustrating problem, usually caused by incorrect Mailbox Behaviours. These settings simply tell your iPhone which folders on the server it should use for your drafts, sent items, and deleted messages.
Getting this right is what unlocks the full power of IMAP, keeping your email perfectly synchronised no matter where you check it.
Crucial Check: Go to Settings > Mail > Accounts > [Your Account] > Account > Advanced. You need to make sure that your 'Sent Mailbox' and 'Deleted Mailbox' are mapped to the folders 'On the Server', not 'On My iPhone'. This one small change ensures your email history is consistent across all your devices.
Managing Device Storage with Mail Days to Sync
If you’ve got an email account with years of history, syncing every single message can eat up a surprising amount of storage on your iPhone. That's where the 'Mail Days to Sync' setting comes in. It lets you limit how far back your iPhone downloads emails—for example, just the last week, month, or three months.
This doesn't get rid of your older emails. They’re still safe and sound on the server, and you can access them anytime via webmail or your desktop. It just stops them from cluttering up your phone and frees up valuable space. You can adjust this under Settings > Mail > Accounts > [Your Account] > Mail Days to Sync.
The Non-Negotiable Outgoing Server Authentication
Lastly, let's cover a critical security setting for your Outgoing Mail Server (SMTP). To stop your email account from being hijacked by spammers, you must have authentication turned on. All this means is that your iPhone has to provide your username and password not only to receive mail but also to send it.
Modern setups usually enable this by default, but it's always worth double-checking. It’s a simple way to confirm to our server that you are who you say you are, and it's one of the best defences against your account being used for malicious activity. For a deeper dive into server configurations, check out our guide on Premium Email Server Settings.
Common Questions and Quick Fixes
Even with a smooth setup, it’s normal for a few questions to pop up. Here are the most common ones our support team gets from UpTime Web Hosting customers, along with some quick fixes to get you sorted.
Why Does My iPhone Say “Cannot Verify Server Identity”?
Ah, the classic “Cannot Verify Server Identity” warning. This is your iPhone’s security feature kicking in, and it's basically saying the server name you’ve typed in doesn't perfectly match the name on our server's security (SSL) certificate. It’s a very common hiccup during a manual setup.
This usually happens when you use a generic server name like mail.yourdomain.com.au but the server's actual hostname is something specific, like au1.uptime-server.com. For that secure, trusted connection, the names have to be an exact match.
- The Fastest Fix: Go back and use the cPanel auto-configuration profile. It’s designed to prevent this exact problem by using the correct server names from the get-go.
- The Manual Fix: Pop back into your cPanel, find the Connect Devices section, and carefully copy the server names listed there. Paste them directly into your iPhone's mail settings to make sure there are no typos.
Can I Add More Than One Email Account to My iPhone?
Yes, absolutely! The iPhone's Mail app is built to handle multiple accounts without a fuss. You can add all of your business and personal email accounts and easily switch between inboxes, or even see all your new mail in one unified view.
To add another account, you just repeat the same process.
- Head to Settings > Mail > Accounts.
- Tap on Add Account.
- Just follow the same steps you used for your first account.
I Can Send Emails but Not Receive Them. What’s Wrong?
This is a scenario we see all the time, and it almost always points to an issue with your incoming mail server (IMAP) settings. Your outgoing (SMTP) server is clearly working fine—that’s why your sent emails are going through. But your iPhone isn't able to pull new messages down from the server.
The culprit is usually a tiny typo. Go back and meticulously check your incoming mail server details. Make sure the server name, your username (remember, it’s your full email address), and your password are all correct. Also, double-check that SSL is enabled on port 993.
A great little troubleshooting trick is to log in to your Webmail in a browser. If you can see your new emails there, you've confirmed the problem is isolated to your iPhone's incoming settings. This one check can save you a ton of frustration. Carefully re-entering the correct IMAP details will almost certainly get your inbox syncing again.
Ready for reliable, Australian-based hosting that just works? UpTime Web Hosting offers fast, secure email and web hosting with expert local support to keep your business connected. Explore our cPanel hosting plans and get started today. Visit us at https://uptimewebhosting.com.au.