A lot of Australian business owners reach the same point. The site still works, but it feels heavy, support replies land at odd hours, and every small change turns into a waiting game. If your current host is overseas, you can also run into sluggish admin logins, slower uploads, and a migration process that sounds harder than it should be.
A cPanel to cPanel hosting transfer is usually the cleanest way out of that mess, especially if you’re moving from one standard Linux hosting setup to another. The good news is that this isn’t black magic. It’s mostly about choosing the right transfer method, preparing properly, and testing before you change DNS.
For small businesses in Australia, local infrastructure matters. Hosting your site closer to your customers can help make the whole experience feel snappier, and local support means you’re talking to someone who understands .au domains, local registrars, and the quirks of Australian ISP propagation. If you’re still sorting out the basics first, this overview of understanding web hosting gives useful context before you touch a single setting.
Moving Your Website to a New Australian Home
A common starting point looks like this. A business in Brisbane has a WordPress site, a few email accounts, and a contact form that can’t afford to break. The site lives on an older cPanel host overseas, and every update feels slower than it should. They don’t need a rebuild. They need a tidy move.
That’s where a local migration makes sense. Australian hosting keeps your site, email, and management tools closer to the people using them. It also makes support easier when you need help during business hours, not at midnight.
If you’ve been comparing providers, it also helps to look at the local angle properly. This guide to Australian owned web hosting companies is a practical place to start if you want to compare local hosting options rather than just chase the cheapest international plan.
What usually pushes businesses to move
Most migrations don’t happen because someone woke up excited to move servers. They happen because one of these problems keeps recurring:
- Slow back-end work: Logging into WordPress, uploading media, or running updates feels laggy.
- Poor support timing: Replies arrive when your office is closed, which drags out fixes.
- Messy email setup: Mailboxes exist, but no one is sure how they’re configured.
- Growing site complexity: You’ve added forms, plugins, databases, staging copies, and more over time.
Practical rule: A migration goes well when you treat it like an operations task, not a gamble. List what exists, back it up, test it, then switch.
For Australian businesses, the true benefit isn’t just “moving hosts”. It’s getting your website onto infrastructure that fits your audience and support expectations. That brings peace of mind, especially when the move is planned instead of rushed.
Your Pre-Migration Checklist for a Smooth Transfer
A lot of first-time migrations go wrong before anyone copies a file. The usual pattern is simple. The website moves, but a forgotten mailbox, an old cron job, or a hidden subdomain gets left behind. For an Australian business changing to a local provider like UpTime, the goal is not just to get the site across. It is to switch with as little disruption as possible for customers, staff, and email.
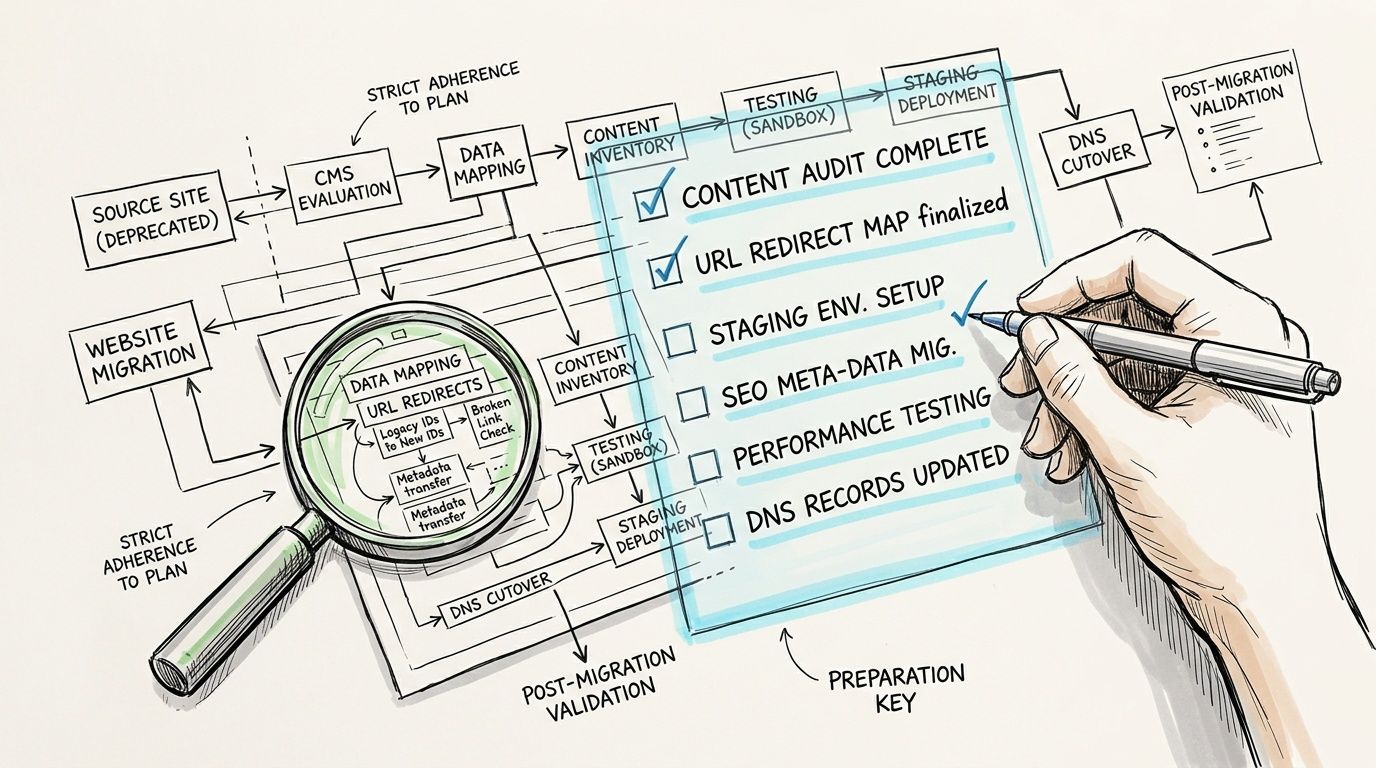
If you want a second reference while you work through this section, keep this website migration checklist for hosting moves open in another tab.
Audit the account before you touch anything
Start by treating the old cPanel account like an inventory job.
Log in and document everything that matters. A five-page brochure site can still have three databases, old staging folders, custom redirects, and half a dozen mailboxes nobody mentioned in the handover. I see this often with small business sites that have changed developers once or twice over the years.
Record these items:
- Domains and subdomains: Primary domain, addon domains, parked domains, staging sites, and any temporary URLs in use.
- Databases: Database names, database users, and which application connects to each one.
- Email setup: Mailboxes, forwarders, autoresponders, mailing lists, spam filtering, and webmail usage.
- Cron jobs: Scheduled imports, invoice tasks, backups, feed pulls, cleanup scripts, and application jobs.
- SSL and redirects: HTTPS rules, non-www to www redirects, .htaccess rules, and any custom rewrite logic.
- File locations: Public website files, private uploads, backup archives, and application folders outside public_html if they exist.
This is also the right time to tidy up. Remove outdated backups sitting in the account, archive old staging copies, and get rid of plugins, themes, or folders you know you do not need on the new host. Cleaner accounts are easier to transfer and easier to test afterwards.
Check DNS access early
DNS causes more stress than the file transfer itself.
Before migration day, confirm where your DNS is hosted and who can edit it. That might be the current web host, the domain registrar, Cloudflare, Microsoft 365, or an old IT provider who set things up years ago. If you do not know this before the move, cutover can stall while everyone tries to work out who has the login.
If you plan to lower TTL values before the switch, do it well ahead of time and only if you have access to the active DNS zone. Lower TTL can help new records get picked up faster after the change, but it is not instant. Some resolvers and some Australian ISP caches can still hold onto older answers longer than you would like, so build in a buffer and avoid promising an exact propagation time to staff.
A practical approach is to schedule the final DNS change outside your busiest trading period, then allow time for mixed traffic while caches update.
Create a backup you can actually use
Always keep your own copy of the account backup, even if UpTime support or another technician is handling the migration for you.
Download a full cPanel backup if that option is available. For manual jobs, also export the database separately and save a copy of the website files. If the site processes orders, bookings, or enquiries, note the time the backup was taken so you know what data may need a final sync later.
Do not stop at “download complete”. Check that the backup is usable:
- Confirm the file size looks reasonable: If the account is large and the archive is tiny, something probably failed or was excluded.
- Open the archive listing: Make sure core website files, configuration files, and mail folders are there if email is part of the move.
- Check for a database export: WordPress, Joomla, Magento, and custom CMS sites will not work properly without it.
- Store a second copy elsewhere: Local computer plus cloud storage is a safer setup than one copy on a laptop.
One backup is good. Two is better.
Confirm versions, limits, and app requirements
Older websites often depend on very specific settings. The site may look fine from the front, while the back end relies on an old PHP version, a particular extension, or a custom php.ini value that nobody has reviewed in years.
Before the move, check:
- PHP version: Match the current working version first. Upgrade later, after the site is stable.
- Required PHP modules: ionCube, intl, imagick, GD, SOAP, and anything else the application expects.
- Database version compatibility: Older plugins and custom code can react badly to version changes.
- CMS details: Caching plugins, security plugins, custom themes, and hard-coded paths.
- Disk space and inode usage: Large media libraries or email-heavy accounts can hit limits quickly.
- Special environment needs: If part of the setup relies on Windows hosting, MSSQL, or ASP.NET, a standard cPanel destination will not be suitable.
This matters even more for businesses moving onto Australian hosting for speed gains. Local data centres can improve latency for Australian visitors and staff, but performance gains disappear quickly if the site lands on a mismatched PHP version or a missing extension breaks part of the application.
Review email before the cutover
Email is usually the part business owners worry about most, and for good reason. A website issue is visible. A quiet email failure can sit unnoticed for hours.
List every mailbox that still matters. Check forwarders, aliases, autoresponders, and mailing lists. Confirm where email is currently delivered, because not every business with cPanel hosting also uses cPanel mail. Some use Microsoft 365 or Google Workspace, while the website stays on cPanel. In that case, the website migration and the mail setup need to be handled separately so MX records are not changed by mistake.
Also check mailbox sizes. Big accounts with years of attachments can take longer to sync, and quota differences on the new host can catch people out.
Pause changes during the final sync
Once you reach the final migration window, keep the old hosting account live and reduce avoidable changes.
Do not publish new pages, upload fresh media, change product data, or edit forms unless you are prepared to copy those changes again. If the site accepts orders or enquiries, monitor what is still landing on the old server during the cutover period. This is especially important while DNS is still settling across Australian networks.
A calm migration usually starts with boring prep work. That is a good sign. It means fewer surprises once the transfer begins.
Choosing the Right cPanel Migration Method
A Brisbane retailer moving one brochure site to a Sydney data centre does not need the same migration method as an agency shifting twenty client accounts between WHM servers. The right option comes down to access, site complexity, and how much of the old setup you want to keep.
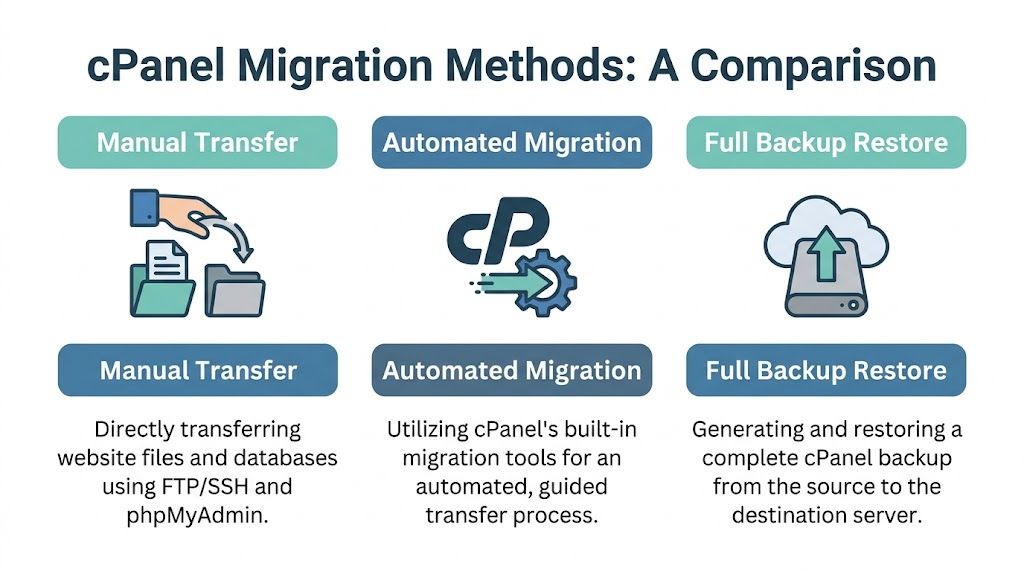
For many Australian small businesses, the decision is simpler than it first looks. If you are moving a single cPanel account to a local host such as UpTime, a full account backup is often the practical middle ground. If you need a copy of the whole account, including mail, databases, files, and settings, start with this guide on creating and downloading a full cPanel backup.
The quick comparison
| Method | Required Access | Best For | Technical Skill |
|---|---|---|---|
| WHM Transfer Tool | Root access on source and destination | Resellers, VPS owners, multi-account moves, full server migrations | High |
| Full cPanel Backup and Restore | cPanel access, plus restore help on destination if needed | Single accounts that need a broad copy | Medium |
| Manual Migration | cPanel, FTP or SFTP, phpMyAdmin, app-level access | Smaller sites, selective moves, older or messy setups | Medium to High |
WHM Transfer Tool
The WHM Transfer Tool is the cleanest choice when both servers are under proper admin control. It suits resellers, agencies, and businesses running their own VPS or dedicated server.
Its main advantage is speed and structure. You can bring across whole accounts with less manual handling, which reduces the chance of missing a database, mailbox, or account-level setting. That matters if you are moving several client sites at once or trying to preserve the same account layout on the new Australian server.
Best fit:
- Multiple cPanel accounts
- Reseller migrations
- Server-to-server moves
- Sites where account structure needs to stay the same
The trade-off is straightforward. Shared hosting customers usually do not have this level of access, so the method is often unavailable unless the new host performs the migration for you.
Full backup and restore
For a standard business website, this is often the most sensible option. You create a full backup from the old cPanel account, then the new host restores it into the new environment.
It usually works well for a single account moving to local hosting, especially if the current setup is tidy and you want a close copy rather than a selective rebuild. Many first-time migrations to an Australian provider fall into this category because the business owner has cPanel access but no server-level control.
Best fit:
- One primary cPanel account
- A business site with email, files, and databases in the same account
- Customers without root access
- Moves where the new host can assist with restore work
The limitation is that a backup restore copies the account. It does not magically fix an outdated app, a broken plugin, or a PHP mismatch. If the old hosting was messy, the restore can bring that mess with it.
Manual migration
Manual migration gives the most control. You copy the website files, export and import databases, recreate settings, and check each part as you go.
I usually recommend this method when the old account needs a clean-up, the site only uses part of the account, or there is a reason not to bring old clutter across to the new server. It takes longer, but it can produce a cleaner result. That is often worth it for older WordPress sites, abandoned addon domains, or businesses moving from a bloated overseas host to a leaner Australian setup.
It’s especially useful for:
- Smaller sites
- WordPress installs with one or two databases
- Partial migrations
- Accounts with outdated or confusing structures
Manual work also makes troubleshooting easier. If something breaks, you can usually pinpoint whether the issue sits with the files, the database, the DNS, or the application itself.
How to choose without overthinking it
Use the method that matches your access level and risk tolerance.
- Pick WHM Transfer Tool if you are moving multiple accounts and have server-level access.
- Pick Full Backup and Restore if you are moving one typical cPanel account and want the closest copy.
- Pick Manual Migration if you want to leave old clutter behind or you expect compatibility issues.
For many Australian businesses moving to a local host, the best method is not the most automated one. It is the one you can test properly, get support for, and reverse quickly if something looks off before DNS changes reach Telstra, Optus, TPG, and the rest of the local networks.
Executing the Transfer A Detailed Walkthrough
A good migration window feels boring. The phone stays quiet, orders still come through, and the only people watching the move are you and your host.
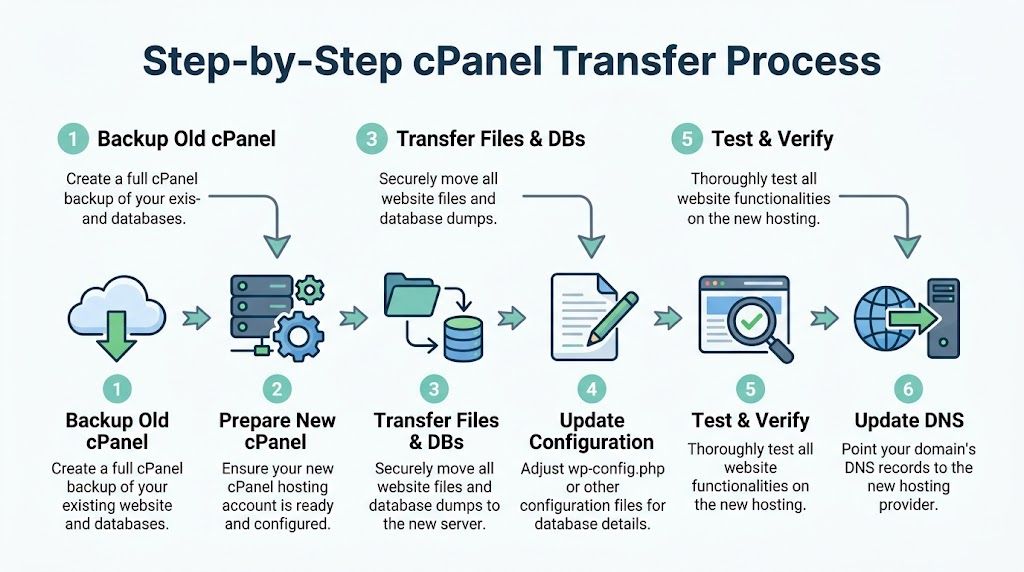
That usually comes down to discipline. Make one change at a time, keep the old hosting active, and check the new copy privately before the public sees it. If you have not done that before, follow this guide on using the hosts file to test websites. It lets you inspect the new server from your own computer while customers still reach the old one.
Using the WHM Transfer Tool
If you have root access on both servers, this is normally the fastest path for moving multiple cPanel accounts. It copies account data in bulk and saves a lot of manual handling. The trade-off is that it also brings over old settings, unused mailboxes, and account baggage unless you review the selection carefully.
The practical sequence
- Check the source server first
Confirm root SSH access works, note the accounts being moved, and identify anything you do not want copied. On reseller setups, move reseller accounts in the right order so ownership stays intact. - Log in to WHM on the new server
Open the Transfer Tool and enter the source server details. Use credentials with enough privileges to read the accounts properly, otherwise the migration may start but miss parts of the account. - Set the transfer options with intent
Express Transfer can help during cutover because it adjusts services to point users toward the new server. Automatic DNS-related options can also save time, but only use them if you understand which zones will change and who manages the domain records. - Select accounts one by one Review package names, usernames, storage use, and suspended accounts before you start. During this review, older shared hosting setups often reveal test domains, forgotten staging copies, and mail-heavy accounts nobody meant to keep.
- Run the transfer and read the log
Do not assume a green tick means the website is ready. The transfer log tells you whether the copy finished. It does not confirm the application runs correctly. - Check server-specific settings on the destination
Compare PHP versions, handlers, cron paths, and SSL status against your pre-migration notes. Australian businesses moving from a big overseas host to a local data centre often notice better latency after cutover, but only if the application itself is happy on the new stack.
What commonly goes wrong
Two issues show up often after a WHM move. The first is a PHP mismatch. A site built around an older version or a missing extension can throw errors straight away. The second is email. Quotas, forwarders, and account-level settings can copy across, but mail delivery still needs checking at mailbox level.
I usually test these items immediately:
- Homepage and contact forms
- PHP version and required extensions
- Cron jobs
- Primary mailboxes and forwarders
- Disk quotas
- SSL coverage for the main domain and any subdomains
A completed migration is only the file transfer part. Real success means the site, forms, and mail all behave normally.
Using a full cPanel backup and restore
For one standard business site, a full backup and restore is often the least fiddly option. You create a full cPanel backup on the old account, move it to the new host, then restore it using the destination host’s process.
This method usually preserves more account detail than a manual copy. That is helpful for email, databases, addon domains, and account settings. The downside is cleanup. If the old account has years of leftovers, the restore can bring those across too.
Step by step
On the old account:
- Generate a full cPanel backup
- Save a copy to your computer or other secure storage
- Export a separate copy of important databases if the site handles leads, bookings, or sales
On the new account:
- Confirm the destination cPanel account is ready
- Upload the backup file if required
- Restore it using the host’s supported method
- Review websites, databases, email, and account settings after the restore finishes
This approach suits a lot of Australian small business websites. Tradie sites, service businesses, local WooCommerce stores, and brochure-style WordPress builds are often good candidates. It gives broad coverage without the slower file-by-file work of a manual transfer.
Check these items after the restore:
- Database user assignments
- PHP version
- Email routing
- Addon domains and subdomains
- SSL status
- File ownership and permissions
Running a manual migration
Manual migration takes longer, but it gives you the clearest view of what is being moved. I use it when an account is messy, partly obsolete, or likely to break if copied wholesale.
It is also a sensible choice when only one site from a larger account needs to come across, or when the old host uses odd settings you do not want to carry into the new environment.
Files first, then database
A straightforward manual move usually follows this order:
- Compress the website files in the old cPanel account, usually from
public_htmland any app-specific folders. - Download the archive to your computer.
- Export the database from phpMyAdmin, including routines or triggers if the app uses them.
- Upload the files to the new account by File Manager, FTP, or SFTP.
- Extract the archive into the correct document root.
- Create the destination database and user in cPanel.
- Import the database dump into the new database.
- Update config files such as
wp-config.phpwith the new database name, user, and password.
For larger sites, I prefer SFTP or SSH-based methods where available because browser uploads can time out on slower NBN connections. That matters more than people expect, especially when you are moving media-heavy WordPress sites from regional offices with patchy upstream speeds.
Manual transfer pitfalls that show up often
Manual migrations fail in predictable ways:
- Missing PHP modules such as ionCube, GD, or specific database drivers
- Wrong database credentials in the config file
- Large database imports timing out
- Broken file permissions
- Email left behind because mail folders were never copied or recreated properly
WordPress usually tells on itself quickly. You will see a blank page, plugin fatal error, or database connection message. Custom PHP apps can be less polite and just return a 500 error, so check the error logs early.
If the site looks right on your machine but not on someone else’s, local DNS caching may be part of the confusion. This short guide on how to clear DNS cache is useful when you need to confirm whether you are still seeing the old server.
Keep the move traceable
Manual work rewards neat habits. Label the archive, label the SQL export, and keep a small text file of every setting you changed. If a problem appears later, that record saves a lot of guesswork.
For business-critical sites, compare more than the homepage. Check form submissions, login areas, cart behaviour, image paths, and any SMTP settings used by the site itself. A migration is only finished when the quiet parts are working too.
Which execution path usually causes the least stress
Use WHM if you have multiple accounts and the right level of access. Use full backup and restore for a typical single cPanel account. Use manual migration if the account is old, customised, or overdue for a clean-up.
The calmer moves usually share the same habits. One primary method, one fallback plan, and no rush to cancel the old hosting. That matters even more for Australian businesses because visitors on Telstra, Optus, TPG, and other local networks may not all reach the new server at the same moment once DNS changes begin.
Post-Migration Essentials DNS, SSL, and Final Testing
The files may already be sitting on the new server, but your customers still need to reach the right place. This is the point where the migration stops being a back-end task and becomes a live business change.
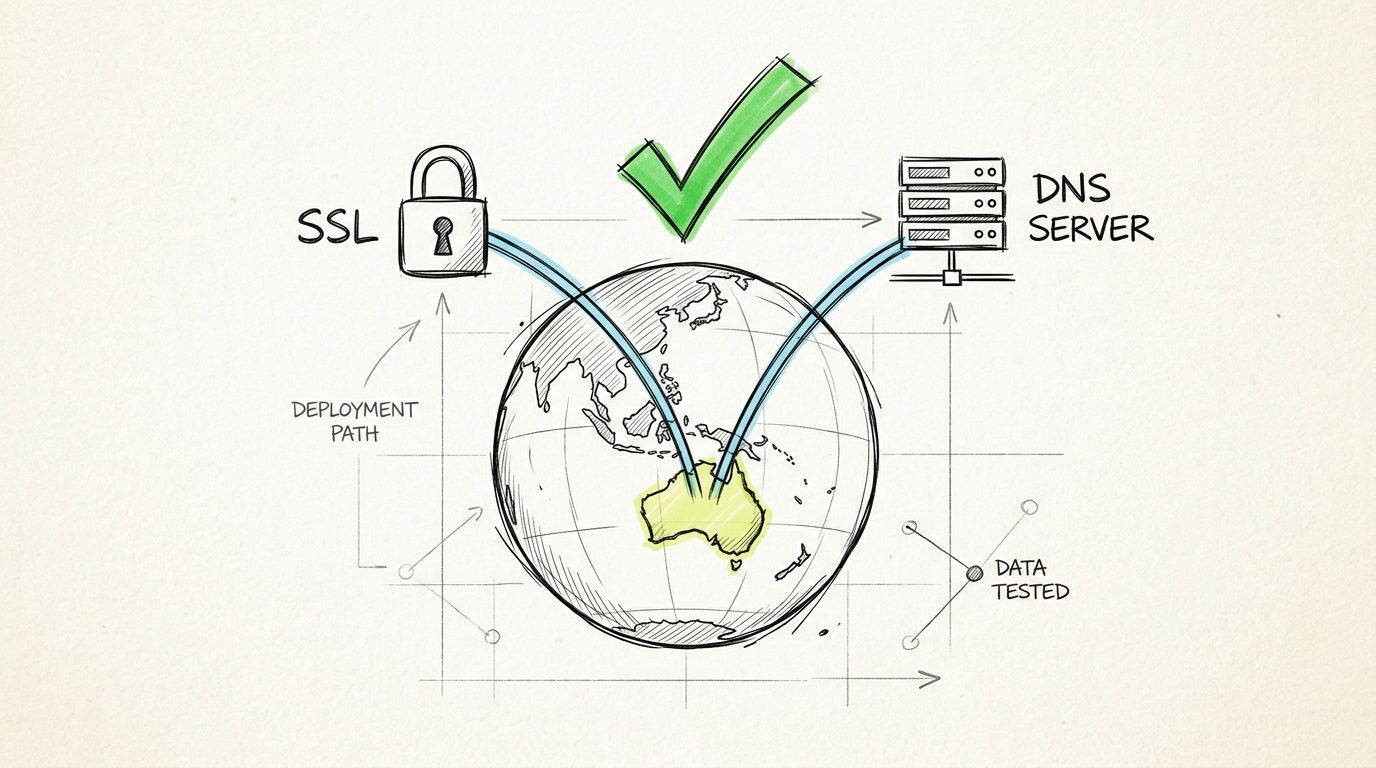
If you need a practical reference while checking certificates, this SSL set-up checklist for cPanel is handy for making sure the secure layer is active after cutover.
Update DNS with care
Once testing on the new host looks right, update the domain’s nameservers or relevant DNS records at your registrar. For Australian businesses, that often means logging into the registrar handling your .au domain and making the change there, not inside cPanel.
Because you lowered TTL earlier, many visitors should start seeing the new destination sooner than they would have otherwise. That said, DNS still isn’t instant everywhere. Some users will reach the old server briefly while others reach the new one.
Keep these habits in place during cutover:
- Leave the old hosting active: Don’t cancel it the same day.
- Avoid content edits: Especially on stores, booking systems, and forms.
- Watch email closely: Mail routing can lag behind web traffic changes.
- Check from multiple networks: Office NBN, mobile data, and home internet can differ.
If your own computer keeps showing the old location after you’ve changed records, clearing local DNS cache can help. This guide on how to clear DNS cache is useful when your browser seems stuck on old results.
Confirm SSL and redirects
After DNS starts resolving to the new server, confirm the SSL certificate is installed and serving the correct domain. Open the website using HTTPS, check the padlock in the browser, and make sure the certificate matches the domain visitors use.
Then test your redirects:
- HTTP to HTTPS
- non-www to www, or the reverse
- old URLs that rely on rewrite rules
- checkout, account, and login pages
A site can look fine on the home page while still throwing mixed content warnings deeper in the build. That’s common with older WordPress sites, hard-coded image URLs, and scripts pulled from old paths.
Don’t stop at the home page. Test the pages that make the business money or generate leads.
Test like a customer, not like an admin
Business owners often log in, see the homepage load, and assume the job’s done. It isn’t. Test the site as if you were a visitor who doesn’t know the back story.
Run through:
- Navigation: Main menu, footer links, and internal links.
- Forms: Contact forms, quote forms, booking forms, newsletter forms.
- Logins: Admin area, customer account area, membership content.
- Transactions: Cart, checkout, payment gateway handoff, test order flow if relevant.
- Media and styling: Images, CSS, JavaScript, sliders, downloadable PDFs.
For email, send messages in and out from each important mailbox. If staff use Outlook, Apple Mail, or mobile clients, confirm they’re connecting to the new service properly after the switch.
Leave a short observation window
Once the site is live, monitor it for a little while before declaring victory. Watch for missing mail, intermittent form behaviour, broken scheduled tasks, or old server references hidden in scripts.
A migration usually fails in the edges, not the obvious bits. The homepage loads. The hidden cron job doesn’t. The shop works. One mailbox doesn’t send. That’s why final testing matters.
Troubleshooting Common Migration Hiccups
Even a neat cPanel to cPanel hosting transfer can throw up a few sharp little problems. Most of them are fixable fast once you know where to look.
Database connection errors
If you see a database connection error, start with the application config file. On WordPress, that usually means checking the database name, username, password, and host value in wp-config.php.
Also confirm the database user has the right privileges on the destination server. A restored or imported database won’t connect properly if the user mapping is incomplete.
Broken styling or missing images
When a site loads without styling, the usual causes are missing files, wrong file paths, or mixed content. Check that CSS, JavaScript, and image folders transferred into the correct document root.
Then inspect your .htaccess rules and any hard-coded paths left over from the old hosting environment. Cached references can also make a site look broken when the files are there.
Email not sending or receiving
Email issues after migration are common because website and mail routing don’t always switch at the same moment. Check the mailbox exists, the password is correct, and the domain’s mail routing settings match the new environment.
Then review authentication-related settings such as SPF and DKIM in cPanel. If a business depends heavily on email, test each key mailbox directly instead of assuming one successful message means everything is fine.
PHP module and version problems
A site that worked on the old server can experience subtle failures if the new one uses a different PHP version or lacks a required extension. Symptoms include blank pages, plugin crashes, admin errors, or pages that partially render.
Look at the active PHP version first. Then enable any required modules the application depends on. This is especially relevant with older WordPress plugins, custom apps, and encoded software.
If a migrated site is half-working, don’t start redesigning it. Check environment settings first. Version mismatch causes more trouble than layout code during moves.
When to stop and ask for help
If you’ve checked config files, file paths, PHP settings, and email routing and the issue still doesn’t make sense, pause. Don’t keep changing five things at once. Make one correction, test it, and note the result.
That approach saves time and makes support far more effective if you do need to escalate the problem.
Frequently Asked Questions About cPanel Transfers
How much downtime should I expect?
For a typical cPanel to cPanel move, the goal is little to no noticeable downtime. If the site is copied properly, tested on the new server first, and the old hosting stays live during DNS cutover, many visitors will never notice the change.
Australian businesses should still allow for some inconsistency during propagation. A customer on Telstra may reach the new server before someone on Optus or TPG does, so brief overlap is normal. That is one reason I tell people not to cancel the old account too early.
Will my email stop working during the move?
It can, especially if the website moves cleanly but mail routing lags behind. The usual trouble spots are missing mailboxes, old DNS records, incorrect MX settings, or mail still landing on the previous server while some staff have already started checking the new one.
For a small business, this is the part to treat carefully. Test your main inboxes, send messages between internal and external addresses, and confirm webmail, IMAP, and SMTP all work as expected. If you host with an Australian provider such as UpTime Web Hosting, local support can usually check the cPanel mail setup quickly and confirm whether the issue is DNS, routing, or mailbox data.
What’s a rollback plan?
A rollback plan means keeping the original hosting account active until the new service has been checked properly. If something business-critical breaks, such as orders, forms, or email, traffic can be pointed back to the old server while the fault is fixed.
Keep a recent backup, avoid deleting the source account, and hold off on major site changes during the cutover window. That gives you a safe fallback instead of trying to repair a live business site under pressure.