
Setting up a professional email address for your business is a surprisingly simple move, yet it packs a serious punch. It really just boils down to a few key things: choosing a provider, creating your email address (think hello@yourbusiness.com.au), and then getting it configured on your devices. This one change can instantly make your business look more professional and build trust with every single message you send.
Why a Domain Email Is a Game Changer for Your Business

Making the switch from a generic email like yourbusiness2024@gmail.com to a custom domain email is one of the most powerful first steps you can take. It’s not just about looking the part; it's about building immediate credibility and making your brand memorable to customers, suppliers, and partners. Every single time you send an email, you're reinforcing your brand name.
This is a huge deal in Australia’s crowded market. Having a proper domain email has become essential, especially as the local domain market has exploded to over 1,758,398 registered domains across 667 top-level domains as of 2025. With Australia's internet usage at a massive 97.1%, businesses still using generic emails are taking a big risk. In fact, 43% of recipients admit they might just delete messages from generic addresses without even opening them.
Establishing Credibility and Trust
A professional email address immediately signals that your business is established and takes itself seriously. Put yourself in a customer's shoes for a moment: an email from sales@yourbrand.com.au just feels far more trustworthy than one from yourbrand.sales@yahoo.com. It’s a small detail, but it can be the difference between a potential customer engaging with you or hitting the spam button.
A custom domain email isn’t just a technical setup; it’s a foundational piece of your brand’s identity. It shows you’ve invested in your business, which in turn builds confidence with your audience.
Enhancing Brand Consistency and Security
Using a domain email helps create a seamless brand experience across all your communications, from your website right through to your email signature. It also gives you much greater control over your data. Unlike free email services, business email hosting usually comes with far better security features, which is crucial for protecting your sensitive information. This is just one of the many impressive benefits of professional web hosting for businesses.
To get started, it’s worth taking the time to understand your options and choose wisely from the best business email providers, as this decision really sets the foundation for your brand's credibility. Partnering with a local provider like UpTime Web Hosting gives you the right tools and support to set up a secure, professional email system that helps you compete effectively from day one.

Performance you can feel, backed by clients who depend on it. Read how our support and uptime create long‑term customer success.Power Your Business with Better Hosting
Creating Your First Email Accounts in cPanel
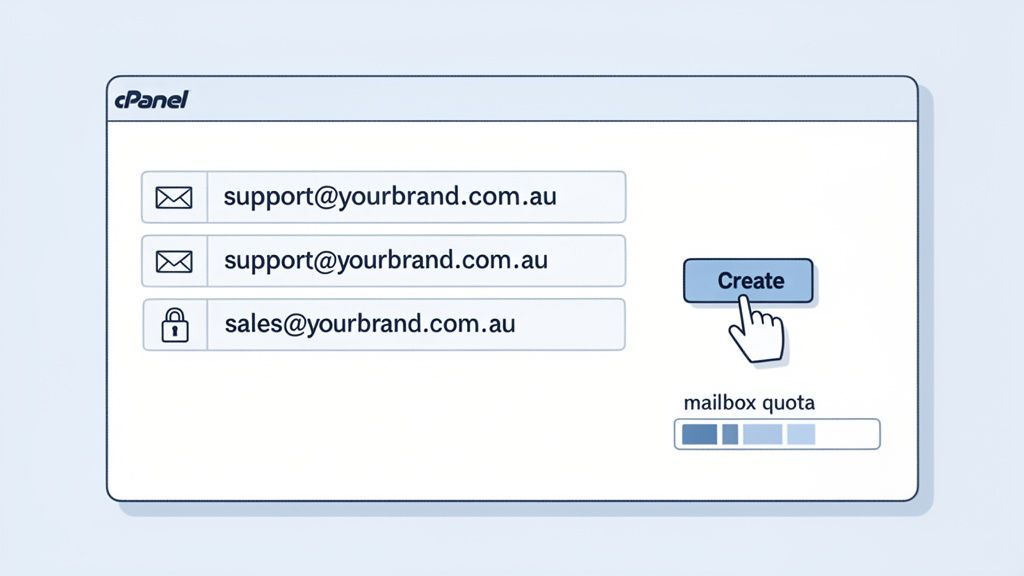
Alright, with your domain and hosting sorted, it's time for the fun part: creating your first professional email addresses. This is where your business really starts to look the part in every message you send.
Thankfully, a platform like cPanel turns what sounds like a technical headache into a few simple clicks. If you're using quality Australian web hosting, chances are you've got cPanel ready and waiting. Everything you need is right there in one dashboard.
Navigating to the Email Accounts Tool
First things first, you'll need to log into your hosting account’s cPanel dashboard. Once you're in, you'll see a screen full of icons and tools. Don't be overwhelmed – just look for the "Email" section, which is usually right near the top.
The main tool you're looking for here is called Email Accounts. Clicking on that will take you straight to the management screen. This is your command centre for creating, deleting, and managing every email address tied to your domain. For step-by-step guidance, check out our knowledge base article on how to create an email account in cPanel.
Setting Up Your First Address
On the Email Accounts page, you can't miss the big blue "Create" button. Give that a click, and you'll be on the screen to fill in the details for your new email.
Now's a good time to think strategically about the addresses you create. Instead of a generic info@, why not set up role-based accounts that immediately direct enquiries to the right place? It looks professional and saves you a ton of time sorting through a crowded inbox.
Consider these common, effective options:
- For Customer Enquiries:
support@yourbrand.com.au - For Sales Leads:
sales@yourbrand.com.au - For Specific Team Members:
jane.doe@yourbrand.com.au
For each account, you'll just need to type in a username (the part before the "@") and set a strong, secure password. Most hosts, including UpTime Web Hosting, have a built-in password generator. I strongly recommend using it. A randomly generated password is far tougher to crack than anything you'd come up with yourself.
A Quick Tip on Passwords: Think of a strong password as the front door lock for your business communications. It should be a random mix of uppercase and lowercase letters, numbers, and symbols. Never use common words or personal info.
Getting this right from the start establishes a professional and secure foundation. You can dig deeper into the features that make this so easy by exploring options for cPanel hosting in Australia.
To make this step even clearer, here’s a quick checklist to run through every time you create a new email account in cPanel.
cPanel Email Account Creation Checklist
| Step | Action Required | Key Tip |
|---|---|---|
| 1. Choose a Username | Decide on the first part of the email address (e.g., sales, support, john.s). | Think about roles, not just names. It makes your business look more established. |
| 2. Generate a Password | Use the built-in password generator to create a strong, secure password. | Don't reuse passwords! Every account should have its own unique one. |
| 3. Set a Mailbox Quota | Define the storage limit for this account (e.g., 1024 MB or "Unlimited"). | Give high-volume accounts (like sales@) a larger quota to avoid missed emails. |
| 4. Create the Account | Click the "Create" button to finalise the setup. | Double-check the spelling of the username before you hit create. It saves a headache later! |
Following these simple steps ensures each email address is set up correctly and securely from day one.
Managing Mailbox Quotas and Storage
One of the most practical settings you’ll manage is the mailbox quota. This is just a fancy term for how much storage space—emails and attachments included—each account can have before it gets full.
When you create an account, cPanel will ask you to decide on this. You generally have two choices:
- Set a specific size: You can allocate a fixed amount of storage, like 1 GB (1024 MB). This is really handy for managing your overall hosting space, especially as your team grows.
- Choose "Unlimited": This option lets the mailbox use as much space as your hosting plan allows. It’s perfect for critical accounts like
support@that might receive a lot of attachments and can't risk bouncing important messages.
Managing your quotas strategically is smart. For example, a graphic designer who regularly sends and receives massive files will need a much larger quota than a general info@ account. This simple step prevents one person's full inbox from causing problems for everyone else.
It's also worth pointing out that many of UpTime Web Hosting's plans offer uncapped email accounts. This gives you amazing flexibility as your business expands, letting you create as many addresses as you need without worrying about hitting some arbitrary limit.
Configuring DNS for Reliable Email Delivery
Okay, so you've created your new email accounts. That's the first step done. But now for the really crucial part: telling the internet where to actually send your mail. This is all handled by your Domain Name System (DNS) records, and getting them right is the secret to making sure your emails land in your inbox, not floating around in cyberspace.
Think of it like this: your domain name (yourbusiness.com.au) is your street address. The DNS, on the other hand, is the super-detailed set of instructions that tells Australia Post exactly which building and which post box to deliver your letters to. For email, the most important of these instructions is the MX (Mail Exchanger) record.
The Role of MX Records in Email Delivery
The MX record is a specific type of DNS record that points all incoming mail to your email server. When someone sends an email to sales@yourbusiness.com.au, their email server first does a quick DNS lookup to find the MX record for yourbusiness.com.au. This record essentially says, "Hey, send all mail for this domain to this specific server over here."
Without a correctly configured MX record, the internet has no clue where to deliver your email. It’s the digital equivalent of having no letterbox on your house. The good news is, if you're with a quality host like UpTime Web Hosting, managing these records is pretty straightforward right inside cPanel.
Finding and Managing DNS Records in cPanel
To get started, log into your cPanel dashboard and find the Zone Editor. This tool is your command centre for all the DNS records tied to your domain, including the all-important MX records.
Once you open the Zone Editor, you'll see a list of your domains. Find your primary domain and click the "Manage" button next to it. This will show you all the current DNS records—things like A, CNAME, and TXT records. For now, we're just focused on the MX record.
Here’s what you can expect to see in the cPanel Zone Editor. It's where you'll add, edit, and manage your records.
This screen gives you a clear overview of all your DNS settings, making it easy to spot and tweak the records needed to get your email working perfectly.
Configuring Your MX Record for UpTime Web Hosting
If your domain is registered with UpTime Web Hosting and you’re using our email services, this should already be done for you. The MX record will almost always point to mail.yourdomain.com.au by default. Simple.
However, things change if you're using a third-party email service like Google Workspace or Microsoft 365 while hosting your website with us. In that scenario, you’ll need to update your MX record to point to their servers. This usually means editing the existing MX record or adding a few new ones based on the instructions they provide.
When you're editing in the Zone Editor, you'll work with a couple of key fields:
- Priority: This number tells servers which mail server to try first. A lower number means a higher priority. For a simple, single-server setup, this is usually set to 0.
- Destination: This is the address of the mail server that will handle your email. For us, it’s
mail.yourdomain.com.au. For other providers, it will be an address they give you (likeaspmx.l.google.com).
Just a heads-up: DNS changes aren't instant. It can take anywhere from a few minutes up to 24 hours for the updates to spread across the entire internet. So, if things don't work immediately after you click save, give it some time.
If you ever find that emails aren't arriving, a DNS hiccup is often the culprit. For a deeper dive into troubleshooting, you can learn more about what to do when your DNS server is not responding. Getting this foundational step right ensures your email system is built on a solid, reliable base, giving you proper control over your email deliverability.
Host your website with our 5-star rated, cPanel website hosting plans.
Super fast servers, with security included and hosted in your choice of Australian Data Center.
View cPanel Plans
Activating SPF, DKIM, and DMARC to Secure Your Email
Okay, so your emails are now flowing to the right place. That’s a huge step. But the job’s not quite done. We now need to make sure those emails are secure. I’m not just talking about a strong password; I’m talking about proving the emails you send are genuinely from you.
This is where three powerful security protocols come into play: SPF, DKIM, and DMARC.
Think of these as the three pillars of security for your business email. They work together to stop scammers from faking your email address (a practice known as "spoofing"). Getting this right protects your brand's reputation and massively improves your chances of landing in your customers' inboxes instead of their spam folders.
What Are SPF, DKIM, and DMARC?
Let's quickly demystify these acronyms. You don't need to be a tech whiz to get the gist of what they do for your business.
SPF (Sender Policy Framework): This is basically an approved senders list. You add a simple text record to your domain's DNS that tells the world, "Only emails coming from these specific servers are authorised to be sent from my domain." If a server receives an email claiming to be from you but it came from an unlisted server, it knows something's off.
DKIM (DomainKeys Identified Mail): Think of this as a digital, tamper-proof seal on a letter. DKIM adds a unique digital signature to every single email you send out. The receiving server can check this signature to verify the message hasn't been fiddled with in transit, confirming it’s legit.
DMARC (Domain-based Message Authentication, Reporting & Conformance): This protocol is the enforcer. DMARC tells receiving email servers exactly what to do if an email fails either the SPF or DKIM checks. You can set a policy to quarantine suspicious emails (send them to spam) or just reject them outright, stopping them cold.
These protocols are the absolute industry standard for email authentication. Beyond just setting them up, it's also crucial to train your team and implement practical steps to protect against phishing attacks, which often target unsuspecting staff members.
One-Click Activation in cPanel
In the old days, setting up these records meant manually creating and editing complicated text strings in your DNS settings. It was a pain. Thankfully, with hosts like UpTime Web Hosting, the process is now incredibly simple.
Most of the heavy lifting is handled by a tool in cPanel called Email Deliverability, which you’ll usually find under the "Email" section. This brilliant tool automatically checks your domain for valid SPF and DKIM records and lets you generate and install them with just a few clicks.
As you can see, cPanel clearly flags any issues and gives you a "Repair" or "Manage" button to fix them for you.
This is a massive time-saver for business owners. The tool generates the correct DNS records and installs them into your domain's Zone Editor without you ever needing to copy and paste a single line of code. Once you've activated SPF and DKIM, you can then set up your DMARC policy.
For most small businesses, a basic DMARC policy that quarantines failures is a perfect starting point. It provides a strong layer of protection without the risk of accidentally blocking legitimate emails. For example, a simple DMARC record could look like:
v=DMARC1; p=quarantine; rua=mailto:dmarc-reports@yourdomain.com.au
This focus on security is more important than ever. A recent report found that in 2025, Australian IT leaders from over 1,000 organisations see professional domain email as vital for compliance and branding. For UpTime Web Hosting customers, configuring email in under 10 minutes by setting MX records and enabling DKIM/SPF leads to an inbox placement rate exceeding 86%. This performance helps startups avoid the 65% deliverability struggles that can plague businesses with unauthenticated email.
The diagram below shows the journey an email takes after you hit 'send,' highlighting how DNS records guide it to the correct recipient.
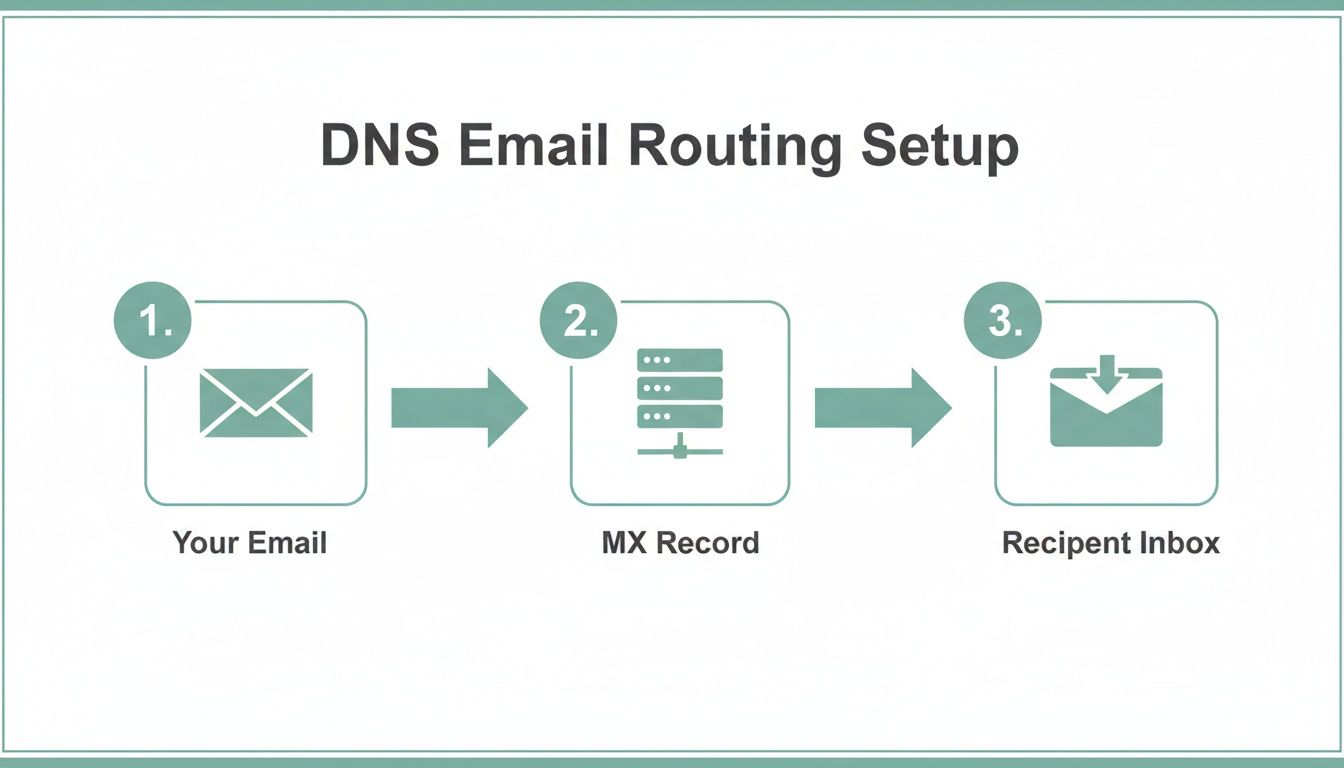
As this visual shows, the MX record acts as the critical traffic director, making sure your message finds its way to the right server and, ultimately, the right inbox.
Connecting Your Email to Mail Clients and Devices
Right, your professional email address is up and running on the server. But let's be honest, an email account is only useful if you can actually use it on your phone, laptop, and whatever other devices you rely on daily.
The final piece of the puzzle is connecting your new domain email to clients like Outlook, Apple Mail, or the mail app on your smartphone. This just means punching in the right settings so your apps know how to talk to our servers.
Choosing Between IMAP and POP3
First, you'll need to make a choice between two protocols: IMAP and POP3. They sound technical, but the difference is actually pretty simple.
We strongly recommend you use IMAP. It’s the modern standard for a reason. IMAP syncs your email across all your devices, so when you read, delete, or file away an email on your phone, the exact same change happens on your laptop. Everything stays perfectly organised and in sync.
POP3, on the other hand, is a bit old-school. It typically downloads emails to a single device and then deletes them from the server. This can get messy fast, leaving you with emails on one computer that you can't see on another. For any modern business, IMAP is the only way to go.
Standard Email Client Settings
To get your email set up on any app, you'll need a few key details: your username (which is your full email address, like jane.doe@yourbrand.com.au), your password, and the server settings. For UpTime Web Hosting customers, we keep these details consistent to take out any of the guesswork.
The table below lays out the exact secure settings you should use. Using the secure SSL/TLS option isn't just a suggestion—it's essential. It encrypts the connection between your device and our server, protecting your login details and the contents of your emails from anyone trying to snoop.
UpTime Hosting Standard Email Client Settings (IMAP Recommended)
| Setting | Secure SSL/TLS (Recommended) | Description |
|---|---|---|
| Username | your.name@yourdomain.com.au | This is your full email address. |
| Password | Use the password you set in cPanel. | This is the password for your specific email account. |
| Incoming Server | mail.yourdomain.com.au | This is the server address for receiving emails. |
| IMAP Port | 993 | This is the secure port for IMAP connections. |
| Outgoing Server | mail.yourdomain.com.au | This is the server address for sending emails. |
| SMTP Port | 465 | This is the secure port for SMTP connections. |
When you open Outlook, Apple Mail, or the mail app on your phone, look for the option to add a new account. You'll likely need to choose "Other" or "Manual Setup" to enter the details from the table above. Once you save the settings, your app will connect to the server and start pulling down your emails.
Using Webmail for Access Anywhere
What happens if you're away from your devices and need to check an urgent email? That’s what Webmail is for. It’s a browser-based version of your inbox that lets you log in and manage your email from any computer with an internet connection.
To get in, just open your web browser and go to yourdomain.com.au/webmail. A login screen will pop up where you can enter your full email address and password.
Webmail is incredibly handy for a few scenarios:
- Checking email while travelling: Use it on a hotel computer or a public device without having to configure a thing.
- Troubleshooting: If your desktop app is acting up, logging into Webmail is a great way to check if the problem is with the app or the server itself.
- Quick access: Sometimes it’s just faster to open a browser tab than to launch your full email program.
As you start sending emails, it's worth remembering that different providers have their own rules. For example, knowing your host's email attachment size limit can save you from the headache of a bounced email when sending a large file to a client. Little details like this make for a much smoother experience.
Frequently Asked Questions About Domain Email
Of course, it's totally normal to have a few questions rattling around even after you've followed all the steps. Setting up a professional email system is a big deal, and getting the details right matters.
Think of this section as your go-to guide for those little uncertainties that can pop up. We'll tackle some of the most common queries we hear, giving you clear, practical answers so you can manage your new email with total confidence.
How Long Do DNS Changes Actually Take to Work?
This is easily one of the most common points of confusion. You’ve just updated your MX records to point to your new email server, but nothing's happening. The key thing to remember is that this process, known as DNS propagation, isn't instant.
While you might see changes kick in within an hour or two, it can sometimes take up to 24 hours for the new settings to spread across the entire global internet. So, if your email doesn't work right away, don't panic! It’s usually just a case of waiting for the digital posties to get the new address.
A great rule of thumb is to make these DNS changes during a quiet period for your business, like over an evening or a weekend. This gives everything plenty of time to sync up without disrupting your day-to-day communications.
How Many Email Accounts Do I Really Need?
That’s a smart question, and the answer really depends on how your business is structured. A solo operator might get by with just one or two addresses, but a growing business should think more strategically.
- For individuals: Start with a primary, professional address like
your.name@yourdomain.com.au. - For teams: Create role-based accounts like
support@andsales@. This not only looks more professional but also keeps specific enquiries organised and easy to manage. - For marketing: You might want a dedicated address like
newsletter@to handle mailing lists and campaign replies separately.
Many of our plans at UpTime Web Hosting come with uncapped email accounts, so you never have to worry about hitting a limit. You're free to create as many addresses as you need to run your business efficiently.
What's the Best Way to Migrate from an Old Provider?
Moving from an old email provider like Gmail or another web host can feel like a huge task. The secret is to plan it out properly so you don't lose a single important message. One of the simplest and most reliable methods is to use a desktop email client like Outlook or Apple Mail to do the heavy lifting for you.
Here’s how it works:
- Add Both Accounts: First, set up both your old and new email accounts in your preferred email client using IMAP.
- Recreate Your Folders: In your new account, create the same folder structure you had in your old one.
- Drag and Drop: Now for the easy part. Just drag the emails and folders from your old account directly over to the new one. Your email client will handle the rest, downloading the messages from the old server and uploading them to the new one.
This process can take a while if you have a massive mailbox, but it's a rock-solid way to get everything migrated accurately without needing any fancy or expensive tools.
Ready to build trust and elevate your brand with a professional email address? UpTime Web Hosting makes it easy with our fast, secure, and 100% Australian hosting solutions. Get started today and see how simple it is to set up your domain email. Learn more at https://uptimewebhosting.com.au.