In short
The hosts file is located at C:WindowsSystem32driversetchosts on Windows and /etc/hosts on macOS and Linux. Edit it with administrator or sudo access, add the new server IP beside the domain, save the file, test the site, then remove the entry so public DNS takes control again.
Key takeaways
- Windows 11 and Windows 10 normally store the hosts file at
C:WindowsSystem32driversetchosts. - macOS, Ubuntu and most other Linux distributions use
/etc/hosts. - A hosts-file override affects only the computer on which it is saved; it does not alter public DNS.
- Map every hostname being tested, such as both
example.comandwww.example.comwhen the website uses both. - Remove the test entry when finished, and do not rely on
nslookupordigto confirm a local override.
Table of contents
- Where is the hosts file on Windows, macOS and Linux?
- What should a hosts file entry look like?
- How do you edit the hosts file safely?
- How do you use the hosts file to preview a migrated website?
- How can you confirm the hosts file override is working?
- What should you check if the hosts file change does not work?
- What else do people ask about the hosts file?
- What should you do after testing is finished?
A hosts-file override is particularly useful when migrating to a new host. It lets one computer open the copy on the new server while customers and other devices continue using the live site. The override does not change public records or make what DNS propagation means happen faster.
Technical check: the paths and commands below were checked against current Microsoft, Apple open-source, Ubuntu, systemd and BIND documentation in November 2026.
Where is the hosts file on Windows, macOS and Linux?
The Windows hosts file is normally under the Windows system directory, while macOS and Linux use /etc/hosts. All three are protected system files, so viewing the file is usually easier than saving a change.
| Operating system | Hosts file location | Permission needed to edit |
|---|---|---|
| Windows 11 and Windows 10 | C:WindowsSystem32driversetchosts or %SystemRoot%System32driversetchosts | Administrator |
| macOS | /etc/hosts | Administrator account with sudo access |
| Linux, including Ubuntu | /etc/hosts | Root or sudo access |
Sources: Microsoft Support hosts-file guidance, Apple's open-source network diagnostics and the Ubuntu hosts manual.
On Windows, the file may appear to be missing because Notepad initially shows only text documents. Change the file picker from Text Documents to All Files. The filename is simply hosts, with no .txt extension.
On macOS and Linux, the leading slash means the path starts at the filesystem root. Opening a normal Finder or file-manager window is less direct than using Terminal because /etc contains protected system configuration files.
The hosts file is in one standard system path on each operating system and must be edited with elevated access.

Performance you can feel, backed by clients who depend on it. Read how our support and uptime create long‑term customer success.Power Your Business with Better Hosting
What should a hosts file entry look like?
A hosts entry places an IP address first and one or more exact hostnames after it, separated by spaces or tabs. Do not include https://, a page path, a port number or a trailing slash.
“text 192.0.2.123 example.com www.example.com “
The example uses a documentation-only IPv4 address. Replace 192.0.2.123 with the actual IP address supplied for the new server.
One line can contain both the apex domain and its www hostname. Separate lines are also valid and can be easier to comment out individually:
“text 192.0.2.123 example.com 192.0.2.123 www.example.com “
The hostname must match what will appear in the browser. Mapping example.com does not automatically map www.example.com, shop.example.com or another subdomain.
A hash character starts a comment. This is useful for recording why the temporary entry exists:
“text 192.0.2.123 example.com www.example.com # migration test “
Leave existing localhost and system entries unchanged. Add the temporary website mapping on a new line near the end of the file.
A valid hosts entry contains an IP address and the exact hostname, with no protocol, path or port.
How do you edit the hosts file safely?
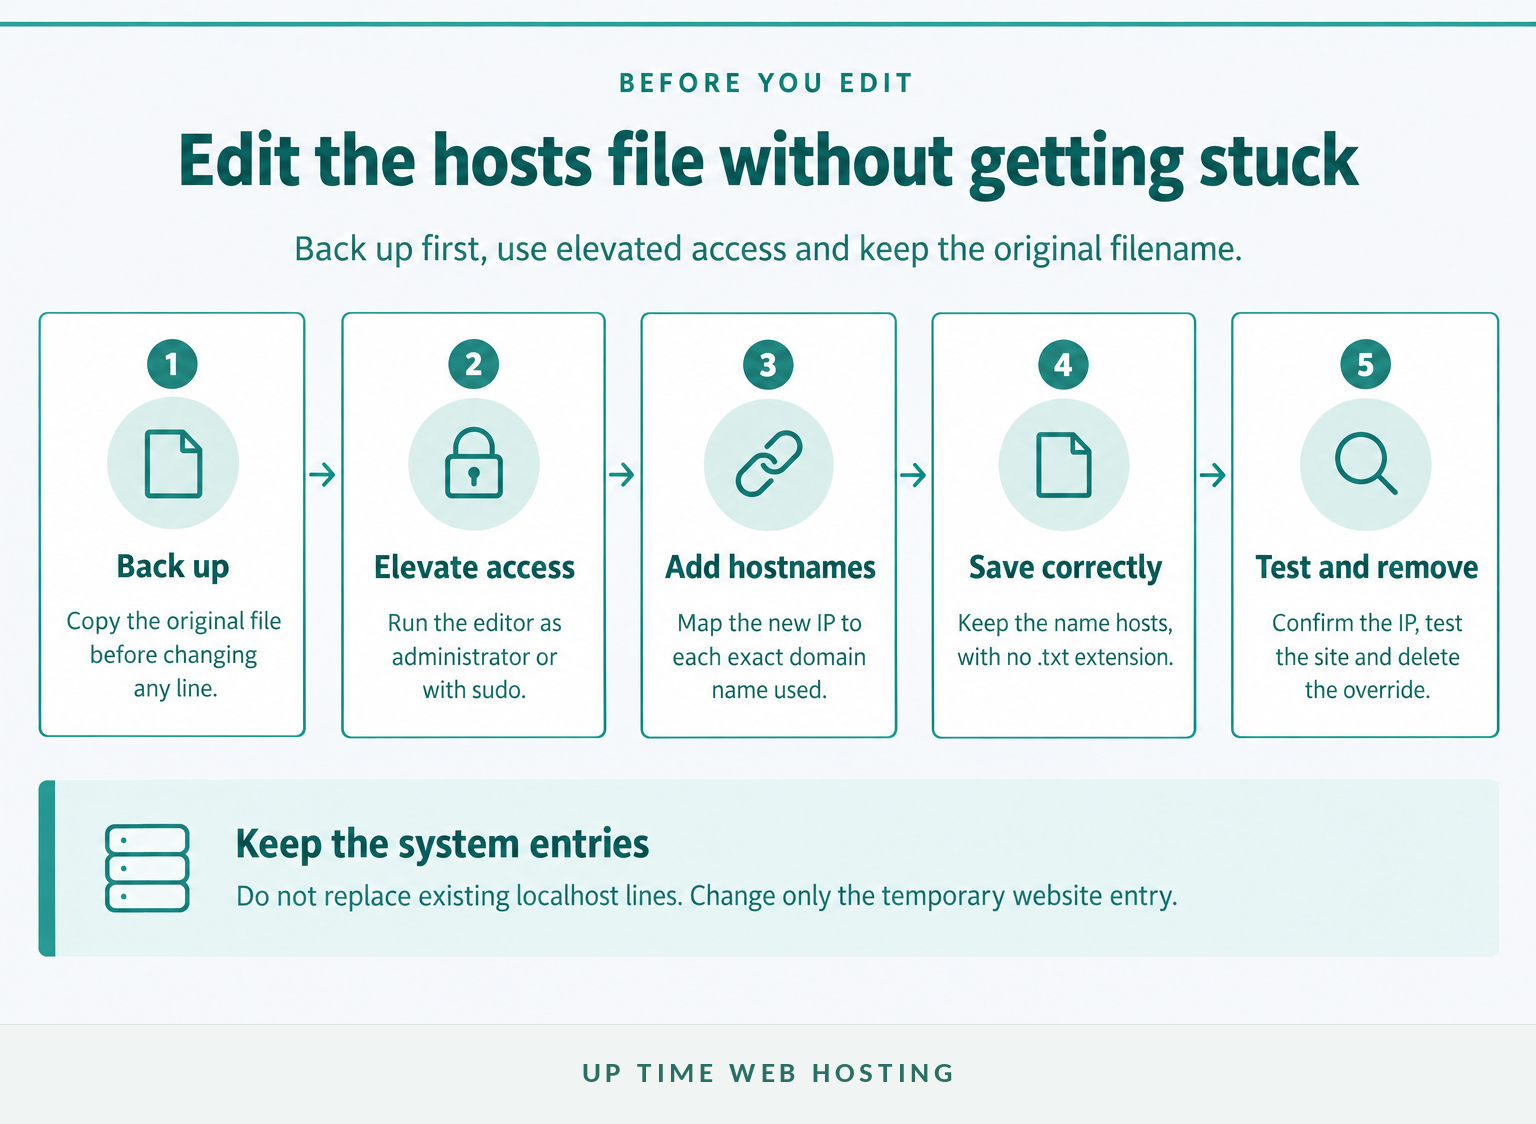
Make a backup before changing the hosts file, then open the editor with administrator or root privileges. Change only the lines needed for the test and keep the original filename, encoding and system entries intact.
Windows 11 and Windows 10
- Copy the existing
hostsfile to a safe folder as a backup. - Open Start, search for Notepad, right-click it and choose Run as administrator.
- In Notepad, choose File > Open and enter
C:WindowsSystem32driversetchosts. - Change the file filter to All Files if the folder appears empty.
- Add the required entry on a new line and choose Save.
Microsoft's hosts-file permissions guidance confirms that the editor must be elevated when Windows denies access. Do not weaken the permissions on the Windows system folder just to save the file.
If Notepad creates hosts.txt, the operating system will ignore it. Reopen the original file through the elevated editor and confirm the saved filename remains hosts.
macOS
Open Terminal, create a backup and edit the file with nano:
“bash sudo cp /etc/hosts /etc/hosts.backup sudo nano /etc/hosts “
Add the entry on a new line. Press Ctrl+O, press Return to confirm the filename, then press Ctrl+X to close the editor.
Linux and Ubuntu
The basic commands are the same on distributions that include nano:
“bash sudo cp /etc/hosts /etc/hosts.backup sudo nano /etc/hosts “
A different trusted text editor can be used if nano is unavailable. The key requirement is that the editor runs with root permission and saves plain text back to /etc/hosts.
On a business-managed device, stop if administrator access is unavailable or security software blocks the change. The correct next step is to ask the organisation's IT administrator rather than altering permissions or disabling protection.
Back up the file, edit it as administrator or root, and preserve the original filename and existing lines.
Host your website with our 5-star rated, cPanel website hosting plans.
Super fast servers, with security included and hosted in your choice of Australian Data Center.
View cPanel Plans
How do you use the hosts file to preview a migrated website?
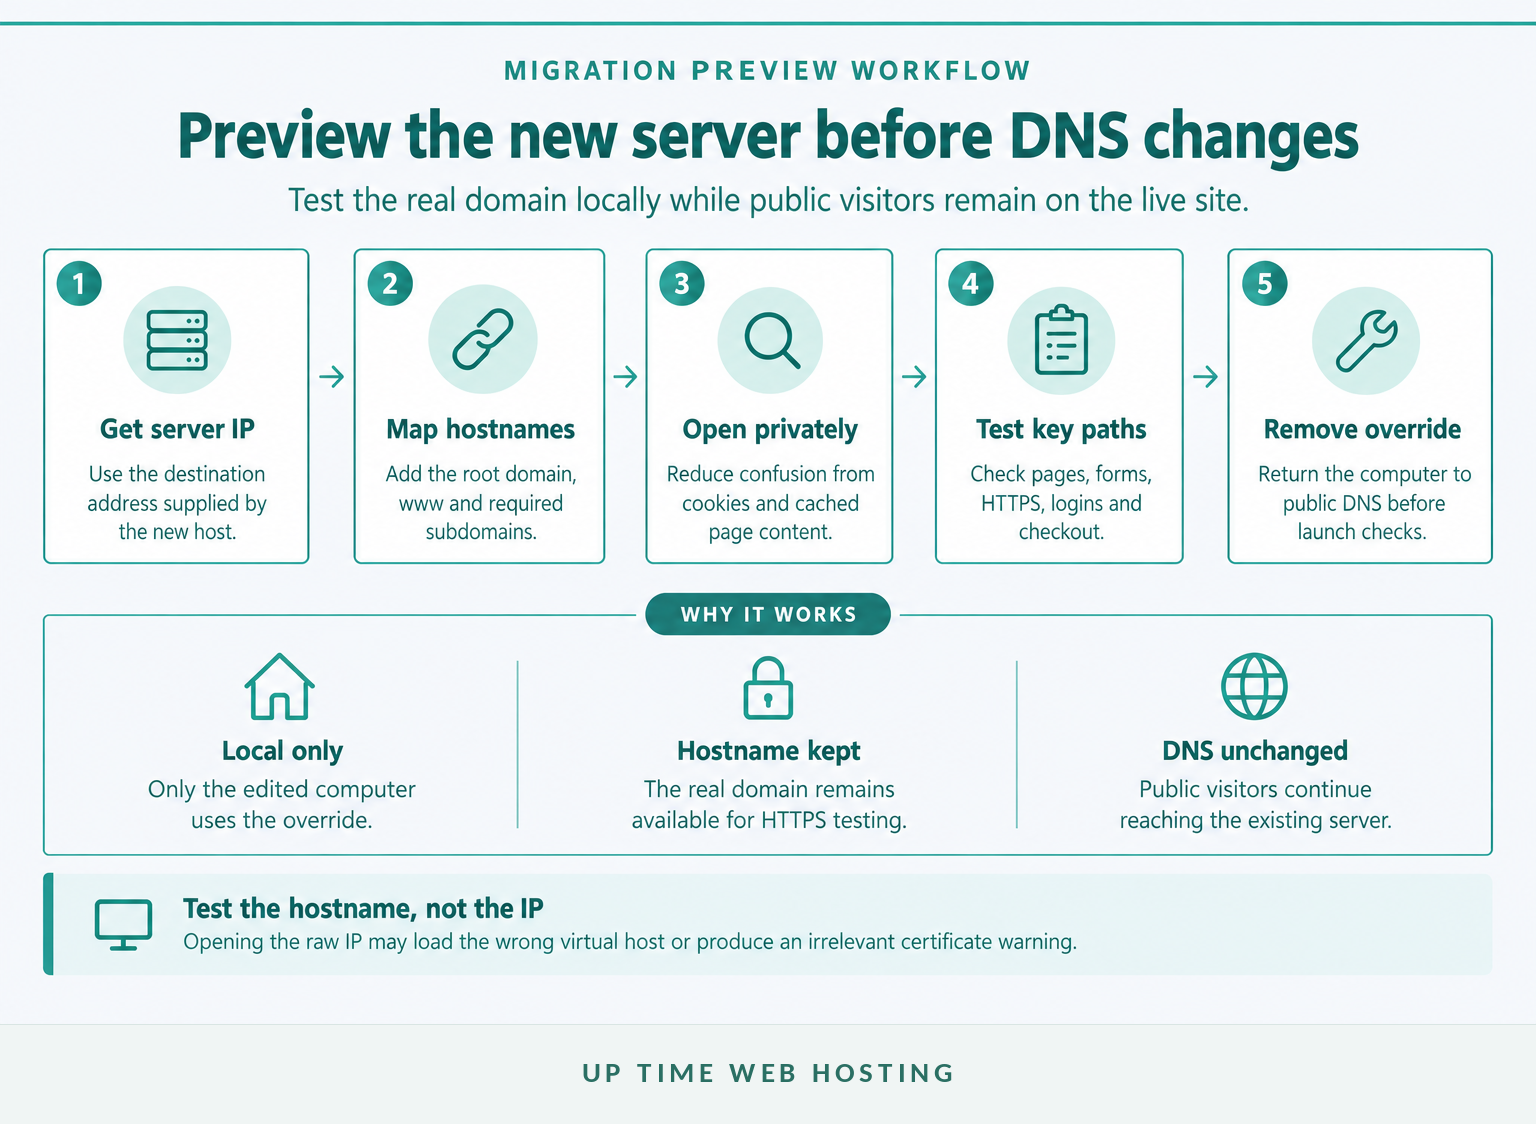
Point the website's real hostname to the new server IP on one test computer, then browse and test the site normally. Public visitors continue reaching the existing server because the hosts-file change remains local to the test device.
Microsoft also documents website migration as a use case for a local override in its Hosts File Editor documentation.
- Get the correct destination IP. Use the new hosting account's server information or ask the provider. Do not guess the address from a control-panel URL or mail server name.
- Map every website hostname being tested. Add the apex domain,
wwwand any separate subdomain that serves part of the site. - Open a private browser window. Private browsing does not change DNS, but it reduces confusion from stored cookies, logged-in sessions and cached pages.
- Test the important paths. Check the homepage, main landing pages, images, styles, scripts, forms, redirects, HTTPS, login areas and checkout in test mode. If the website uses one of the common content management systems, test both the public site and its administration area.
- Remove the local override before final checks. The computer must return to normal public resolution before the migration is considered complete.
Keep the real domain in the address bar. Visiting the server IP directly can load the wrong virtual host, skip hostname-based routing or produce a certificate warning that would not occur under the proper domain.
A hosts-file preview does not reproduce every production condition. A content delivery network, web application firewall, external image host, payment gateway or API may still follow its own DNS and network path. Test those integrations separately rather than assuming the local override covers them.
Practical rule: A hosts-file test answers whether the new server can serve the website under its real hostname. It does not prove that public DNS, a CDN or every third-party service is ready.
A hosts-file override lets one computer test the new server under the real domain name while public DNS stays unchanged.
How can you confirm the hosts file override is working?
Use a system-level hostname lookup and check that the displayed address matches the new server IP. Opening the website is useful, but an IP check prevents an old cached page from being mistaken for a successful override.
On Windows, macOS or Linux, start with:
“bash ping example.com “
The first output line should show the resolved IP. The server does not need to reply to the ping packets; the displayed address is the important part. Microsoft's ping documentation confirms that the command can resolve names through the local hosts file.
On Linux, the Name Service Switch result can also be checked with:
“bash getent hosts example.com “
The Ubuntu getent manual explains that the command reads the configured system name-service sources.
To check the web response itself, run:
“bash curl -I https://example.com/ “
The official curl documentation explains that hostnames normally resolve through DNS or the local hosts file. A response such as 200, 301, 302, 401 or 403 proves that an HTTP connection was made, but the site still needs functional testing in a browser.
Do not use nslookup or dig as the main hosts-file test. Microsoft's nslookup documentation and the BIND dig manual describe them as tools for querying DNS name servers, so they can continue showing the public DNS answer while the local override works correctly.
Confirm the resolved IP with a system-level lookup, not a tool that queries DNS directly.
What should you check if the hosts file change does not work?
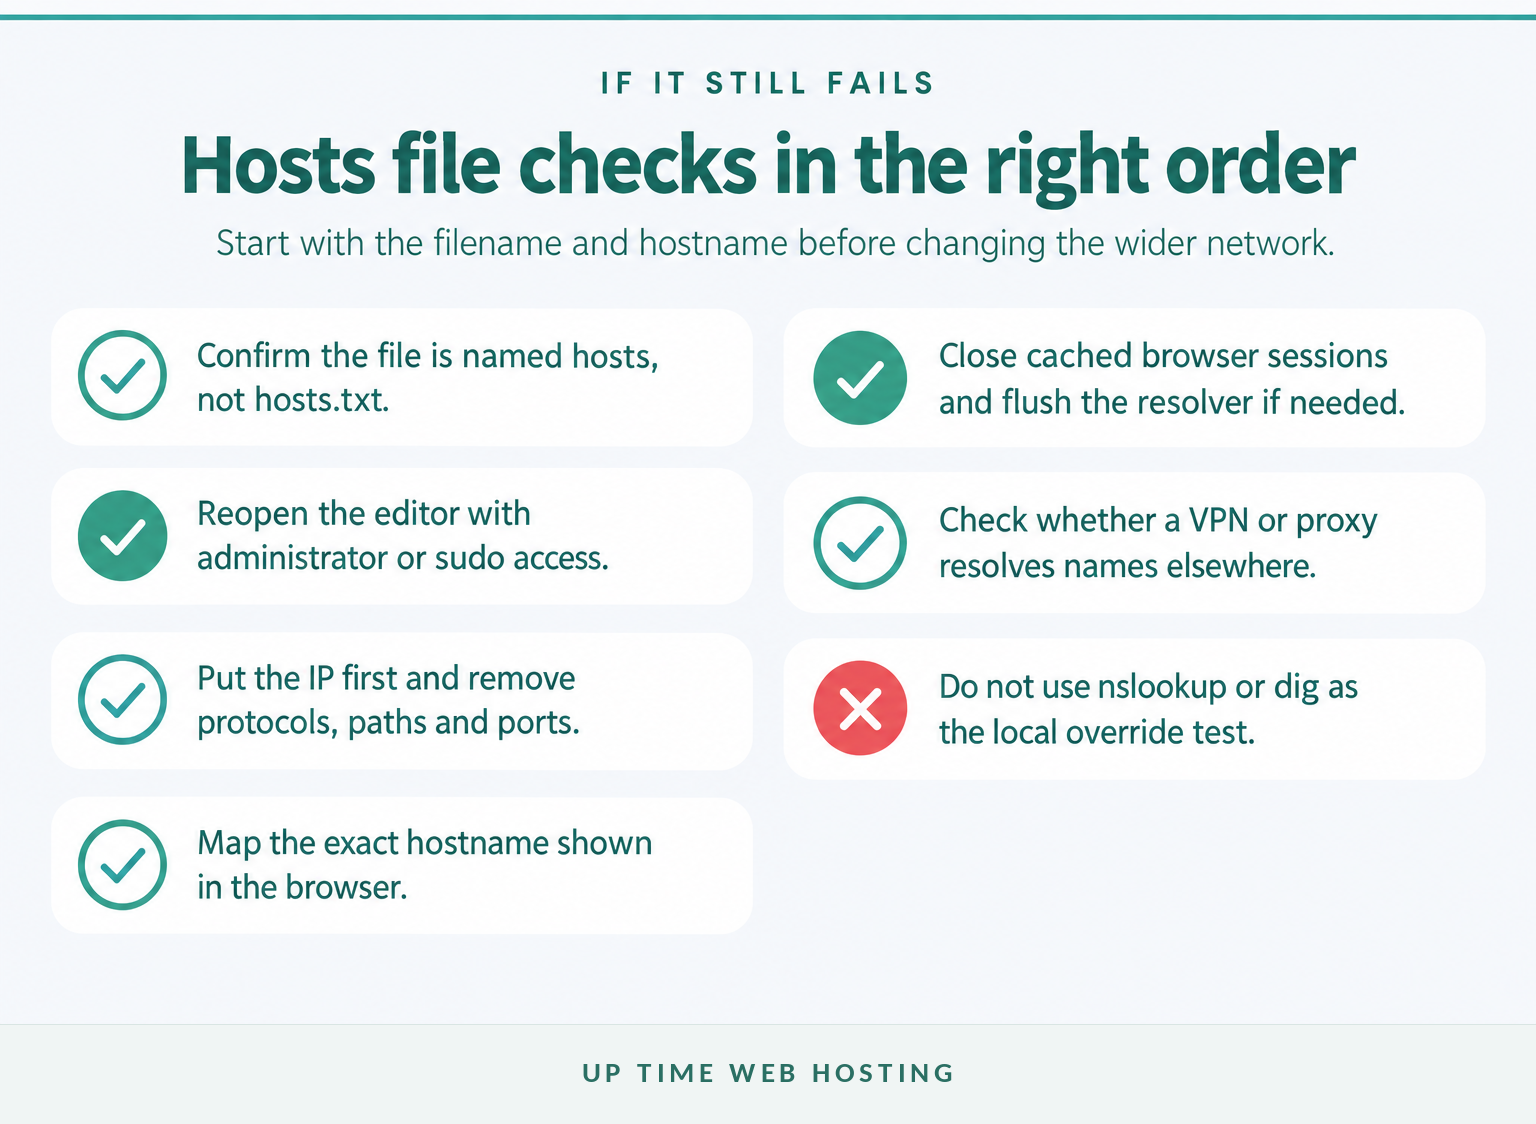
Start with the filename, permissions, entry format and exact hostname before changing network settings. If the computer resolves the correct IP but the wrong site appears, the problem is probably on the destination server rather than in the hosts file.
Check these causes in order:
- The file is really
hosts.txt. Windows may hide known file extensions. Confirm the file is namedhostswith no extension. - The editor was not elevated. Reopen Notepad as administrator or use
sudoon macOS and Linux. - The entry is malformed. Put the IP first, then whitespace, then the hostname. Remove protocols, paths and ports.
- The browser uses another hostname. A redirect from
example.comtowww.example.comrequires both names to be mapped. - A VPN or proxy resolves names elsewhere. Pause it only if company policy permits, then test again.
- The destination server is not configured for the domain. Confirm its virtual host, document root, application settings and TLS certificate include the tested hostname.
- The resolver or browser is holding stale information. Close and reopen the browser before using system-wide cache commands.
On Windows, clear the resolver cache from an elevated Command Prompt:
“text ipconfig /flushdns “
Microsoft's ipconfig documentation states that this resets the DNS client resolver cache, including dynamically cached entries.
On a Linux system using systemd-resolved, run:
“bash sudo resolvectl flush-caches “
The systemd resolvectl documentation notes that this command clears locally maintained resolver records. Not every Linux distribution uses systemd-resolved, so do not assume the command exists everywhere.
On macOS, quit and reopen the browser first. If the old address remains across applications, restart the Mac rather than copying an undated cache command from an unknown website.
Most failures come from permissions, a hidden .txt extension, the wrong hostname, caching or an unprepared server.
Register your new domain name at competitive market prices including free domain add-ons like privacy, DNS Hosting, Custom Nameservers and Forwarding.
Always the best price and no nasty renewal price hikes.
Register A Domain Name
What else do people ask about the hosts file?
The most common questions concern the Windows path, administrator access and the file's missing extension. The answers below use the exact questions associated with this search topic.
How do I edit host files?
Open the hosts file with elevated permissions, make a backup, add an IP address followed by the exact hostname, save it without a file extension, and test the result. On Windows, run Notepad as administrator. On macOS or Linux, use sudo nano /etc/hosts or another trusted text editor.
Does Windows 11 have a hosts file?
Yes. Windows 11 includes the hosts file at C:WindowsSystem32driversetchosts, the same standard location used by Windows 10. The file has no extension and normally requires administrator permission to save. If Notepad shows an empty folder, change the file picker from Text Documents to All Files.
Where is the hosts file located in Windows?
In Windows, the hosts file is normally located at C:WindowsSystem32driversetchosts. Microsoft also expresses the location as %WinDir%System32DriversEtchosts, which works if Windows is installed somewhere other than C:Windows. Open the file from an elevated text editor so changes can be saved.
Where is the host file in C drive?
On a standard Windows installation, the host file is in C:WindowsSystem32driversetchosts. It is named hosts, not hosts.txt. Open Notepad as administrator, choose File > Open, paste the path, select All Files, and confirm the original file name remains unchanged when saving.
The most common questions come back to the same two points: the standard path and the need for elevated access.
What should you do after testing is finished?
Delete the temporary hosts entries, save the file and confirm that the domain once again resolves through public DNS. Leaving an old mapping behind can make one computer keep visiting the test server long after everyone else has moved to the live address.
- Reopen the file with elevated access and remove the temporary domain lines.
- Flush the applicable resolver cache if the old result remains.
- Open a fresh browser window and confirm the public result.
- After the DNS cutover, use a separate device or network when checking DNS propagation.
If the migration needs a new hosting platform, compare cPanel website hosting plans before scheduling the DNS cutover.
The hosts file is a temporary local test, so remove the override as soon as the site has passed and public DNS is ready.