In short
Adding reCAPTCHA to WordPress safely takes four steps: confirm which reCAPTCHA version your form plugin supports, create matching keys for the live domain, connect those keys in WordPress, then test successful and rejected submissions before relying on it. Use staging first, keep a rollback path, and never assume a visible badge proves server-side verification works.
Key takeaways
- reCAPTCHA v3 assesses an interaction in the background, while v2 may show a checkbox or visual challenge, according to Google's version guide.
- The key type must match the WordPress integration because v2 keys do not work in a v3-only integration.
- As of September 2026, Google has completed the automatic migration of Classic keys to Google Cloud, although existing v2 and v3 keys can continue working without code changes.
- A reCAPTCHA response token expires after two minutes and can be verified only once, so verification should run when the visitor submits the form.
- A complete test confirms the on-screen result, any stored entry and the email notification as separate outcomes.
Table of contents
- Which reCAPTCHA version should you choose?
- How do you add reCAPTCHA to WordPress without breaking the form?
- How should you test reCAPTCHA before going live?
- Why does reCAPTCHA make WordPress forms fail?
- How do you keep reCAPTCHA accessible and privacy-aware?
- What else do WordPress owners ask about reCAPTCHA?
- What should you do after reCAPTCHA is live?
reCAPTCHA in WordPress works only when the form, the selected key type and server-side verification agree. If the form itself still needs work, finish creating the WordPress form before adding another component to its submission path.
A badge or checkbox proves only that browser-side code loaded. Google's server-side verification guide explains that the response token must also be sent to the service and validated by the form handler.
Before changing a live form, record its current settings and take a usable backup. WordPress also recommends having a current backup before updating plugins in its official plugin management guide.
Which reCAPTCHA version should you choose?
Choose the version your active form integration supports, not simply the version that sounds newer. v3 usually creates less visitor friction, while v2 provides a visible challenge when the integration or risk level requires one.
How do v2 and v3 differ?

reCAPTCHA v3 runs in the background and returns a score. Google's v3 guidance uses 1.0 for interactions that appear very likely to be legitimate and 0.0 for interactions that appear high risk, but the form plugin decides what happens at its configured threshold.
reCAPTCHA v2 can display a checkbox and may present a visual or audio challenge. Google's current key-creation documentation discourages checkbox keys for new cloud deployments because they increase user friction without significantly improving accuracy.
Plugin compatibility still takes priority. A plugin may support v3 only, expose both versions, or ask for different credentials depending on its integration. For example, Contact Form 7's current documentation says version 5.1 and later uses v3, applies the check without a form tag and cannot use old v2 keys in that integration.
As of September 2026, key ownership also deserves attention. Google's August 2026 migration overview says automatic migration of Classic accounts was completed in the first quarter of 2026. Existing v2 and v3 keys continue without immediate code changes, but changes to migrated key configuration are made through Google Cloud. The same document lists a free tier of 10,000 monthly assessments, after which billing may be required.
The safe choice is the reCAPTCHA version your active form integration can verify on the server without creating unnecessary visitor friction.

Performance you can feel, backed by clients who depend on it. Read how our support and uptime create long‑term customer success.Power Your Business with Better Hosting
How do you add reCAPTCHA to WordPress without breaking the form?
Add reCAPTCHA in stages: document the current form, create the correct keys, connect one integration and test one form before expanding protection. This order gives you a clear rollback point if genuine submissions stop working.
What setup order should you follow?
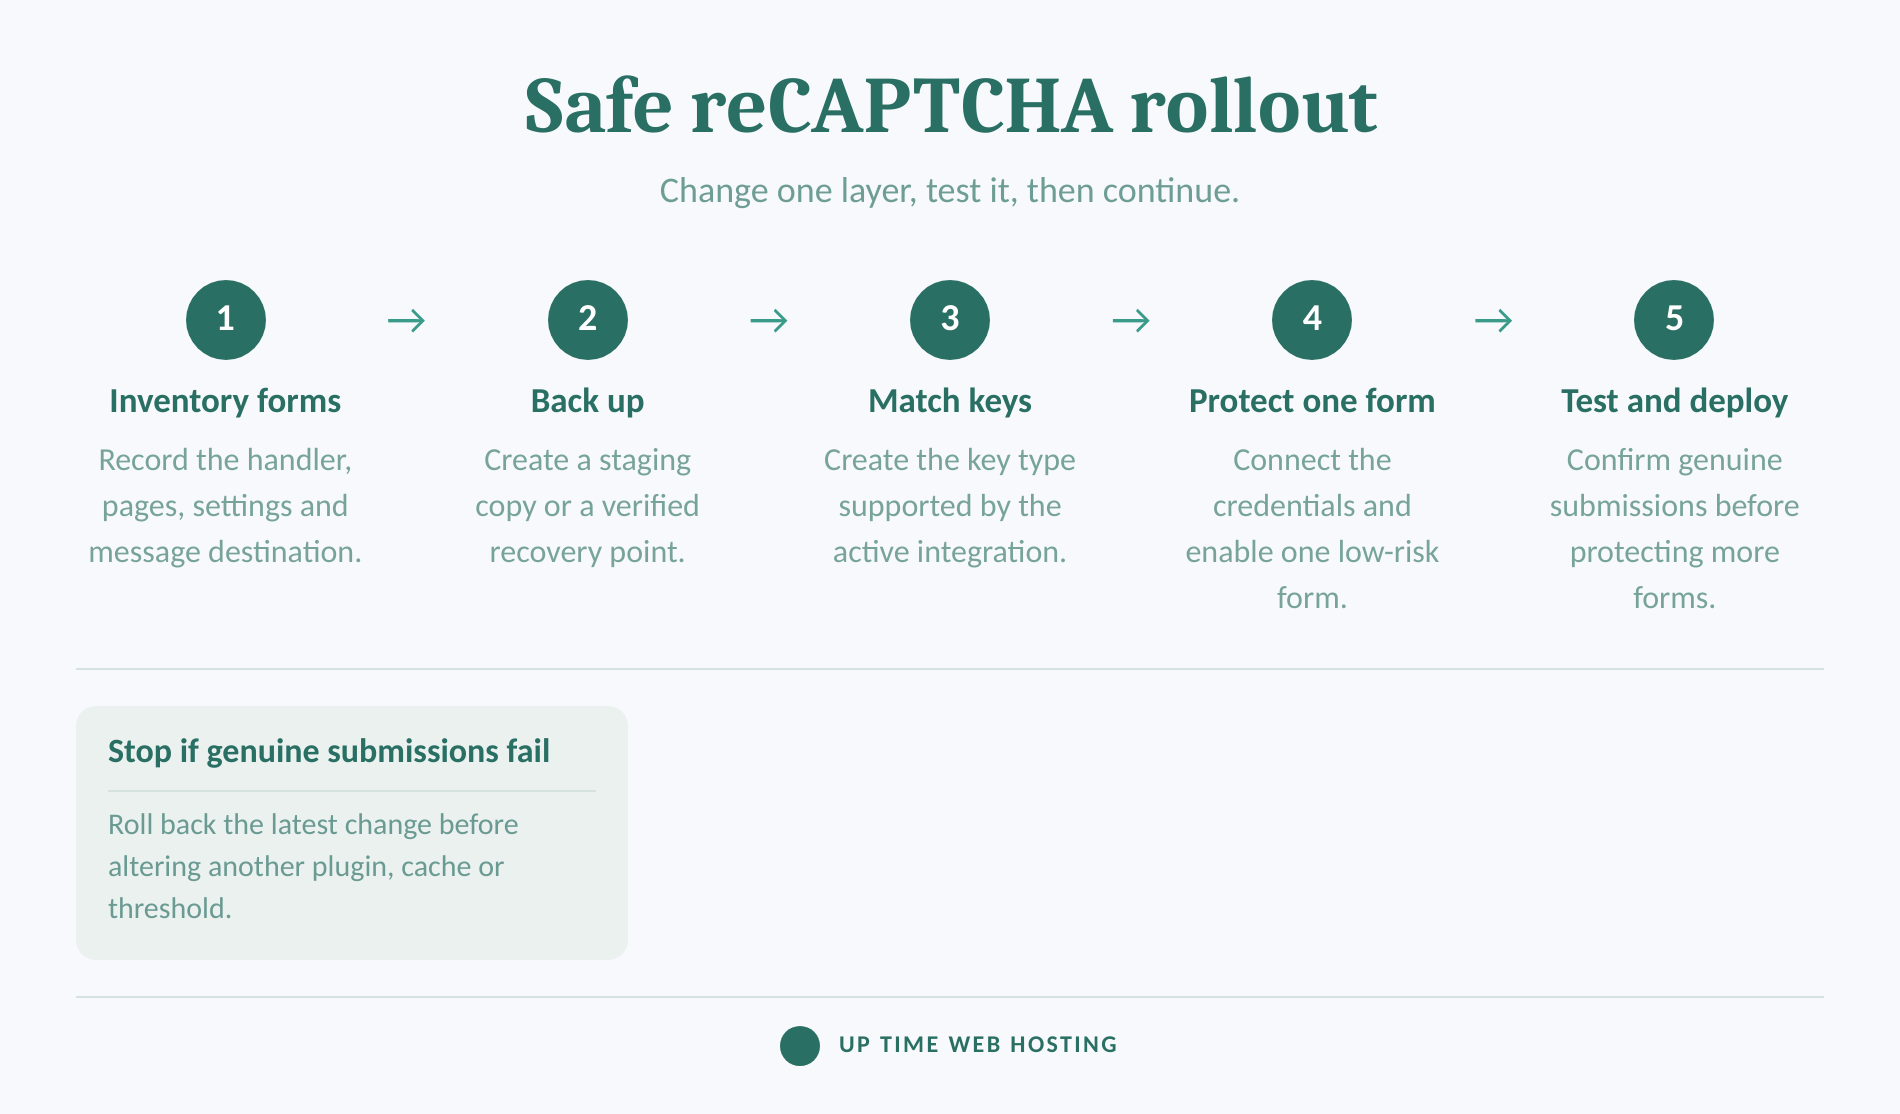
- Identify the form handler. Find the plugin, theme feature or custom code that processes the form. Record its version, the protected page, its current anti-spam settings and where successful submissions are stored or sent.
- Create a staging copy or backup. Do not update the form plugin, add a CAPTCHA extension and change caching rules at the same time. One change per test makes the cause visible.
- Create matching keys. In Google's admin console, add a useful label, choose score-based v3 or challenge-based v2, and enter the website domain. Enter the domain rather than a full page URL. Google's current documentation says a registered parent domain also covers its subdomains and advises keeping domain verification enabled.
- Keep testing separate from production. Google recommends separate keys for development and production. Do not add
localhostto a production key or reuse a development key merely to avoid creating another one.
- Connect the credentials in WordPress. Open the form integration's settings and paste each credential into the matching field. Keep the secret key out of page content, screenshots, support forums and browser-side custom code. Google advises giving secret or API credentials only to trusted integrations.
- Enable protection on one form. Start with a standard enquiry form rather than checkout, registration and password recovery simultaneously. Some integrations require adding a reCAPTCHA field to the form, while others apply v3 globally after the keys are saved.
- Clear relevant caches and deploy. Purge the affected page and script caches after the configuration is saved. Test again with normal optimisation and security controls enabled before applying the setup to other forms.
Do not install a second reCAPTCHA plugin if the form builder already has a maintained native integration. Two tools attempting to load or verify the same service make diagnosis harder and may apply different key types or thresholds.
A safe reCAPTCHA installation changes one layer at a time and proves that genuine submissions still work before the next form is protected.
How should you test reCAPTCHA before going live?
Test as a logged-out visitor and verify the complete submission path, not just the presence of a badge. A genuine message must pass the form, reach its storage or notification destination and remain usable on mobile and with a keyboard.
What must a real submission test prove?
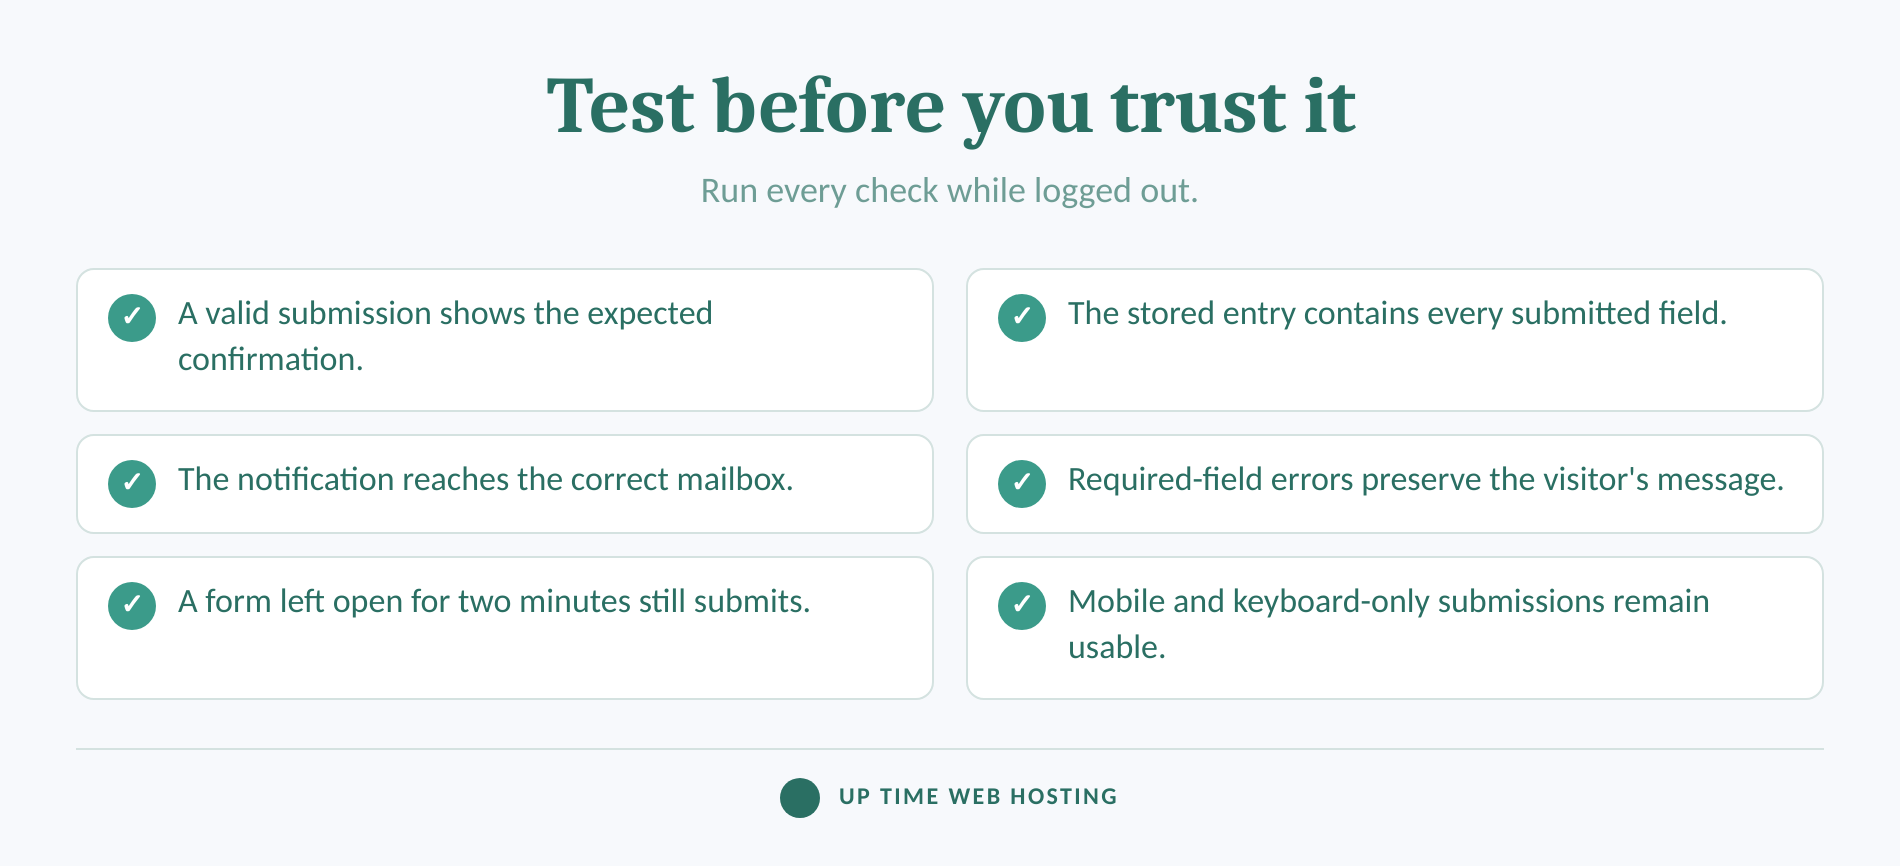
- Valid submission: Complete every required field with realistic data and confirm the expected success message appears.
- Stored result: If the form records entries in WordPress, verify that the new entry exists and contains the submitted fields.
- Email result: Confirm the notification arrives, uses the intended recipient and has a usable reply-to address.
- Validation result: Submit the form with a required field missing and confirm that the visitor receives a clear field-level error without losing the rest of the message.
- Delayed result: Leave the page open for more than two minutes, then submit it. Google's v3 implementation guide says tokens expire after two minutes and should be requested when the protected action occurs, not when the page first loads.
- Visitor result: Repeat the test in a private window, on a phone and with keyboard-only navigation. Logged-in administrators may bypass page caches or form protections that affect ordinary visitors.
Also test after re-enabling script delay, minification, consent controls and security headers. If the form works only after one of those controls is switched off, re-enable settings individually until the conflicting rule is identified.
Do not tune a v3 threshold from staging traffic alone. Google's August 2026 assessment guidance says staging scores and scores within the first seven days of implementation can differ from long-term production results. Start cautiously, monitor real submissions and record genuine messages that were rejected.
For automated tests, Google's testing guidance recommends a separate v3 key and publishes dedicated v2 test keys. Never leave test credentials active on the public form.
A reCAPTCHA test passes only when a logged-out visitor can submit successfully and every expected result is confirmed beyond the badge.
Host your website with our 5-star rated, cPanel website hosting plans.
Super fast servers, with security included and hosted in your choice of Australian Data Center.
View cPanel Plans
Why does reCAPTCHA make WordPress forms fail?
Most failures come from a key mismatch, blocked JavaScript, an expired token, a server verification problem or two integrations competing on the same page. Start with the exact symptom instead of changing thresholds, plugins and caches together.
Which symptom points to which cause?
- Invalid site key or invalid key type: Confirm that the key was created for the same reCAPTCHA version used by the form integration. Check that the public domain is listed and that staging credentials were not copied to production.
- Verification fails immediately: Re-enter the secret key, then check whether the server can make outbound requests. WordPress notes in its Site Health documentation that blocked HTTP requests can prevent plugins and themes from working as intended.
- The form spins or never completes: Open the browser's developer tools and check whether the reCAPTCHA script or verification request is blocked. If the site uses a Content Security Policy, compare its directives with Google's CSP guidance.
- The form fails only after a delay: The token may be generated when the page loads rather than when the visitor submits. Google says each response token expires after two minutes and can be verified once.
- The form works for administrators but not visitors: Purge the public page cache and test logged out. Also check whether a consent tool, optimisation rule or logged-in bypass changes when the reCAPTCHA script loads.
- The form confirms success but no email arrives: The CAPTCHA may have passed and the failure may be in mail delivery. reCAPTCHA does not filter messages sent directly to a mailbox, so compare common spam email examples and follow the separate steps for stopping unwanted emails when the message did not come through the protected form.
Use this troubleshooting order:
- Reproduce the failure while logged out.
- Record the page, time, exact error and whether a stored entry was created.
- Confirm the domain, key type and secret key.
- Check browser network errors and WordPress Site Health.
- Pause one script optimisation or duplicate CAPTCHA integration on staging.
- Retest, then restore every control that was not responsible.
WordPress provides a conflict-isolation lesson that uses troubleshooting mode to change plugins and themes for the administrator's session without changing the public site. Use that approach on staging or with a current backup rather than disabling security controls across a live site.
If spam continues after successful verification, confirm that every public form is protected and review the threshold or rejection logs exposed by the integration. reCAPTCHA should sit beside validation, updates, monitoring and wider WordPress security controls, not replace them.
The fastest fix comes from matching one visible symptom to one controlled test, then restoring the site's normal protections.
How do you keep reCAPTCHA accessible and privacy-aware?
Use the least disruptive check that still controls the site's actual spam problem, then test it with people and tools outside the administrator's normal setup. Provide a usable alternative when a genuine visitor cannot complete the challenge or the third-party script does not load.
W3C advises avoiding CAPTCHA where possible because interactive tests can exclude people with visual, hearing, motor or cognitive disabilities. Its updated G144 technique says an interactive CAPTCHA should provide another modality serving the same purpose.
Practical checks include:
- Prefer a non-interactive check when the form integration supports it and genuine submissions can be monitored.
- Keep validation errors next to the form and preserve entered values after an error.
- Complete the form using only a keyboard and at mobile zoom.
- For a visual v2 challenge, confirm that its audio option is available. Google's current challenge documentation says audio challenges support major screen readers.
- Give visitors another contact route when a challenge cannot be completed.
Privacy settings also need review. Google's April 2026 FAQ says reCAPTCHA sets the _GRECAPTCHA cookie for risk analysis and permits the badge to be hidden only when the required reCAPTCHA branding remains visible in the user flow. If an integration does not expose those controls safely, do not hide the badge or edit its script output blindly.
The accessible setup is the one that reduces automated abuse without making a genuine visitor prove more than the form actually requires.
What else do WordPress owners ask about reCAPTCHA?
Most follow-up questions concern platform-specific placement, version choice and what reCAPTCHA can actually stop. The answers below can also be used as final setup checks.
How do I add a reCAPTCHA to a website?
To add reCAPTCHA to a website, create a site key and secret key for the correct domain and reCAPTCHA type, then connect them through the website's form or security integration. Enable protection on one form first, submit a genuine test, confirm server verification succeeds, and verify the message reaches its intended destination.
How to add reCAPTCHA in WordPress Elementor?
To add reCAPTCHA in WordPress Elementor, create matching v2 or v3 keys, then open WP Admin > Elementor > Settings > Integrations and paste the site key and secret key. Edit the Form widget, add the matching reCAPTCHA field, publish, and test logged out. Elementor's official instructions state that this integration does not support the Enterprise API.
Does reCAPTCHA stop all WordPress spam?
No. reCAPTCHA reduces automated abuse but does not guarantee zero spam. Check that every public form is protected, review v3 scores or rejection logs where available, and combine reCAPTCHA with form validation, a honeypot, rate limits or moderation. Messages sent directly to the mailbox need email filtering, not form CAPTCHA.
Why does reCAPTCHA say verification failed?
A reCAPTCHA verification failure usually points to a mismatched key type, an unapproved domain, an incorrect secret, a blocked script, an expired token or a server request problem. Reproduce the error logged out, note the time and page, confirm the key settings, then check browser network errors and WordPress Site Health.
Should I use reCAPTCHA v2 or v3 on WordPress?
Use reCAPTCHA v3 when the form integration supports score-based verification and the site can monitor false positives. Use v2 when the integration requires it or a visible challenge is necessary. Do not mix key types. Google recommends tuning v3 from real production traffic rather than relying on staging scores alone.
The right answer depends first on integration compatibility, then on the amount of visitor friction the form can justify.
Register your new domain name at competitive market prices including free domain add-ons like privacy, DNS Hosting, Custom Nameservers and Forwarding.
Always the best price and no nasty renewal price hikes.
Register A Domain Name
What should you do after reCAPTCHA is live?
Monitor successful submissions, rejected messages and plugin changes rather than treating installation as the final step. Retest the form after updates, cache changes, security-policy edits or changes to the website domain.
If the site needs someone to own that routine, review Up Time Web Hosting's managed WordPress maintenance. The documented service includes managed updates, security monitoring, incremental backups, uptime checks and performance tracking, giving form failures a better chance of being found after a site change.
The setup is finished only when genuine submissions keep working after updates, cache changes and real traffic.